While He Was Napping

momma gets stuff done

  • Home
  • About
  • Archive
  • Do It Yourself
    • Crafts
      • No Sew
      • Painting
      • Paper Crafts
      • Repurpose Projects
      • Vinyl
      • Washi Tape
      • Kid’s Crafts
      • Fonts
    • Sewing
    • Decorate
      • Home Decor
      • Holiday Decor
    • Celebrate
      • DIY Gifts
      • DIY Your Party
  • Recipes
    • Beverages
    • Appetizer
      • Bread
      • Other Appetizers
    • Snacks
    • Main Dish
      • Meat
        • Chicken
        • Beef
        • Pork
        • Seafood
      • Vegetarian
      • Slow Cooker
      • 30 Minute Meals
    • Dips & Sauces
    • Salads
    • Pasta
    • Soup
    • Dessert
      • Cookies
      • Brownies
      • Cupcakes and Cake
      • Box Mix Recipes
      • Other Sweet Treats
    • Breakfast Food
      • Pancakes
      • Waffles
      • Muffins
      • Other Breakfast Food
  • Family
    • Babies
      • Pregnancy
      • Newborns
      • The 1st Year
    • Toddlers
    • Preschoolers
    • Kindergartners
    • 6-8 Year Olds
    • The Grown Ups
      • Date Night
      • Romantic Gifts
    • Self Care
  • For the Home
    • Cleaning
    • Organizing
    • Emergency Preparedness
  • Travel
    • Travel Tricks & Tips
    • Traveling with Kids
  • Tech & Gadgets
    • Must-Have Apps
    • Techy Home Appliances
    • Gadgets & Electronics
    • Blogging Tips
  • Printables
    • Posters
      • Quote Printables
      • Subway Art Printables
    • Printable Organizers
    • Printable Journals
    • Learning Printables & Worksheets
    • LDS Printables
  • Holidays
    • New Year’s
    • Valentine’s Day
    • St. Patrick’s Day
    • Easter
    • Cinco de Mayo
    • Mother’s Day
    • Father’s Day
    • 4th of July
    • Back to School
    • Halloween
    • Thanksgiving
    • Christmas
    • Holiday & Seasonal Printables

Archives for October 2013

October 30, 2013 by Krista

10 Halloween Cookies Anyone Can Make

So, if you’ve been over on the Facebook page lately, you’ve probably heard me whine about how I’m ready to move past Halloween for this year.  It was fun, but I’m ready for something other than witches, ghosts and goblins.  And, I’m out of Halloween blog posts…  No wonder I don’t usually commit an entire month to one theme.  I’m too A.D.D. for that, I get bored.  And with mere days left, why would I want to make something only to put it in storage?!

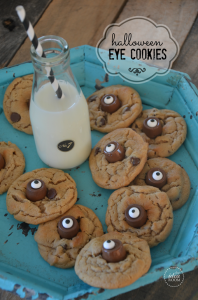
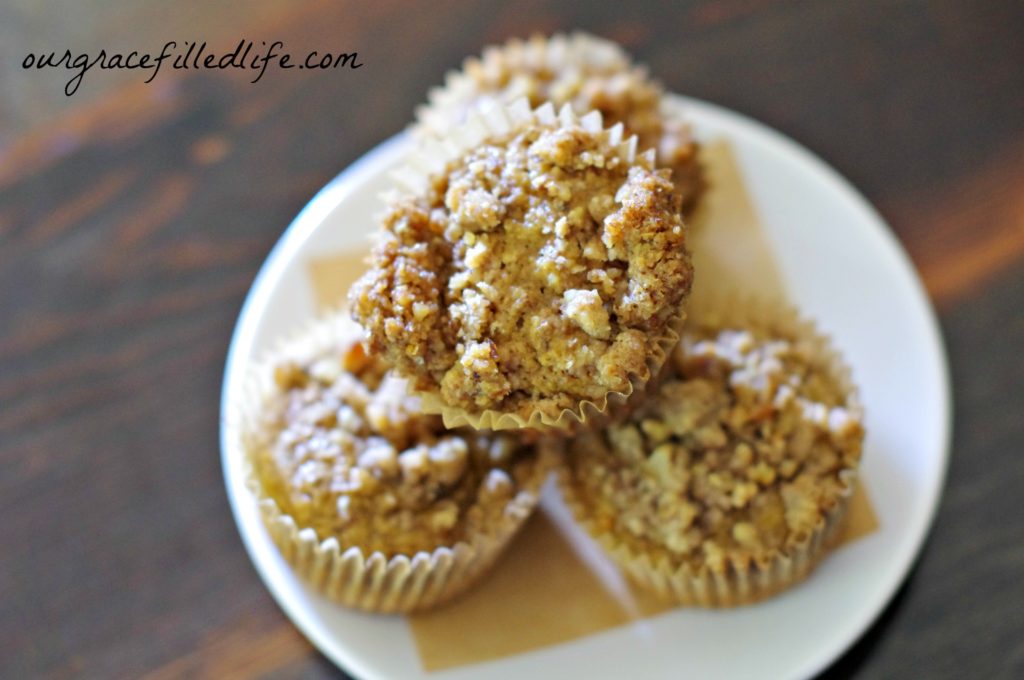
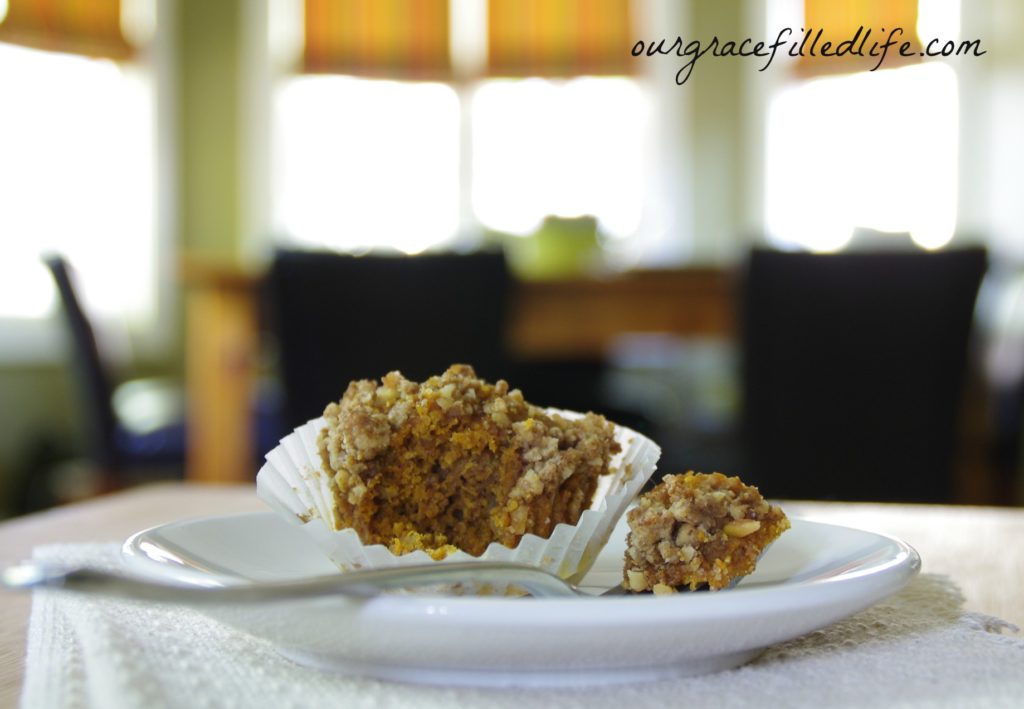
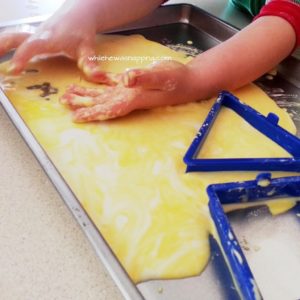
So, the boys and I made cookies… ’cause, well, I can put those away and not have to worry about them in the garage… just around my thighs.  And what’s a few extra pounds, swimsuit season is MONTHS away!  We opted for our go-to Chocolate Chip Cookies (just omit the pumpkin) and a bit of neon food coloring for a little fun.  We also put butterscotch chips in the orange ones, as well as chocolate chips.  We’ll be lucky if these last til November 1st.

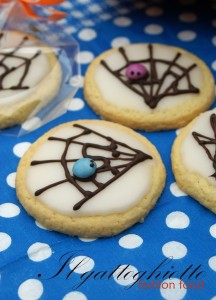
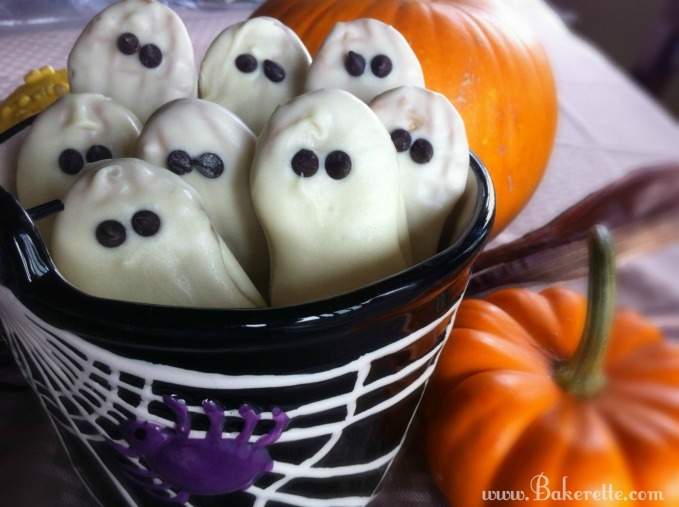
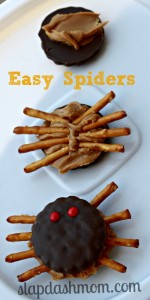
In case you’re still feeling Halloween, but don’t want the commitment of a project to store, how about some of these cookies?  There are tons of fancy bakery cookies on pinterest, but I wanted ones that anyone could make.  Not just those of you that are culinary-inclined.  So, here they are… Halloween cookies anyone can make.

   Spider Cookies at Il Gattoghiotto.
This blog is in Italian, but Google can translate it for you.
And the photos give a pretty good idea of what to do.
Witch Hat Cookies at Craftily Ever After
Nutter Butter Ghosts at Bakerette
Monster Cookies at The Decorated Cookie
Easy Spider Cookies at Slap Dash Mom
Spooky Eyeball Cookies at The Idea Room
Black Cat Oreos at Party Pinching
Candy Corn Pinwheel Cookies at The Sweet, Simple Life
Acorn Cookies at The Hungry Housewives
Peanut Butter Spider Cookies at Half Baked Harvest
You could stick these adorable spiders on just about any cookie.
Which ones are your favorites?

This post was written by Krista and originally appeared on While He Was Napping.

October 29, 2013 by Krista

{Our Grace Filled Life} Pumpkin Streusel Muffins

I would like to introduce you to another amazing contributor!  Amanda is here to share a delicious recipe with us.  How does Pumpkin Streusel Muffins sound!?  Well, let’s get party started!  Take it away, Amanda!

__________________________________________________________

Hey there!  I’m Amanda Fisher & I blog at Our Grace Filled Life.  My interests are all over the place, so you see a bit of everything there, but my favorite things to blog about are food, healthy living, furniture makeovers, home renovation & adoption. Today, I am super honored to be here & sharing one of my favorite Fall treats with you!  I look forward to pumpkin season all year round.  On occasion, my love of pumpkin even flows into other seasons {gasp! :)}.  Pumpkin really is best enjoyed in the Fall though, there’s just something very comforting about savoring a pumpkin treat with a little chill in the air.

Pumpkin Streusel Muffins

For many years, I strictly used store-bought canned pumpkin, thinking that making homemade pumpkin puree was too difficult, too time consuming or simply wouldn’t taste as good.  Last year though, I ran across this tutorial from The Pioneer Woman & figured I’d give it a shot.  It really didn’t look too hard & because I try to make most everything else from scratch, it seemed silly that I’d never even tried it.  So, I gave it a shot & was pleasantly surprised by the results.  It really wasn’t difficult to do & we loved the flavor.  We’d also grown a few pie pumpkins in our garden last year, so it was fun knowing we’d made our own food from start to finish.

Pumpkin Streusel Muffins

Whatever type of pumpkin you use, store-bought or homemade, I think you’re going to LOVE these muffins.  I’m a big fan of using whole grains & sweeteners that are as unprocessed as possible, so I’ve included a couple of different options for some of the ingredients so that you can use what you have on hand or are able to find.  Hope you enjoy!

Pumpkin Streusel Muffins
Save Recipe
Print
For the muffins
  1. 1 1/4 c. pumpkin puree {canned or homemade}
  2. 1/4 c. applesauce
  3. 1/3 c. sucanat or brown sugar
  4. 1 egg
  5. 1 t vanilla
  6. 2 c. whole wheat pastry flour or all purpose flour
  7. 2 t baking powder
  8. 1 t pumpkin pie spice
  9. 1/2 t sea salt
  10. 1/2 c. walnuts or pecans, chopped
For the streusel topping
  1. 4 T butter, softened
  2. 1/4 c. sucanat or brown sugar
  3. 1/2 c. whole wheat pastry flour or all-purpose flour
  4. 1/3 c. walnuts or pecans, chopped
Instructions
  1. Preheat oven to 350*.
  2. Line a muffin tin with paper liners.
  3. Using a stand or hand mixer, beat together pumpkin, applesauce, egg & vanilla.
  4. Add in flour, baking powder, pumpkin pie spice & sea salt & stir until just mixed.
  5. Gently fold in chopped nuts.
  6. Using an ice cream scoop or two spoons, fill prepared muffin tin with batter, filling each liner just 2/3 of the way full.
  7. In another bowl, mix together the topping ingredients. The mixture should be nice & crumbly.
  8. Using your hands, divy out the topping onto the waiting muffins.
  9. Bake for 23-25 minutes, until the middles are set.
  10. Enjoy!!
__________________________________________________________
YUM!  Don’t you want to just head to the kitchen!  I will need to try these this holiday season for sure.  Thanks for sharing with us, Amanda!  Head over and check out the other great things on Our Grace Filled Life.

This post was written by Krista and originally appeared on While He Was Napping.


October 28, 2013 by Krista

{October Spooktacular} Glowing Cauldron

Okay, by now I’m sure you’ve noticed a bit of a reoccurring theme with my Halloween posts this year… yeah?  If not, I’ll give you a hint: Witches.  Okay, not really a hint.  Sorry.  Well, I’m almost ready to reveal the whole table display, but first I have to add the finishing touches.

This is a simple little project, but finishes off my display quite nicely.  Take a look:

GLOWING CAULDRON

Materials:
– Pillow batting (I just bought a cheap set of 2 pillows for $5 at Wal-Mart and unstuffed half of one of the pillows)
– Glow Sticks (Dollar Tree)
– Plastic Cauldron (On clearance at Wa-Mart last November)

Directions:
– Stuff the pillow batting into the cauldron and fluff until it looks “steam-like”.  I didn’t, but you could try hair spray or fabric stiffener to make the batting “rise” out of the cauldron a bit more.
– Break the glow sticks and position inside the batting.  Close to the outside of the batting but not so close you can see the actual shape of the glow sticks.  Play with it.  It will partly depend on the thickness of your batting.  My glow stick ended up having a crack in it and the glowy liquid spilled on the batting.  It turned out pretty cool as you could spread the glow around and not worry about the glow stick showing; but if you’ve got kids around, it might be safer to keep the glow sticks intact.

That’s it!  Super easy and it looks great.  The photo doesn’t do it justice.  Guess that’s what I get for trying to take a dark photo at mid-day…

This post was written by Krista and originally appeared on While He Was Napping.


October 25, 2013 by Krista

Weekend Wander #145

Hey everyone!  Sorry I missed the party last week!  We took a little long weekend trip down to Monterey, CA and I intended to get the party set up before I left… but it didn’t happen.  So, apologies, but I hope your weekend was as fun as ours!

We got to go with my parents and sisters and the boys loved it!  We took them to the Monterey Bay Aquarium, which we’d been wanting to do since Mr Napping and I went while I was pregnant with Little J.  There was just the right mix of exhibit and hands-on that even though neither boy napped, they still had fun and a good day overall.  We went down to Fisherman’s Wharf and found a little restaurant to get dinner from.  We took it back to the hotel and gorged on some of the best clam chowder I have ever eaten.  Oh my goodness.  We were so sore, but it was totally worth it!  We spent Saturday morning at the Butterfly Sanctuary in Pacific Grove and at the beach.  We stopped at IKEA on our way back through Sacramento for dinner.  Unfortunately, I came home sick and Little J has shared with me.

Did you miss any of these super fun ideas?

DIY Spell Books
No-Sew Witch’s Hat
Halloween Parties for Kids
Vinyl Halloween Sign & Printable
3-Ingredient Slime Sensory Play
Mummy Jars from Somewhere in the Middle
10 (Healthy) Halloween Treats

From two weeks ago…

  Bleeding Brain Balls via Kim’s Kandy Kreations
Spooky Spider Welcome Sign via Burton Avenue
Bah, lots of cool stuff.  It’s sooo hard to choose just a few.  Thanks ladies!  And thanks everyone who linked up!  Now, let’s party!  Annnnnnnnnd………………….. GO!


This post was written by Krista and originally appeared on While He Was Napping.


October 24, 2013 by Krista

DIY Halloween Night Light Baby Food Jar Upcycle

Links in this post may be affiliate links.  All content is original, 100% mine and 100% honest.  Should you choose to purchase through any of my affiliate links, I receive a small portion of the proceeds.  Your cost is in no way effected and I appreciate the little bit of support you can give.  

Big J is at the point where he prefers a night light in his room.  We have one in the bathroom and one in the hallway on the way from his room to the bathroom.  Just in case there are any middle of the night trips.  When we have a nursing baby, we have a night light in our room.  Just enough light for momma to see, but not enough light to wake Daddy or baby.  Our babies have both weaned themselves of nursing before they give up all their night feedings, so we have a night light in the kitchen as well to prepare bottles.  Basically, you turn the lights off and our house lights up like a Christmas tree.  Night lights aren’t exactly pretty decorations, but who says they can’t be fun?!  With this DIY Halloween Night Light Baby Food Jar Upcycle you can make your night light whatever you want.  Change this up to fit any holiday or go with a simple monogram.  Etching the glass is another fun option I’m looking forward to experimenting with…

HALLOWEEN NIGHT LIGHT


Materials:
– Night light base – I bought a four pack (did you hear how many night lights we have?) at Wal-Mart.  It was just a cheap set of the lights that turn on when it’s dark.  I got the set of four lights for around $10-15.  I couldn’t find the exact set on Wal-Mart’s site, but here are some similar ones on Amazon.  You just need a light base with decent wall clearance (an inch or two).

– Baby food jar or other jar (use plastic if you’re worried about it breaking)
– Drill with spade bit
– Paint and/or vinyl

Directions:
– Wash and dry the jar.  Remove glue and labels.
– Take the shield off the night light so you just have the base.  This photo is of the actual night light I used.  That clear plastic just slides off the front.

DIY Frankenstein Night Light

– Measure the LED stand – mine was 3/4″.  Use the drill and spade bit to drill a hole in the lid of the jar to fit around the LED stand.  Or have your awesome husband do it, because you may or may not have totally created a mess when you tried it.

DIY Frankenstein Night Light

DIY Frankenstein Night Light

DIY Frankenstein Night Light

DIY Frankenstein Night Light

– Paint the jar or use your vinyl to decorate.  I painted the inside of the jar with watered down acrylic paint.  You’ll have to play with the water to paint ratio in order to get it thin enough to let enough light through.  Different colors needed different amounts of water.  Darker paint = more water.  Another idea would be mod podge colored with food coloring.  Google a tutorial for that, but be aware it creates a pretty opaque finish.  I painted the insides of the jar and vinyl-ed on the outside.  I also used Washi tape on one for a super quick and easy “fancy-it-up” job.

DIY Frankenstein Night Light

DIY Ghost Night Light

DIY Jack-O-Lantern Night Light

DIY Jack-O-Lantern Night Light
–  Screw the lid back on and place the LED stand in the hole in the lid.  Plug in your night light and wait for dark (or high-tail it to a dark room and try it out in broad daylight, you rebel!).

DIY Frankenstein Night Light

DIY Ghost Night Light

DIY Jack-O-Lantern Night Light

DIY Frankenstein Night Light

Frankenstein is, by far, my favorite.  Big J’s too, but that might just be because it’s green.
The other ones cam out cute though too.  The ghost is a bit streaky, as my paint was ancient and stringy.  When you mix the paint and water, I would recommend stirring and not shaking the paint.  It makes bubbles, which also leads to streaky paint

You can use the same lid (provided you use the same kind of jar) and make lots of different night light covers.  Just switch them out whenever the mood strikes.  It’s also nice because you can adjust how much light comes though with what you decorate your jar with.  Darker paint will give a more muted light, while light paint will still shine bright.

This post was written by Krista and originally appeared on While He Was Napping.

  • 1
  • 2
  • 3
  • 4
  • Next Page »

I'm Krista. Ringleader here on While He Was Napping, wife to my handsome Mr. Right & momma to my THREE energetic boys, Big J (9), Little J (6) & Little N (4). We FINALLY added a beautiful little girl to our family last December.

I’m knee-deep in Tonka trucks & Thomas trains. I survive our crazy days with Vanilla Coke, Sonic slushies, sweet snuggles and little giggles. When I tuck them in tight & kiss them good night, I get a little time to create & just be me.


It all happened
while (s)he was napping
Want More of My Story?

Privacy Policy

While He Was Napping respects your privacy and is committed to keeping any personal information collected on this website confidential. To find out what information we collect and how it is used or what options you have regarding your information, see our full privacy policy here. Creative Commons License The website found at whilehewasnapping.com and all subdomainsauthored and published by Krista is licensed under a Creative Commons Attribution-NonCommercial-NoDerivs 3.0 Unported License.

Pretty Chic Theme By: Pretty Darn Cute Design