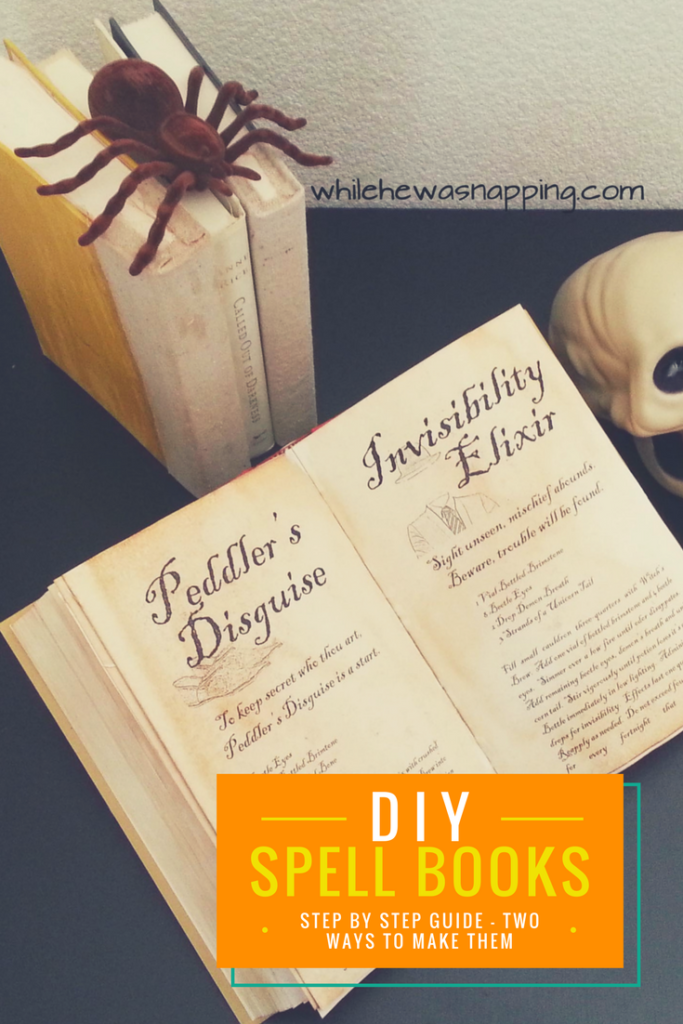
I have been wanting some Spell Books to go with my Potion Bottles and Witch Hat.
I had a specific vision though. I wanted three spell books that didn’t open and one that did.
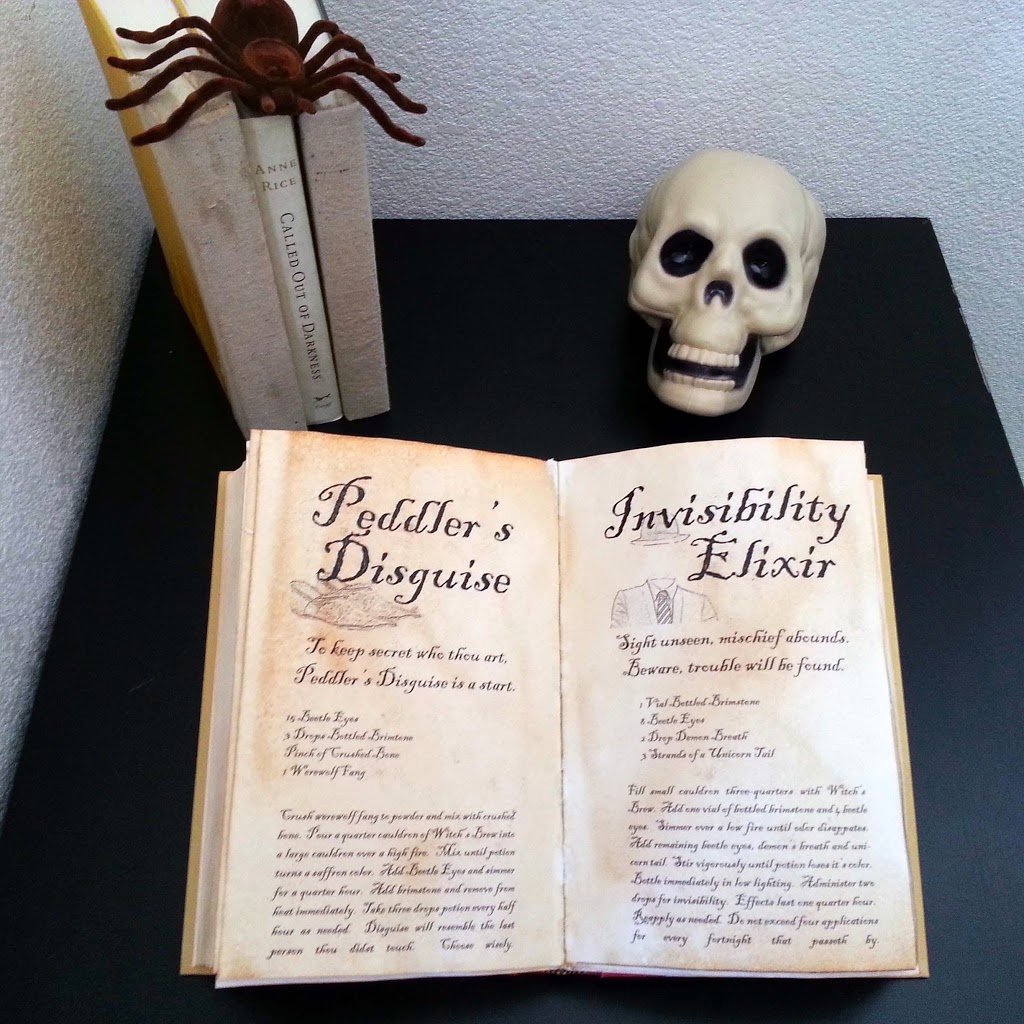
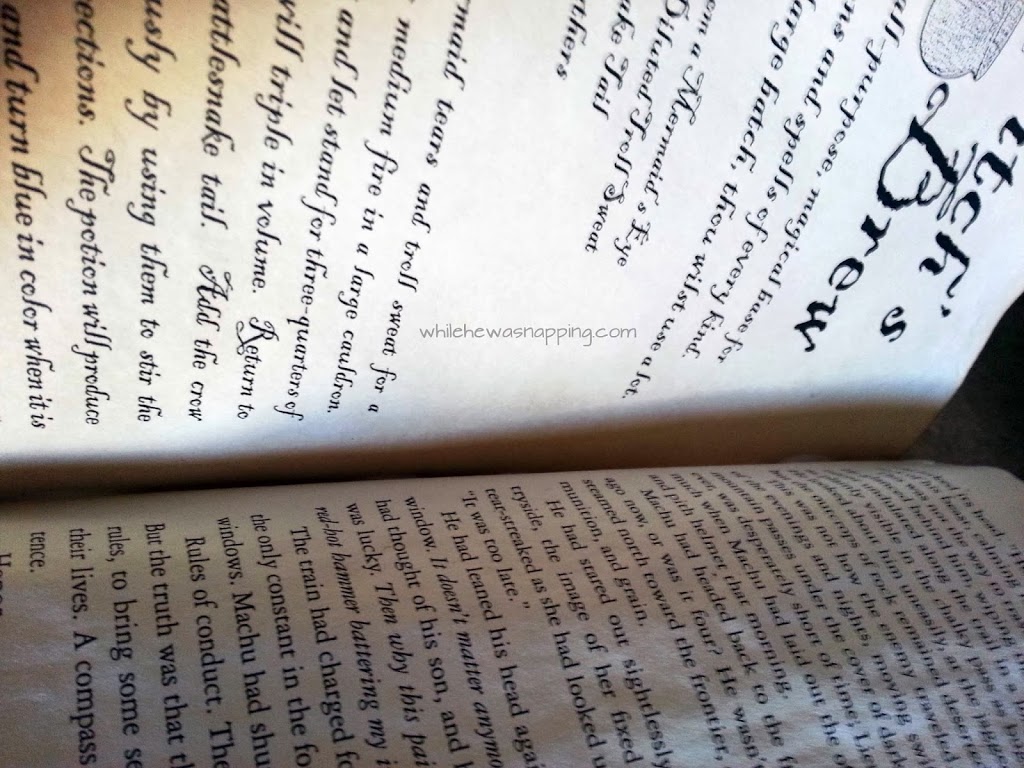
The open one, I wanted to have spells in it. Spells that sounded somewhat legit but weren’t super dark and scary. And not just one spell, but multiple spells.
So, I Googled that right up and guess what I found on the internet? EEK. In short, nothing that fit my vision. So, I had to make my own. I actually made up all the spells and designed all the pages. It was more time consuming than expected an, believe it or not, I don’t know any spells.
Spell Book Materials:
– Tacky Glue
– Canvas (I used scrap pieces from a painter’s drop cloth)
– Hot glue gun and glue sticks
Spell Book Directions
STAINING THE PAGES:
– Begin by printing off and cutting to size your spells. I HIGHLY suggest printing these on card stock on a laser printer. I was a little worried about the pages smearing and tearing when they’re wet, but I had no problems. Measure your book to find the dimensions you’ll need.
You can purchase the spells I designed in my Etsy shop or make up your own. I did find a few online, but I wanted all of mine to coordinate with the same layout and I wanted more than I could find.
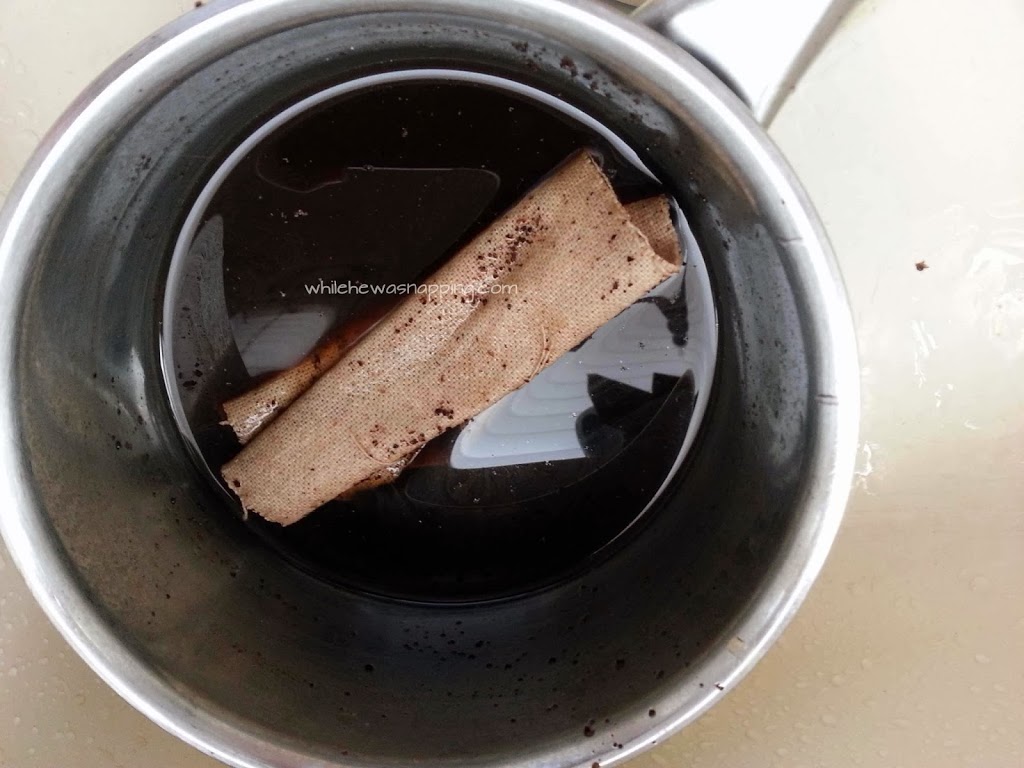
– I used the same staining method for the pages and books as I did for my Potion Bottle labels (see that post for photos of the process). Boil the hot water on the stove and simmer with your coffee grounds or tea bags in the water for about ten minutes.
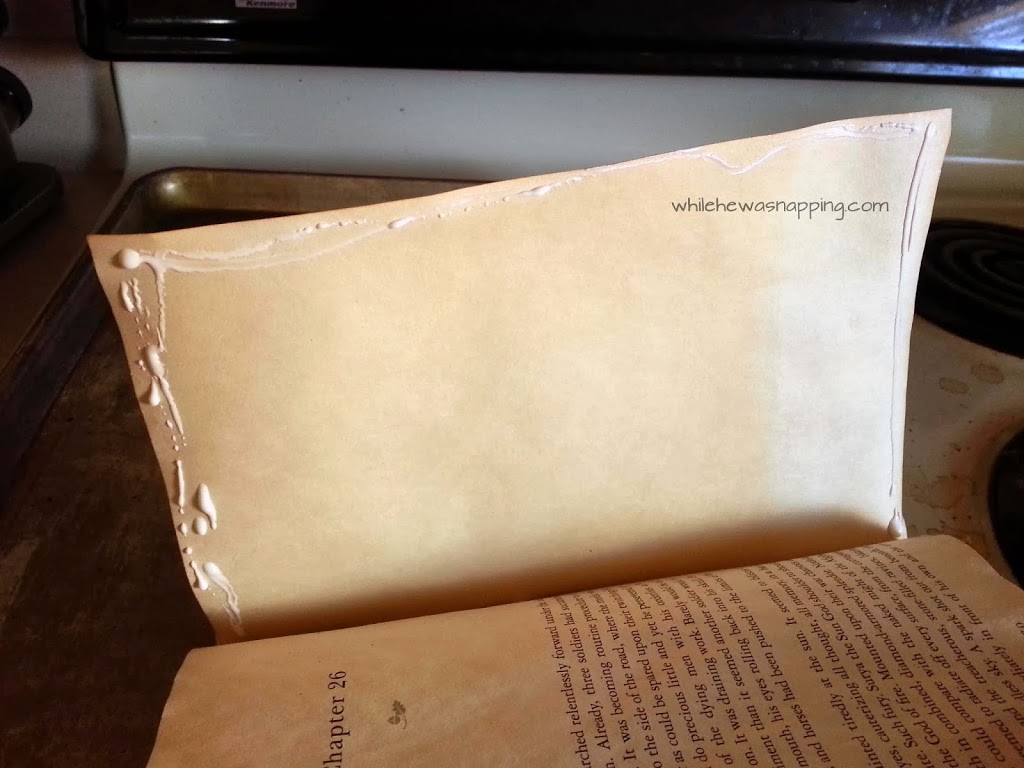
– Place a spell on the baking tray and cover it with a bit of the coffee mixture. Press it down so it’s nice and saturated. Let it set for a few minutes if you want a darker stain. Drain any excess coffee back into the pot. Place the baking tray in a warm oven (I set mine to 200F). Let the paper dry in the oven for approximately 5-10 minutes. Keep an eye on it; paper can catch on fire, after all.
– Remove the pan from the oven. The paper will still be damp. Carefully, pull it off the tray and, if possible, hang it to dry. Mine took about 8-12 hours to dry, but I waited overnight to be sure I wouldn’t tear them on accident.
– Repeat for all the remaining pages.

CONSTRUCTING THE CLOSED SPELL BOOKS:
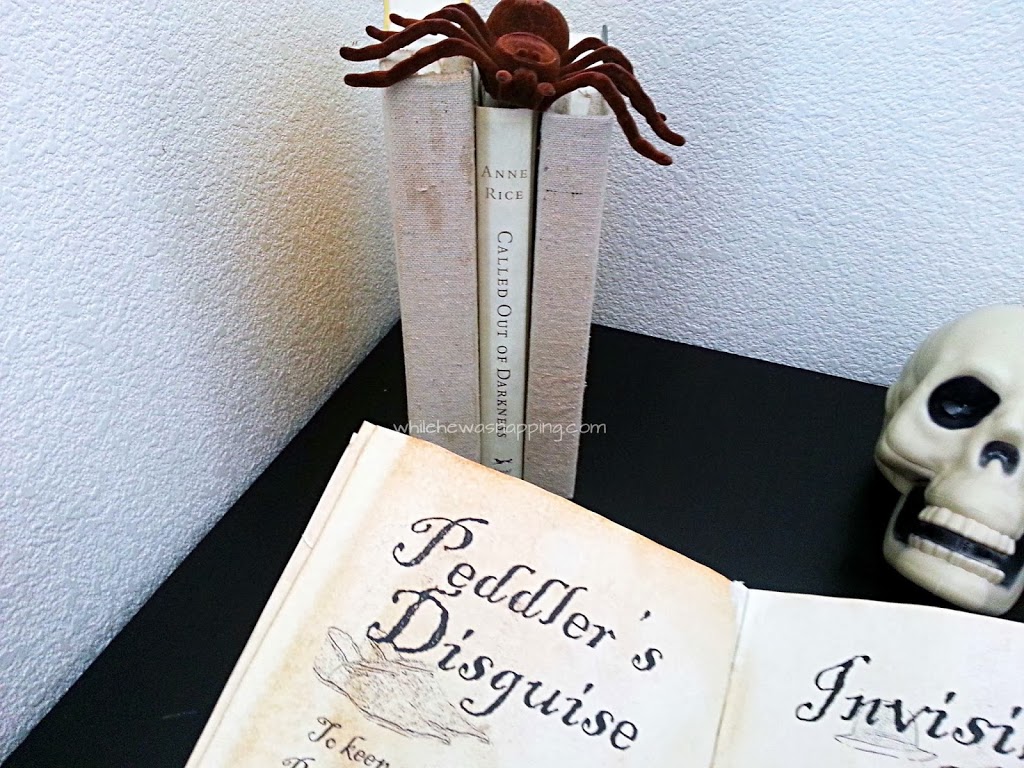
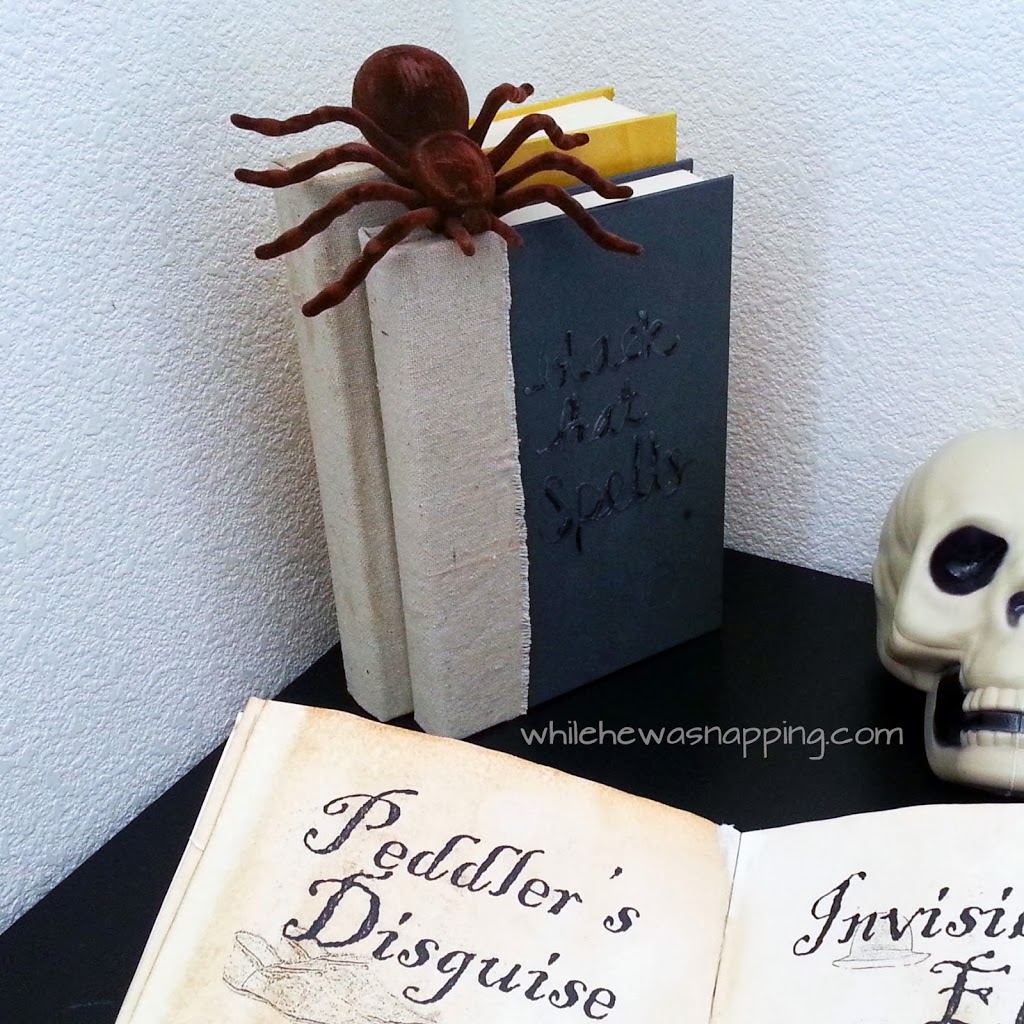
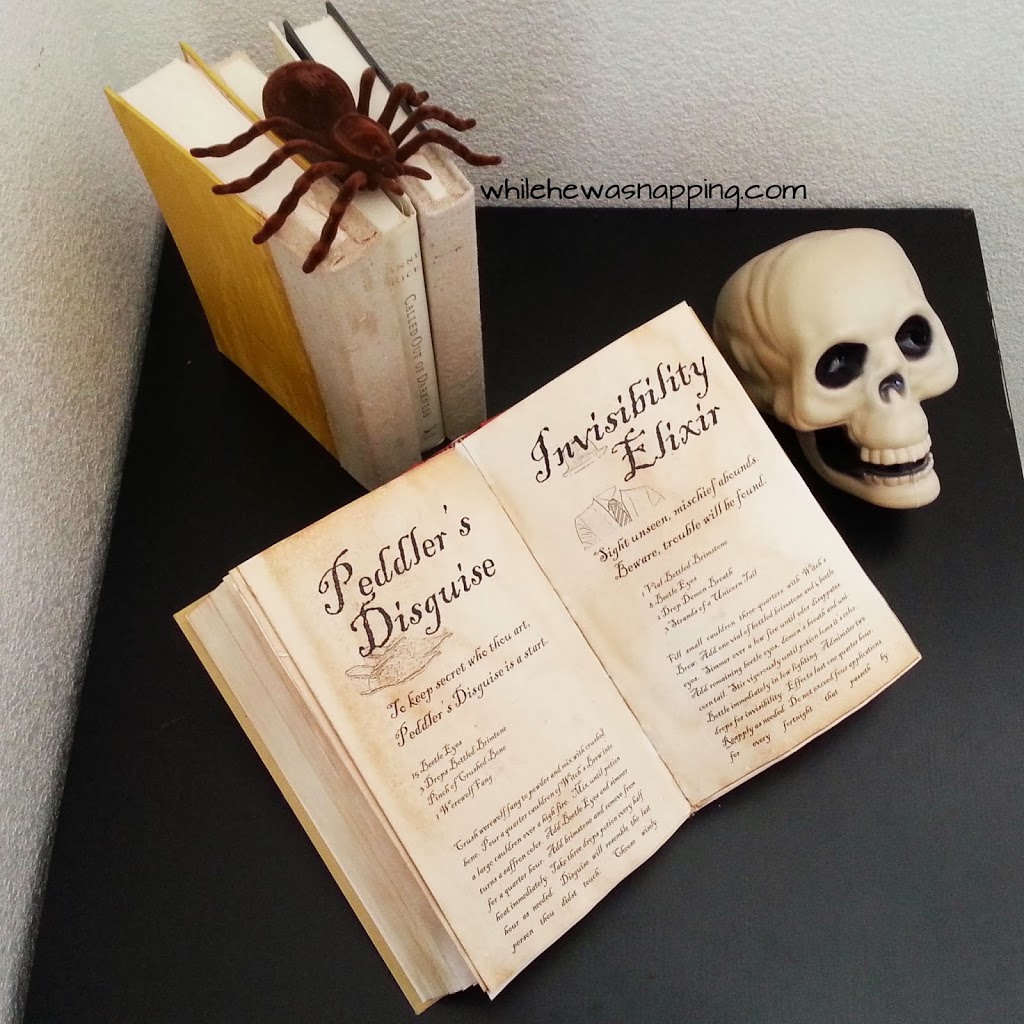
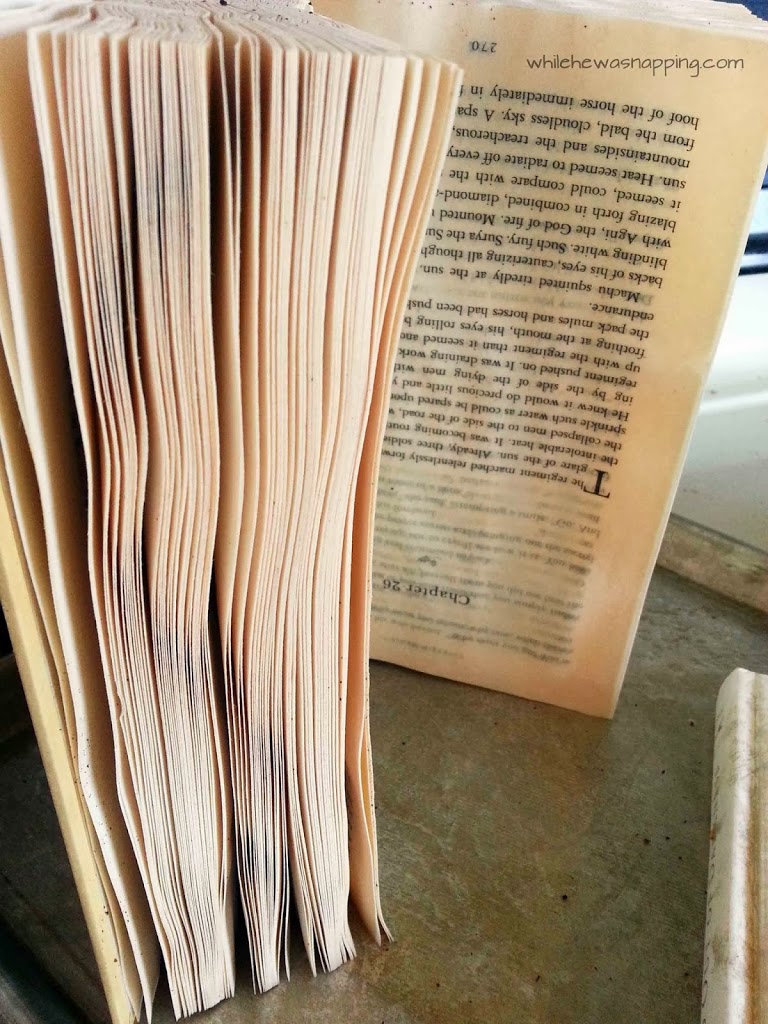
For my closed spell books, I used real books. I wanted to cover the majority of the spines, as they had the book title and author’s name stamped on them. One of my books was titled Called Out of Darkness, which I deemed appropriate enough to remain uncovered. However, Every House Needs a Porch (or something similar) wasn’t quite what I was looking for.
– I measured the spine cover on the book and cut a piece of canvas to fit over it. I stained it in the coffee mixture and then let it dry.
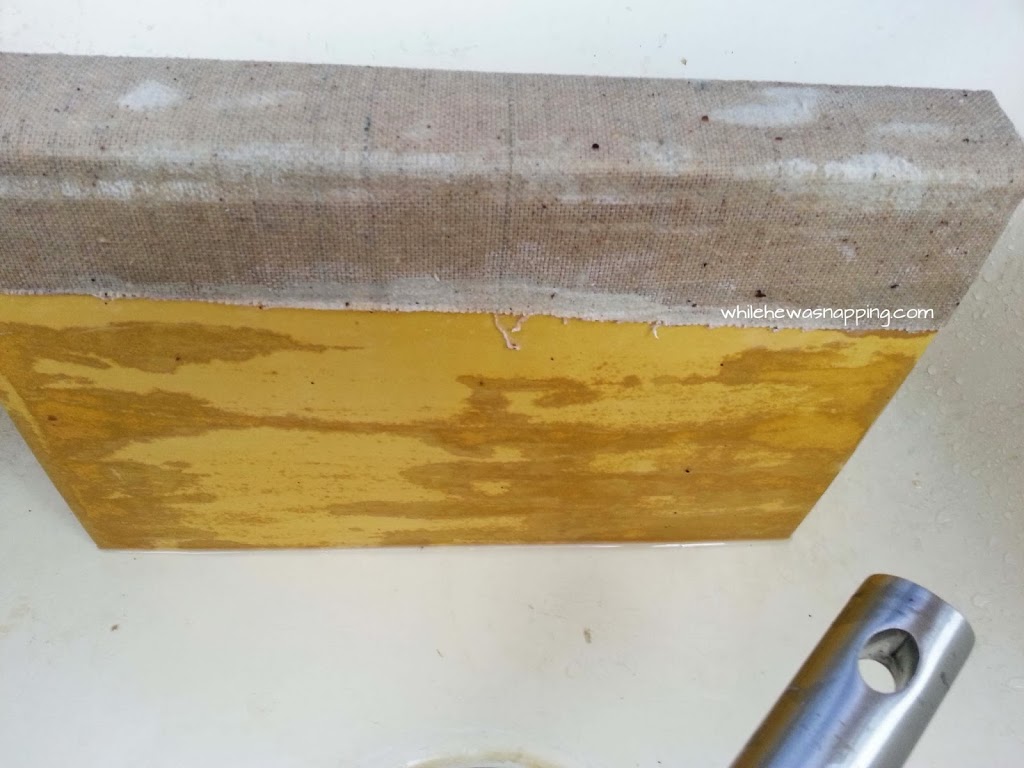
– Once dry, I hot glued the cover onto the book. I actually used Mod Podge on one book. It gives a more form-fitting cover to the book, but made the canvas really stiff. Not a big deal on a book. I opted for hot glue on my second book for the sake of ease and speed. No drying time for hot glue.
– I hot glued the excess canvas at the top of the books.
– Then I took the coffee mixture and a sponge brush and put it on the covers of the books. I also used a little dirt and some of the coffee grounds and rubbed them into the covers. Make it look worn and dirty. I attempted staining the cover on one book with some olive oil, but it eventually all dried out.
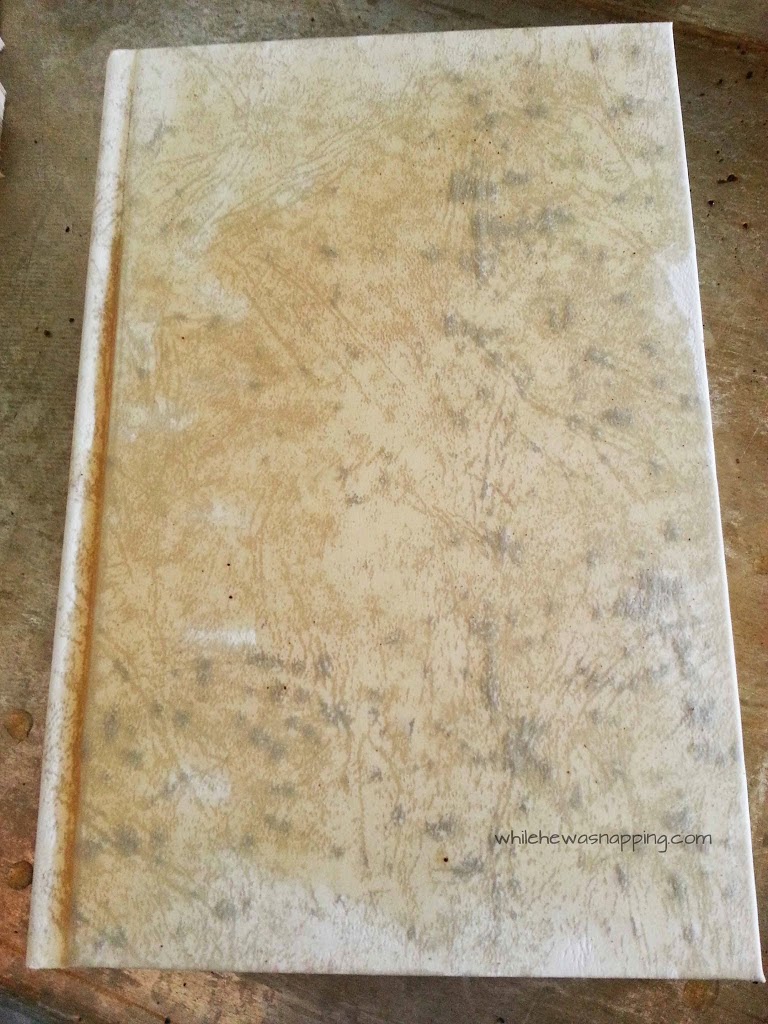
– I used some stamps and stamped “Potions” on one book. I also used hot glue to write out a title on another book. The third (the book with the title on the spine) I left alone.
*Note: I did stain the pages of the open spell book too. It looked funny with the stained pages and the off-white pages of the book. I just poured the coffee mixture over the pages and let it seep through them. Then, I used the sponge brush in the coffee to darken the edges to my liking. Let it dry. You’ll probably need to fan the pages out a bit.


INSERTING THE SPELL PAGES INTO THE OPEN BOOK:
– Once all the pages are dry, find where you want your spells in the book. You could intersperse them through out the book or just put them all in one place. I did the latter. I glued the spells back-to-back and then put a line of glue down the spine inside the book and stuck the spells into the glue. If you glue the spells throughout the book, simply glue each spell to a page in the book. I did end up needing to tear about 5 pages out of the book so my papers would fit. I’m sure those will pop up in another project though.
– Repeat with the remaining pages and let it all dry.
– To get the book to stay open, you may have to bend and work the pages a bit so the glue and once-wet paper isn’t so stiff.
Ta-da. Set out your DIY Spell Books and get to spooking the neighbors. Oh, the worst part of this is waiting for all the drying times. Well, and the coffee part – at least for me. I loathe the smell of coffee…