While He Was Napping

momma gets stuff done

  • Home
  • About
  • Archive
  • Do It Yourself
    • Crafts
      • No Sew
      • Painting
      • Paper Crafts
      • Repurpose Projects
      • Vinyl
      • Washi Tape
      • Kid’s Crafts
      • Fonts
    • Sewing
    • Decorate
      • Home Decor
      • Holiday Decor
    • Celebrate
      • DIY Gifts
      • DIY Your Party
  • Recipes
    • Beverages
    • Appetizer
      • Bread
      • Other Appetizers
    • Snacks
    • Main Dish
      • Meat
        • Chicken
        • Beef
        • Pork
        • Seafood
      • Vegetarian
      • Slow Cooker
      • 30 Minute Meals
    • Dips & Sauces
    • Salads
    • Pasta
    • Soup
    • Dessert
      • Cookies
      • Brownies
      • Cupcakes and Cake
      • Box Mix Recipes
      • Other Sweet Treats
    • Breakfast Food
      • Pancakes
      • Waffles
      • Muffins
      • Other Breakfast Food
  • Family
    • Babies
      • Pregnancy
      • Newborns
      • The 1st Year
    • Toddlers
    • Preschoolers
    • Kindergartners
    • 6-8 Year Olds
    • The Grown Ups
      • Date Night
      • Romantic Gifts
    • Self Care
  • For the Home
    • Cleaning
    • Organizing
    • Emergency Preparedness
  • Travel
    • Travel Tricks & Tips
    • Traveling with Kids
  • Tech & Gadgets
    • Must-Have Apps
    • Techy Home Appliances
    • Gadgets & Electronics
    • Blogging Tips
  • Printables
    • Posters
      • Quote Printables
      • Subway Art Printables
    • Printable Organizers
    • Printable Journals
    • Learning Printables & Worksheets
    • LDS Printables
  • Holidays
    • New Year’s
    • Valentine’s Day
    • St. Patrick’s Day
    • Easter
    • Cinco de Mayo
    • Mother’s Day
    • Father’s Day
    • 4th of July
    • Back to School
    • Halloween
    • Thanksgiving
    • Christmas
    • Holiday & Seasonal Printables

February 27, 2019 by Krista

How to DIY Laser Printer Labels for Home Organization

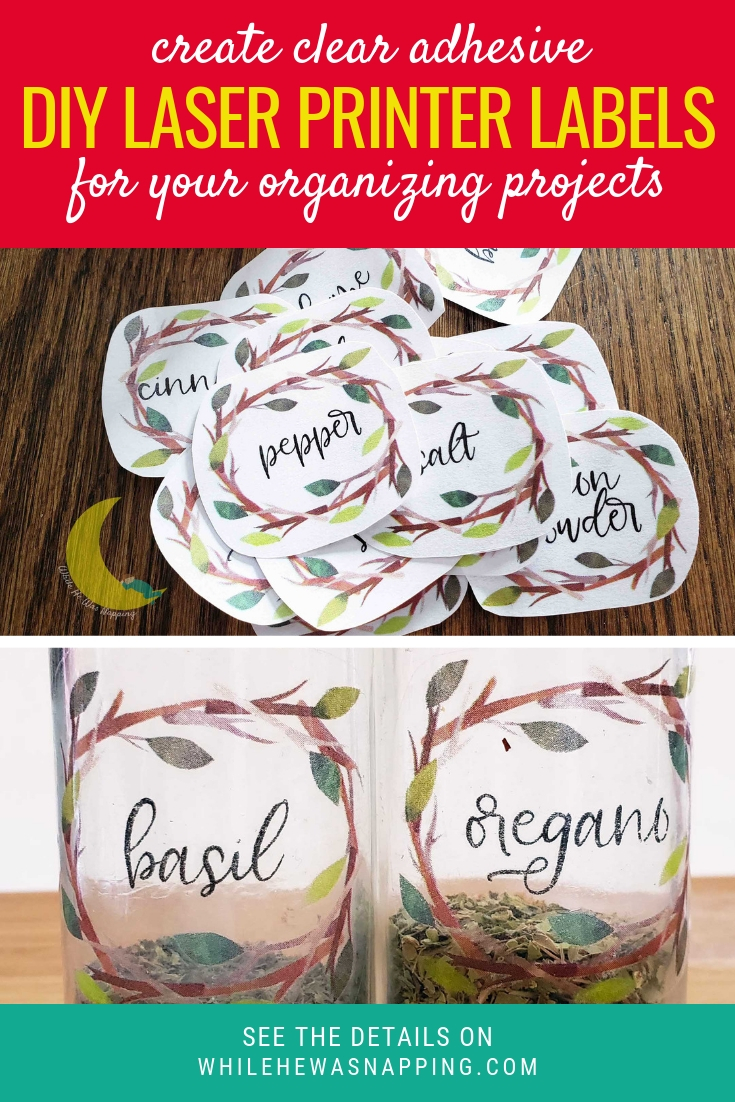
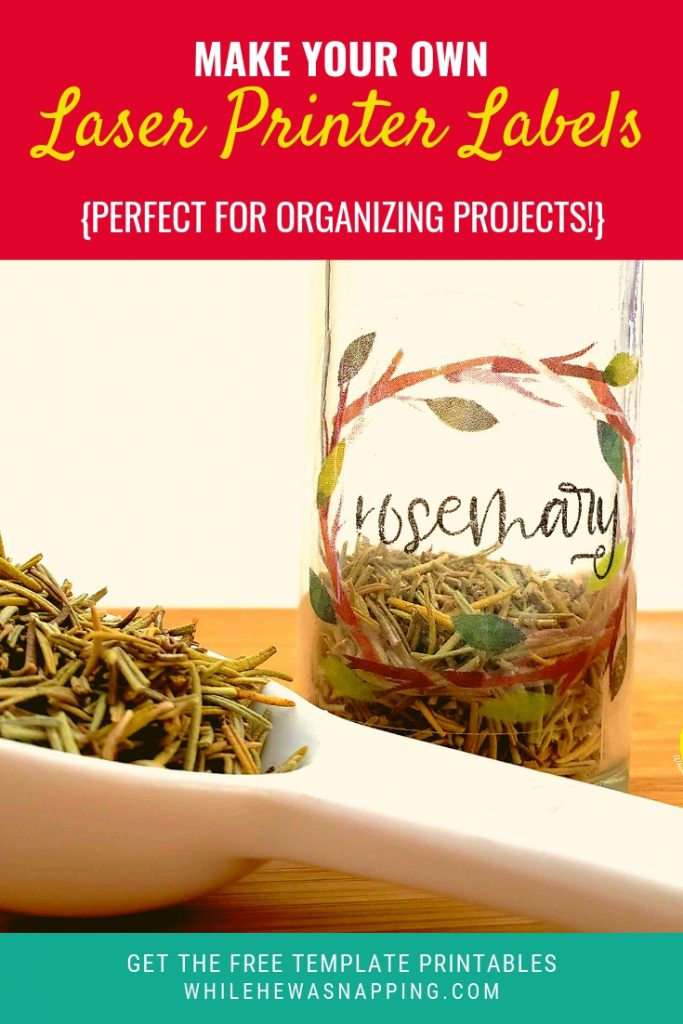
Welcome! I’m so glad you stopped by today! Have you ever been organizing something and thought, this sure could use a cute label!? Or maybe you’ve wished for something cuter than a sticky note. If you’ve ever wish organization could be easier, cuter and functional then these DIY Laser Printer Labels are just what you need. Simple, inexpensive, cute and actually useful! Just how organizing should be!

Make DIY Laser Printer Labels


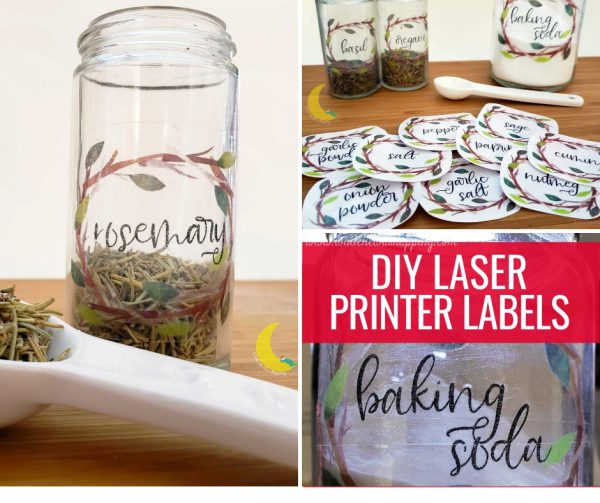
ORGANIZE SIMPLY, EFFECTIVELY AND INEXPENSIVELY WITH DIY LASER PRINTER LABELS

Organizing supplies can get costly quickly. But it doesn’t have to be a choice between chaos and cash. Keep your things in order with a quick print job and this easy DIY project. These labels will make it easier to calm the chaos in the kitchen, the toy room, the craft room, the bathroom, or anywhere else you might need a little more calm and a little less chaos.

Organizing with DIY Laser Printer Labels


ORGANIZE YOUR SPACE FOR FUNCTION AND FORM WITH THESE EASY DIY LASER PRINTER LABELS

  • Does your spice cupboard look like a disaster zone?
  • Do you buy foods in bulk?
  • Do your kids have toys with lots of little pieces? (Lego bricks and Shopkins, I’m looking at you.)
  • Is your home office or command center a jumble of pencils, pens, sticky notes, markets and other paraphernalia?

You need some containers, my friend. But what good is a container if you don’t know what goes in it? And that is where your super easy, oh-so-cute DIY Laser Printer Labels will come to the rescue!

DIY Laser Printer Labels for Organizing


GET ORGANIZED WITH DIY LASER PRINTER LABELS IN JUST 30 MINS

Now that you know why you need some super useful DIY Laser Printer Labels, are you ready for the best part of this little project?

These only take 30 minutes to make. Seriously.

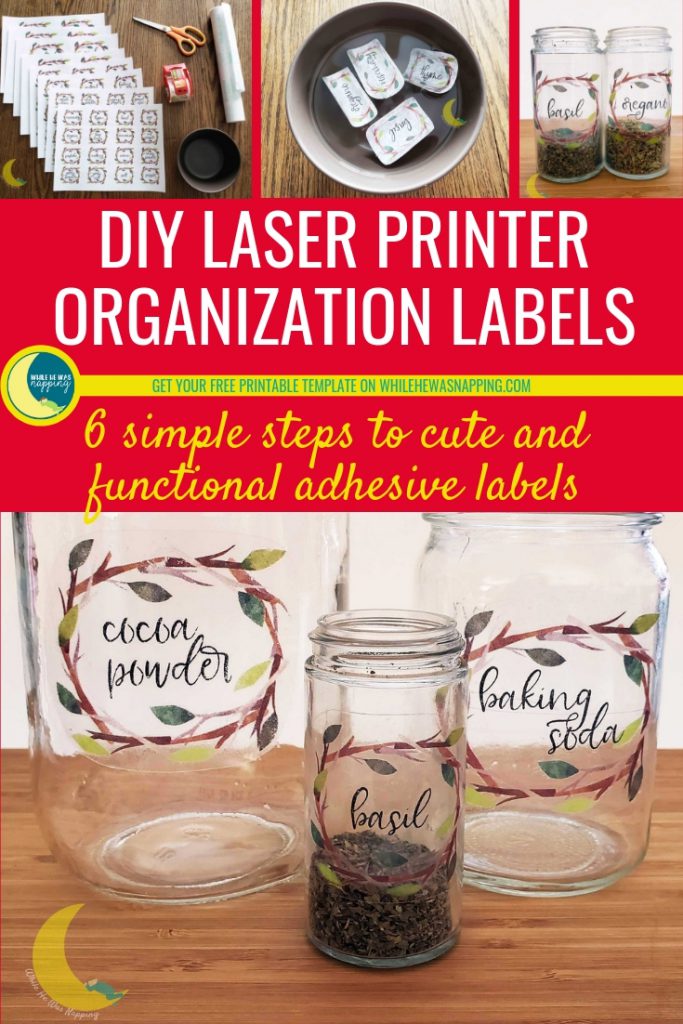
In 6 super simple steps, you’ll be ready to organize ALL. THE. THINGS.

Ready? Let’s calm that chaos!

Affiliate Link Disclaimer


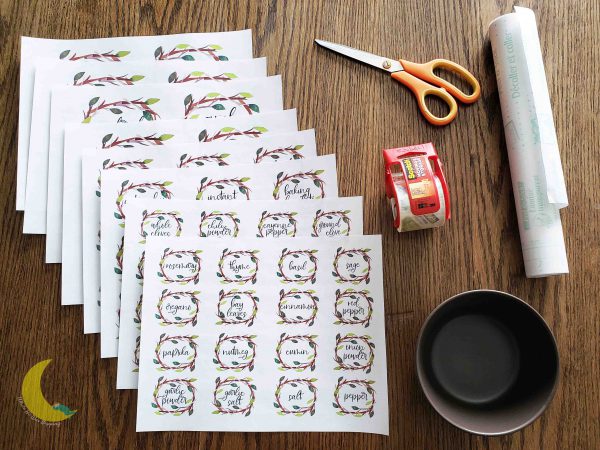
DIY LASER PRINTER LABELS SUPPLIES:

  • Labels. You can download my blank farmhouse-inspired wreath labels HERE and fill them in with an image editor before you print them. Or grab my set of Ready-to-Print Spice, Baking and Pantry Labels with editable templates from my Etsy Shop. The editable templates will make it super easy to quickly make labels for anything you might need.
  • Laser printer. No, unfortunately, ink jet won’t work for this project, as the ink is water based. I personally own a Brother Laser Printer and it does a decent job, as long as you aren’t looking to do photos. You can also get your files printed at an office supply store for just a few dollars, if you don’t have access to a laser printer.
  • Copy paper. Any standard copy paper will work. In fact, the cheaper, the better.
  • Box packing tape or contact paper. I personally prefer the packing tape. The ink tends to transfer better with the tape than with the contact paper. More info on this is below, at the bottom of the directions.
  • Scissors.
  • Bowl and water. 

DIY Laser Printer Labels


DIY LASER PRINTER LABELS DIRECTIONS:
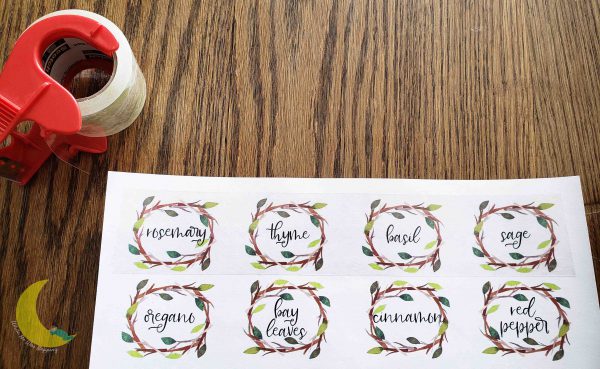
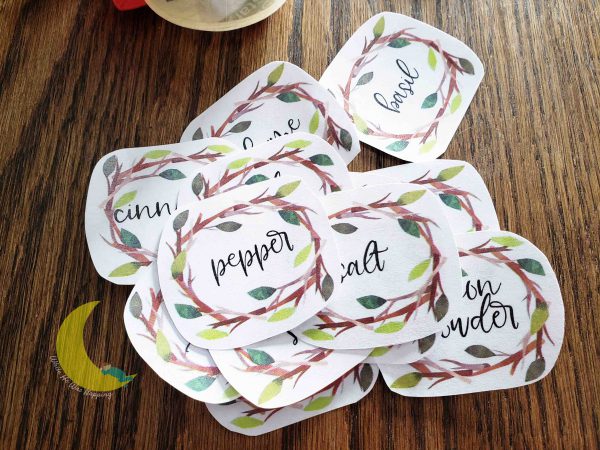
PRINT YOUR LABELS

Step #1: Print your labels on a laser printer. You can download my blank labels from the links below. If you choose to use them, you will need to edit the image files before you print them. Any image editor will work.

2-inch Spice Labels | 2.75-inch Baking Labels | 4-inch Pantry Labels

Kitchen Pantry DIY Laser Printer Labels

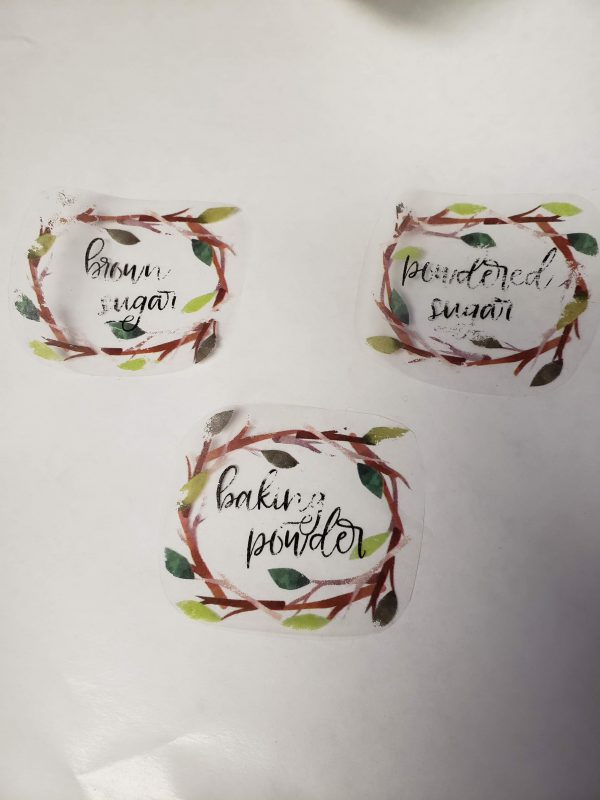
Or get the pictured Ready-to-Print Labels and editable templates in my Etsy shop.


COVER YOUR LABELS

Step #2: Cover your labels with packing tape. If the label is too large for the packing tape, you have 2 choices:

  1. Layer with strips of tape to cover the entire label or
  2. Use contact paper to cover the label.

I personally prefer to layer the tape than to use contact Paper. The ink transfers better with the tape If you use tape, you’ll have to overlap the layers of tape a little or your label will fall apart. The overlap lines are barely noticeable. There is a photo below of a layered label so you can see if it bothers you or not.*

DIY Laser Printer Labels Cover with Tape


CUT OUT YOUR LABELS

Step #3: Use the scissors to cut out your label. The shape of the tape is more important than the shape of the paper. I typically just cut around the perimeter of the label. If you want a specific shape for your label, make sure you cut it out of the tape, not just the paper.

DIY Laser Printer Labels Cut Out


SOAK YOUR LABELS

Step #4: Fill your bowl with water. Regular old tap water at room temperature is my preference. Your hands will be in the water, so super hot or super cold water is not recommended.

Step #5: Place the labels in the bowl. Push them under the water so they are completely submerged. Let the labels soak in the water for 10-15 mins.

DIY Laser Printer Labels Soak


PEEL YOUR LABELS

Step #6: Peel the paper backing off the tape. Rub your fingers lightly, but firmly, over the back of the label until all the paper is rubbed away. The ink should remain on the tape.

DIY Laser Printer Labels

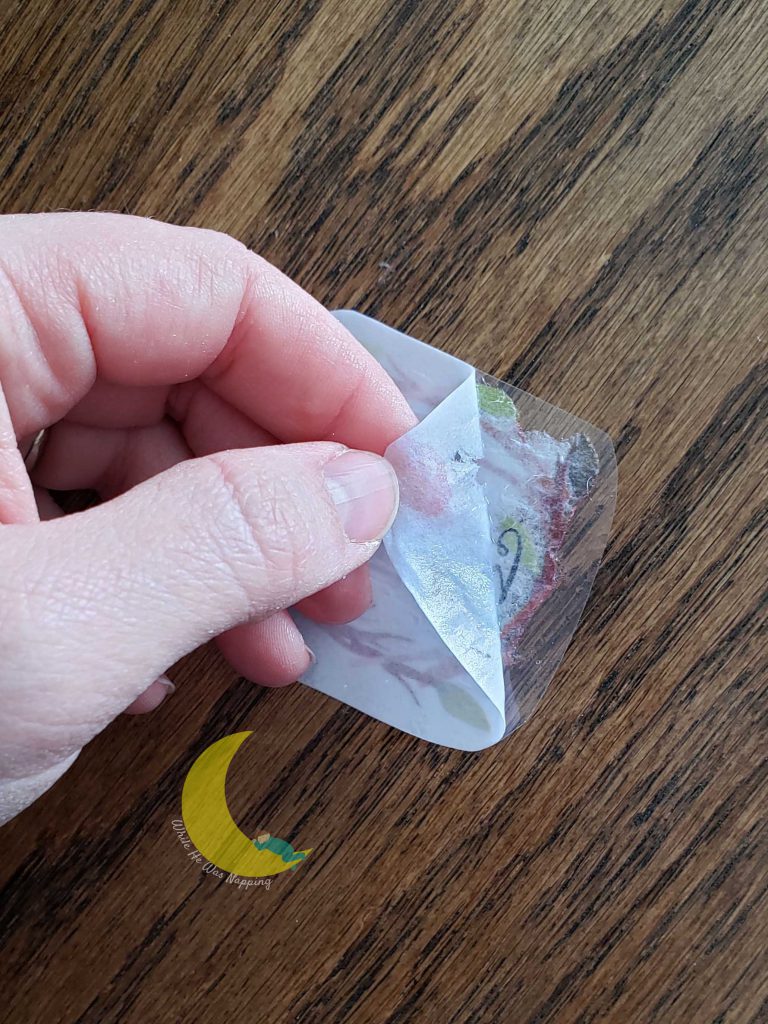
It’s a little easier to rub the paper away while the label is in the bowl, submerged in the water. You’ll need to inspect it to make sure all the paper comes off. Pay particular attention around the ink, it tends to stick there more.

DIY Laser Printer Labels

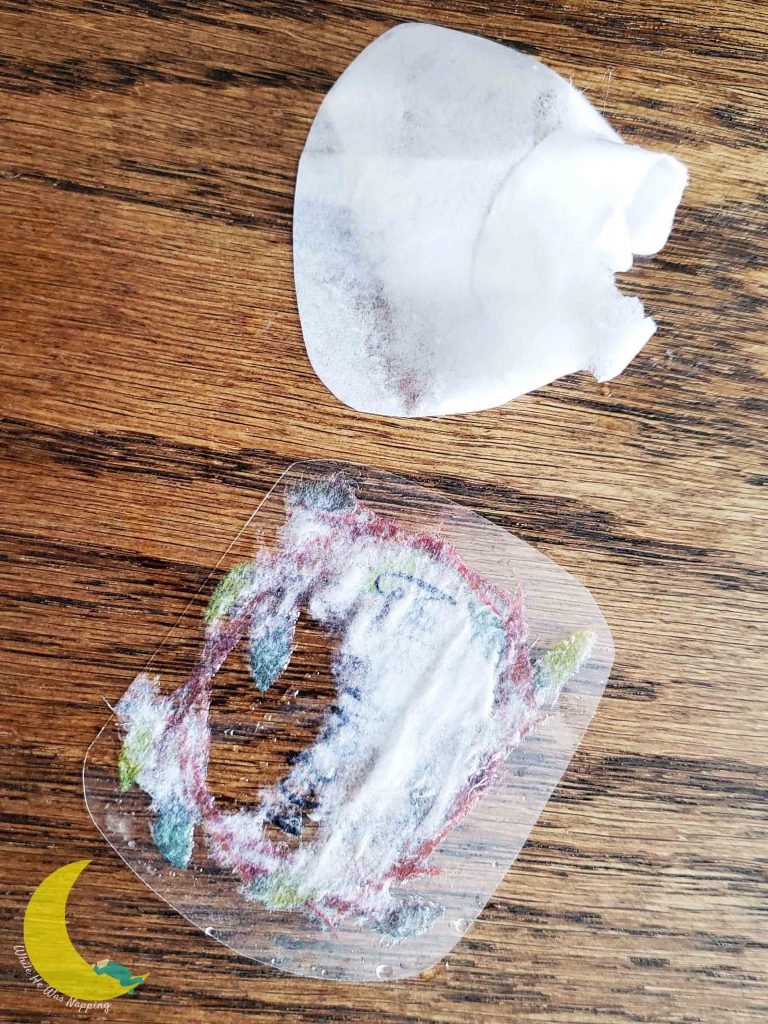
Once all the paper is peeled from the tape, let your label dry completely. You can blot with a paper towel to speed this up a little.

DIY Laser Printer Labels


STICK YOUR LABELS

Yep that’s it. Once your labels are dry, they are ready to use! The adhesive will be sticky again as soon as it is dry. So start sticking those labels and organize all the things!

DIY Laser Printer Labels Baking Labels


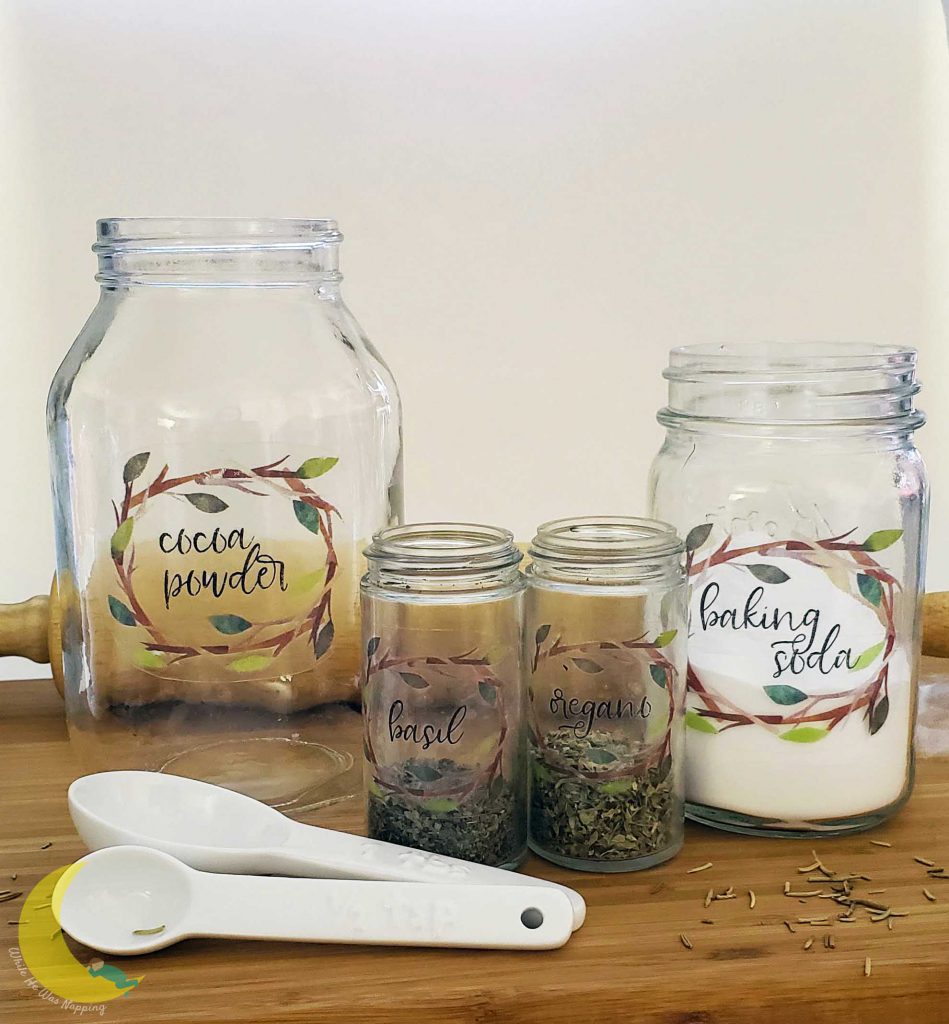
CONTACT PAPER VS. PACKING TAPE

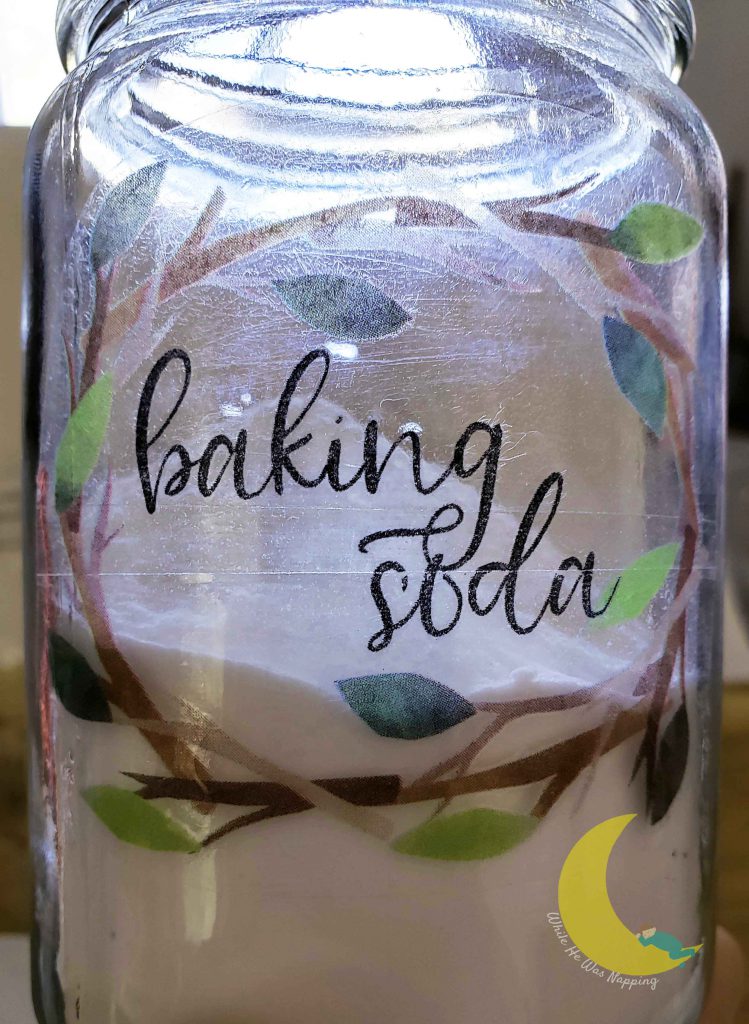
So, remember when I talked about the layering of tape for larger labels? In the photo above, the baking soda label is a layered label. Can you see where the pieces of tape overlap? Check out the close up below. The layer lines go through the word “soda”.

DIY Laser Printer Labels

The cocoa powder label in the first photo above is a contact paper label. And that one actually came out really good. Most of them were more like the photo below, which is why I prefer to layer the tape than to use contact paper.

DIY Laser Printer Labels Contact Paper Fail

If you do decide to use contact paper, make sure you give the ink the best chances of transferring to the contact paper adhesive by rubbing it firmly with a plastic card (like a bank card or library card) or another hard item after you’ve covered the labels with the contact paper.


GET ORGANIZED WITH DIY LASER PRINTER LABELS

Sure, you could spend a small fortune on organizing supplies and custom labels. Or you could make some adorable, functional labels yourself in less than half an hour.

Label your bulk foods, your spice cupboard, your baking ingredients, your kids toys, your office supplies and anything else you might need or want a label on.

So, what are you waiting for? Calm the chaos and organize your life with some totally cute, totally functional, totally inexpensive and easy DIY Laser Printer Labels.

Clear Adhesive DIY Laser Printer Labels


DON’T FORGET YOU CAN GRAB MY READY-TO-PRINT LABELS AND THE EDITABLE TEMPLATES IN MY ETSY SHOP TO MAKE THIS PROJECT EVEN EASIER!

September 6, 2017 by Krista

30+ Healthy & Low-Prep Snack Ideas for the Busy, Pregnant Mom

Anyone who has ever been pregnant knows there’s a lot of information on eating healthy while you’re growing that little babe. The do list, the don’t list, the healthy recipes and even how often you should eat and drink. But sometimes all of that is easier said than done. I get that, really I do. When you’re eating every couple of hours or less, it can be hard to plan all that out. Eating that often means you need lots of snack ideas that are low-prep or you’ll be in the kitchen for the remainder of your pregnancy. I’ve got just what you need…


THE IMPORTANCE OF HEALTHY SNACK IDEAS DURING PREGNANCY

I’m 8 months pregnant with my 3rd baby. I’m not a newbie to this pregnancy thing.

This wasn’t an unforeseen complication. It could have been prevented.

I know all the do’s and don’t’s. I know the importance of staying hydrated and fed.

But, last week I ended up spending about four hours in the hospital.

It was a busy morning getting Big J off to preschool and Little J had absconded with about half my breakfast… because, it’s always better off Mommy’s plate, or something. I was so busy I didn’t realize what I was depriving myself – and my baby – of. Food. Fuel.

Healthy, Low-Prep Snacks for Expecting Moms. 30+ delicious and simple snacks that will keep your energy up during pregnancy.

PRIORITIES DON’T HAVE TO BE TIME CONSUMING

It can be so easy to get so busy that things just slip by us. Mom life is a busy life. It can happen to any of us. So, learn from my oversight, my busy mistake, my imperfect mom life.

And keep this list of healthy, low-prep snack ideas on hand for the next time you make out your grocery list or just need some ideas.

It’s the perfect solution when nothing really sounds good. Or maybe you’re so full of baby, you don’t feel hungry. Whatever the case, pregnancy can be hard enough – let’s make it a little easier.

Healthy, Low-Prep Snack ideas for Pregnant Moms. When you're eating every couple hours or less, it can be exhausting to plan out all that food. Make pregnancy a little simpler with these easy, healthy snacking ideas that are good for you and baby!

After some research and brush up from all those health classes I took once upon a time, I came up with a list of snacks that are easy to make with little to no prep and are healthy.  I’ve divided them into categories: high in iron, high in calcium and high in protein. Some of them appear in more than one section.


Affiliate Link Disclaimer

Healthy, Low-Prep Snack ideas that are Rich in Protein

Snack Ideas High in Protein

– Cottage Cheese and Fruit
– Jerky (choose a low-sodium, low-sugar brand or make your own)
– Mixed Nuts or Trail Mix
– Eggs
– Deli Meat (choose one low in sodium and preservatives.  Put it in the microwave for 20-30 seconds to be safe, if you’re pregnant)
– Protein Shakes or Bars
– Oatmeal Raisin Cookies (here’s a Chocolate Oatmeal Cookie recipe, a Cranberry Almond Oatmeal Cookie recipe and a Chocolate Peanut Butter Oatmeal cookie recipe – try them all! The cranberry almond is my favorite though. And hang on to these after baby is born. Oatmeal can give you a boost while you’re lactating too!)
– Hummus and Veggie Dippers
– Cheese and Crackers
– Chocolate Milk
– Greek Yogurt and Fruit
– Peanut Butter or other nut butter (low-fat and crunchy is best)
– Soy Nuts
– Roasted Edamame
– Tuna (eat sparingly while pregnant)
– Lentils (a yummy, pre-cooked bean salad, perhaps?)
– Oatmeal (pre-packaged flavored packets are super simple and quick!)


Healthy, Low-Prep Snack ideas that are Rich in Calcium

Snack Ideas High in Calcium

– Leafy Greens
– Low-fat Cheese
– Milk
– Yogurt or Greek Yogurt
– Broccoli
– Okra
– Green Beans
– Almonds
– Fortified Cereals
– Fortified Orange Juice
– Soybeans
– Enriched breads
– Oranges
– Oatmeal
– Milkshake
– Omelette
– Cream Cheese on Enriched Bagel


Healthy, Low-Prep Snack ideas that are Rich in Iron

Snack Ideas High in Iron

* If you eat high vitamin C foods with these, your body will better absorb the iron.

– Raisins and Peanuts
– Whole Grain Cereal
– Jerky
– Protein Bars and Shakes
– Meat (Chicken, Beef, Fish – Add these to meals or salads)
– Dark Chocolate (at least 80%)
– Dried Apricots
– Potatoes
– Quinoa
– Beans (black, kidney – on Nachos made with whole grain chips and low-fat cheese or in a salad)
– Broccoli
– Enriched Pasta
– Rice
– Artichokes
– Dried Fruits


What’s your favorite, easy snack?  Give me your ideas in the comments!

Do you want a printable version of this list? CLICK HERE to Sign up to get it in your inbox!
Get your printable list of healthy, low-prep snack ideas perfect for busy, pregnant moms

June 13, 2017 by Krista

How to Make Snack Time Exciting

Hey, I’m so glad you stopped by today! My house is full of boys – hungry boys. I feel like I never leave the kitchen some days; someone always needs something to eat. But, we get in a snacking rut and find ourselves eating the same things over and over. I know there’s a lot more options out there, but they just don’t come to me when I have little hungry piranhas, uhm, I mean boys, nibbling at my ankles. Have you ever fallen into a snack rut too? That’s where this printable list of snack time ideas comes in.

Next time you’re scrambling at snack time, just check out the list and choose something new. It can also help you make out your grocery list and keep your snacks from coming from the candy and chip aisles. Make snack time exciting with these yummy ideas!

How to get out of that snack time rut with healthy options and an occasional treat

A HEALTHIER SNACK TIME FOR THE WHOLE FAMILY

It wasn’t just my children I had in mind when I made up this list. It was my snacking habits as well. I’m totally guilty of grabbing a handful of chocolate chips out of the fridge when the munchies hit. But, not anymore! Your whole family can eat healthier, more filling snacks and you’ll all be better, short and long-term. You’ll snack less, which means less time in the kitchen for you. You’ll stay fuller longer and you’ll have more energy. Who doesn’t want that?

MAKING SNACK TIME EASIER FOR MOM

Have you ever felt like you spent the entire day in the kitchen, feeding the kids? It can be frustrating! I’ve been there, I know. If you need to feed little mouths all day long, but don’t want to spend all day, every day preparing, serving and cleaning up those snacks only to start over again, then this list is for you! On it, you’ll find snack ideas that will help you add variety, nutrition and structure to your family’s snacking. Snacks are divided into:

  • high protein snacks for longer lasting energy
  • make-ahead snacks to help you save time
  • high fiber snacks to help keep tummies happy
  • high calcium snacks for strong bones
  • quick prep snacks for those snacking emergencies when you need something NOW

Not all of these snacks are “healthy snacks”. Some of them are treats, particularly some of the quick-prep snacks. In our family, we believe moderation is the key to healthy and happy tummies. It is up to you to make sure your family has balanced nutrition and moderation. These are ONLY ideas!

 Get out of that snack time rut with this printable list of snack ideas for the whole family

GET YOUR SNACK TIME IDEAS PRINTABLE FOR EASY, DELICIOUS SNACKING

This snack time ideas printable will help you keep your family’s tummies full and happy so you can focus on the important things of summer: playing! It’s super simple. All you have to do is enter your info in the box below to unlock the premium printable and get immediate access.

Materials You’ll Need:

  • Snack Time Ideas printable
  • A computer
  • A printer

DOWNLOAD YOUR PRINTABLE

Step #1: Just click on the image below. A PDF file will open in a new window and you can save or print it. No email addresses, no waiting, just click below and you’re good to go. Because you’ve got better things to do – like guard the pantry and the refrigerator.

How to get your family out of the snacking rut


MAKE THE MOST OF YOUR PRINTABLE

Step #2: Leaving your snack list on the printer isn’t going to be terribly helpful, so hang that baby up where you can see it. Where the kids can see it. Where everyone who ever mutters “I’m huuunggreeeyyy” at you can see it.

If your house is anything like mine, it can be questionable whether a piece of paper is truly going to survive more than a few days. If you want to prolong the demise of your snack ideas, you can laminate the page or simply slide it inside a page protector.

That’s it. You’re ready for a summer of fun, healthy snacks! Go you!


EASIER, HEALTHIER SNACKING FOR YOUR WHOLE FAMILY

Make snack time a breeze with this list of ideas. Some are simple and some a little more complex, but all are suggested with kids and busy schedules in mind. There’s healthy suggestions to keep your family strong and ready to play, along with sweet treats for the occasional sweet tooth. With a little planning, your family will eat healthier, eat less, stay fuller longer and have more energy for all the summer fun headed your way!

 Get your family out of the snack time rut with this printable list of snack ideas

MORE FUN SUMMER IDEAS

If you need some ideas of things for the kids to do this summer, check out this awesome Boredom Bucket List with over 100 ideas. Ideas are divided into outdoor activities, indoor activities and activities that will get everyone out of the house.

Summer Boredom Bucket List with over 100 kid's activities ideas to help you and your kids conquer boredom

May 3, 2017 by Krista

The Kitchen Declutter Challenge You Can Do In A Weekend

Welcome! I’m so glad you stopped by today! If your kitchen is feeling a little overcrowded and cluttered then you have come to the right place. If you want a little more order and less chaos in your cocina, this is for you. In two days, you can reclaim your space with this weekend kitchen declutter challenge. This checklist will guide you through, step-by-step to a clutter-free kitchen.


A CLUTTER FREE KITCHEN IN TWO DAYS WITH THIS KITCHEN DECLUTTER CHALLENGE

Two days is all it will take to get your kitchen under control, contain the chaos and kick out the clutter. Imagine finding that bowl or pitcher or cheese grater the first place you look. What would it be like actually knowing what spices you have in your cupboards. Imagine a calm, enjoyable cooking experience in a kitchen you love. You can have all that and more! Your kitchen can be a place you love, even if it’s not your dream kitchen. Only store the things you use and love. Make your kitchen a haven where your family will love to spend their time.

 Declutter your Kitchen in a weekend

A CLUTTERED KITCHEN IS A SMALL KITCHEN

Do you have a small kitchen? Clutter can make the largest of kitchens feel cramped and claustrophobic. My current kitchen is not small. It’s spacious and open and the reason we made an offer on this house. But the apartment we lived in before we bought our house had a teeny tiny kitchen. We barely had room to open the refrigerator door all the way. And, honestly, some days I miss our little kitchen and the limits it gave us.

If you have

  • a small kitchen with limited space
  • a large kitchen with plenty of space
  • a kitchen with awkward spaces
  • a cluttered kitchen with too many appliances
  • a kitchen that is cluttered and complicated to use

this checklist will help you put your priorities into place, organize what you love, give up the stuff you don’t and figure out how to best use the kitchen you’ve got to make it a place you enjoy being.

Kitchen Weekend Declutter Challenge

TRASH, DONATE, KEEP

The hardest part of decluttering any space is to ruthlessly purge your things. It can be hard to let go of those measuring cups or that casserole dish you got for your wedding… But, if they don’t work anymore, they aren’t doing you any good. Figure out a way to use them for something else or get rid of them. Start with 3 boxes: Trash, Donate, Keep.

Materials/Ingredients:

  • 3 boxes – 1 for trash, 1 for donations, and 1 for things you’re going to keep but that don’t belong in the kitchen.
  • A weekend to conquer the list
  • Weekend Declutter Challenge Checklist (gain instant access when you unlock the premium content below)


Instructions/Directions

CHOOSE A STRATEGY TO CONQUER THE KITCHEN DECLUTTER CHALLENGE

Decide if how you want to tackle your kitchen. Do you work best:

  • starting in one corner and working your way around the room?
  • concentrating on one task at a time?
  • working on small areas at a time?

What works best for you?


PRINT YOUR KITCHEN DECLUTTER CHALLENGE CHECKLIST

Grab your checklist when you click the image below. Download and save or print it right away. No email address and no waiting for it to show up. Just open and print it. And start your decluttering challenge now!

Weekend Kitchen Declutter Challenge Checklist


CHOOSE A WEEKEND AND GET TO WORK!

This challenge is designed to focus on a prominent area so you will be able to enjoy the results of your work. It’s designed to take place over two days so it doesn’t feel like you are cleaning and never making any progress. This challenge is quick and dirty.

For best results, divide this list into to parts. One for the first day and the other for the second day. While you don’t have to stick to it exactly, if you can accomplish approximately half the list one day and half the next, you won’t burn out and you’ll be sure to do a fairly thorough job so it will last longer than just a few days. Because, isn’t that the worst part of cleaning?! I hate spending hours working and you can’t even tell a day or two later. Get your results to last without having to kill yourself to get it all done at once.

 Kitchen Weekend Declutter Challenge

ARE YOU READY TO CONQUER THE KITCHEN DECLUTTER CHALLENGE?

You’ve got your list. Grab some boxes and get the clutter out of your home. Think how much easier it will be to cook in a kitchen that has the things you need, you know where they are and you aren’t avoiding the things you never use. Use this checklist to get your clutter free kitchen in just two days.


Want more inspiration to declutter your home? Check out these great books:


Weekend Declutter Challenge The Kitchen

April 27, 2017 by Krista

10 Essential Oil Recipes that will Help You Focus

Hi and welcome! I’m so glad you stopped by. Have you ever found yourself struggling to focus? If you’re suffering from anxiety in your life, just plain fatigue, prolonged stress or a medically diagnosed condition like ADHD that makes it difficult for you to focus, let me share what has helped me. As a busy mom with lots of responsibilities, I struggle with balancing those things too. I don’t believe essential oils have magical powers that cure everything; but, I have found some essential oil recipes that help me focus and get my stuff done. Plus, I’ll share my bonus tactic that is a huge help in keeping me focused.

Oh, also… I’m not a doctor, nor do I have any medical training. This is NOT medical advice. I’m just a tired, stressed out mom trying to share some of the things that help me cope and even succeed, because maybe they’ll help you too.


10 Essential Oil Recipes that will Help You Focus


AROMATHERAPY WITH ESSENTIAL OIL RECIPES

Aromatherapy has been around for a long time and I’ve spent the last two years researching and testing essential oils in my home. Essential oils will never replace my medicine cabinet, but they do have a place within it. When I started my essential oil research, I didn’t plan to study aromatherapy. But, it has become one of my favorite uses for essential oils. Aromatherapy has been beneficial for my mental health. It’s incredible what essential oils can do for your mood. When combined with (BONUS TACTIC ALERT!) mini meditation sessions and short, focused work times my productivity has increased dramatically.


WANT MORE FOCUS? TRY THESE ESSENTIAL OIL RECIPES

If you struggle with focus, these recipes are for you. Do you find yourself dragging through the afternoon (or before noon!)? Then, these recipes are for you. If you’re tired, your to-do list is long and you start many tasks but accomplish few, this is for you. If you

  • were up all night with the kids
  • suffer from insomnia
  • are committed to too many things
  • feel frazzled, stressed, or anxious
  • are facing deadlines and feel stuck

find a recipe and try it. Not all essential oils have the same impact on every person, but these essential oil recipes are a great place to start to improve your focus and get things done.

Essential Oil Recipe Blends to Help You Focus

10 ESSENTIAL OIL RECIPES THAT WILL HELP YOU FOCUS

You may find that one method of use is more effective for you. Personally, topical application works better for me than diffusing the oils. I use roller bottles a lot, but if diffusing works for you, then do that. These recipes are simple. In all 10 recipes, there are only 6 oils. Most of the oils are common and have multiple uses – which makes me more likely to keep them stocked in my home.

Imagine crawling into bed, your pillow soft against your face as you relax and drift into sleep. Your responsibilities are taken care of – to the best of your ability and you can rest easy. Tomorrow, you’ll get up and do it again. You’ll crush your to-do list. With some discipline, determination and focus you’ll be a rock star!

Materials/Ingredients:

  • Peppermint Essential Oil (get it now)
  • Lemon Essential Oil (get it now)
  • Lavender Essential Oil (get it now)
  • Grapefruit Essential Oil (get it now)
  • Rosemary Essential Oil (get it now)
  • Ylang Ylang Essential Oil (get it now)
  • Diffuser (I have and love this one – love it’s large capacity!) or Roller Bottles (I use these ones)
  • Essential Oil recipes for Focus printable below


GET YOUR 10 ESSENTIAL OIL RECIPES PRINTABLE REFERENCE SHEET

This handy reference sheet will help you keep all the recipes in one place, neat and organized. I have a small notebook where I keep essential oil recipes and printables so, if I find a recipe that works well, I can make sure I’m able to go back and replicate it again and again. All you need to do is enter your information below to get instant access to the recipes and the premium printable.

Click on the image below to download your high resolution printable reference sheet.

10 Essential Oil Blends to Help You Focus

FOR USE IN A DIFFUSER

Step #1: Add water to the max fill line in your diffuser. I like to use distilled water to help keep my diffuser clean.

Step #2: Add the essential oils as directed in each recipe.

Step 3#: Replace the diffuser cover and turn it on. If you diffuser allows you to set time limits or frequency of mist, do that now.

You can diffuse for a couple hours or all day; however, I find it most effective when I diffuse while I am actively working on a task.


FOR USE IN ROLLER BOTTLES

Step #1: Clean and disinfect roller bottles – I run them through a cycle in the dishwasher – before use. Let dry completely.

Step #2: Add the essential oils in the recipe and fill the remainder of your 10mL roller bottle with carrier oil. Fractionated coconut oil is common and works well, but I actually like grapeseed oil in my roller bottle blends.

Step #3: Gently shake the roller bottle before each use to re-blend the oils. Apply to wrists, temples, back of your neck or the bottoms of your feet. Temples and wrists are my preferred locations.

10 Essential Oil Recipes to Help You Focus


FIND YOUR FOCUS AND GET STUFF DONE WITH THESE ESSENTIAL OIL RECIPES

What are you waiting for? If you’re just starting with essential oils, this is a great place to try a few things. When I first started using oils, I wanted miracles and I wanted them RIGHT NOW. But, oils don’t work that way. Be consistent and willing to try other methods to find the one that is right for you. You’ll find your focus and things will get done. And you’ll feel better too!


FOR BEST RESULTS, USE QUALITY OILS

I use Rocky Mountain Oils. I love their guarantee and return policy. The quality of their oils is comparable to the other expensive brands I’ve used before while being a little easier on my wallet and budget too. They are affordable and effective – and, my favorite part, there’s no MLM structure so you can order what you need when you need it.

  • 1
  • 2
  • 3
  • 4
  • Next Page »

I'm Krista. Ringleader here on While He Was Napping, wife to my handsome Mr. Right & momma to my THREE energetic boys, Big J (9), Little J (6) & Little N (4). We FINALLY added a beautiful little girl to our family last December.

I’m knee-deep in Tonka trucks & Thomas trains. I survive our crazy days with Vanilla Coke, Sonic slushies, sweet snuggles and little giggles. When I tuck them in tight & kiss them good night, I get a little time to create & just be me.


It all happened
while (s)he was napping
Want More of My Story?

Privacy Policy

While He Was Napping respects your privacy and is committed to keeping any personal information collected on this website confidential. To find out what information we collect and how it is used or what options you have regarding your information, see our full privacy policy here. Creative Commons License The website found at whilehewasnapping.com and all subdomainsauthored and published by Krista is licensed under a Creative Commons Attribution-NonCommercial-NoDerivs 3.0 Unported License.

Pretty Chic Theme By: Pretty Darn Cute Design

Get the Healthy & Low-Prep Snacks printable right in your inbox!

​

x