While He Was Napping

momma gets stuff done

  • Home
  • About
  • Archive
  • Do It Yourself
    • Crafts
      • No Sew
      • Painting
      • Paper Crafts
      • Repurpose Projects
      • Vinyl
      • Washi Tape
      • Kid’s Crafts
      • Fonts
    • Sewing
    • Decorate
      • Home Decor
      • Holiday Decor
    • Celebrate
      • DIY Gifts
      • DIY Your Party
  • Recipes
    • Beverages
    • Appetizer
      • Bread
      • Other Appetizers
    • Snacks
    • Main Dish
      • Meat
        • Chicken
        • Beef
        • Pork
        • Seafood
      • Vegetarian
      • Slow Cooker
      • 30 Minute Meals
    • Dips & Sauces
    • Salads
    • Pasta
    • Soup
    • Dessert
      • Cookies
      • Brownies
      • Cupcakes and Cake
      • Box Mix Recipes
      • Other Sweet Treats
    • Breakfast Food
      • Pancakes
      • Waffles
      • Muffins
      • Other Breakfast Food
  • Family
    • Babies
      • Pregnancy
      • Newborns
      • The 1st Year
    • Toddlers
    • Preschoolers
    • Kindergartners
    • 6-8 Year Olds
    • The Grown Ups
      • Date Night
      • Romantic Gifts
    • Self Care
  • For the Home
    • Cleaning
    • Organizing
    • Emergency Preparedness
  • Travel
    • Travel Tricks & Tips
    • Traveling with Kids
  • Tech & Gadgets
    • Must-Have Apps
    • Techy Home Appliances
    • Gadgets & Electronics
    • Blogging Tips
  • Printables
    • Posters
      • Quote Printables
      • Subway Art Printables
    • Printable Organizers
    • Printable Journals
    • Learning Printables & Worksheets
    • LDS Printables
  • Holidays
    • New Year’s
    • Valentine’s Day
    • St. Patrick’s Day
    • Easter
    • Cinco de Mayo
    • Mother’s Day
    • Father’s Day
    • 4th of July
    • Back to School
    • Halloween
    • Thanksgiving
    • Christmas
    • Holiday & Seasonal Printables

October 31, 2015 by Krista

Happiness is Homemade Link Party

I am super excited to get to co-host the Happiness is Homemade link party put on by Lisa at Blogghetti, Cathy from A Peek Into My Paradise and Brittany from Mommy on Demand this month. I used to have my own link party back in the day before I had three boys and a teensy weensie bit more time to spend hopping around the blogosphere and setting up link parties. I’ve missed it! So, I’m super excited to get to co-host this month and get my feet back into the link party scene.

So, what this means for you: you can link up here on While He Was Napping for the month of November and your awesome projects, recipes and all the other amazing things you’ve been doing will be seen on SIX other awesome blogs! So, get to sharing! Leave a comment with your link numbers and I’ll share them on social media!

___________________________________________

I’m still in shock that Halloween is now over and now its time to start Christmas Shopping…eek! Where did the year go!?

Hope everyone had a safe and fun Halloween!

We appreciate each of spending time us and making our parties alot of fun!! This month we are introducing 4 new co-host’s so please make sure you take the time to follow these lovely ladies! If you are interested in co-hosting with us in December fill out the rafflecopter below!!

HIH 3 Hosts

[Read more…]

July 22, 2015 by Krista

DIY Cardboard Box Cars for an At-Home Movie Night

If you’ve ever been to a drive-in movie, you know how fun it can be. We love piling into the back of our van with all our favorite blankets and treats and enjoying a movie out in the summer air. But the drive in movies aren’t just fun in summer time, right?! You can skip the chilly night air and bring that fun right into your living room with a fun kid’s activity and art project: Making cardboard box cars! Then, let the kids sit in them while you watch a movie! Two fun family activities in one!

DIY CARDBOARD BOX CARS FOR AN AT HOME DRIVE-IN MOVIE NIGHT

Tyson Any'Tizers DIY Drive-In Cardboard Box Cars

DIY Cardboard Box Cars Materials:

– cardboard boxes your child can fit inside (1 for each car)
– box cutter
– spray paint
– packing tape
– construction paper
– hot glue gun and glue sticks
– scissors
– foam letter stickers
– chalk markers
– 3-inch circle punch
– aluminium foil
– black paper plates
– paper cup
– black wide (2 to 3 inches) grosgrain ribbon

Tyson Any'Tizers DIY Drive-In Cardboard Box Car Materials

DIY Cardboard Box Cars Directions:

PREPARE YOUR BOX

1. Start with some large, empty boxes. The boxes need to be big enough for your child to fit inside them semi-comfortably. Large diaper boxes are good.

2. Cut the flaps off the top of the box and a space wide enough to comfortably stand up through the bottom of the box.

Tyson Any'Tizers DIY Drive-In Cardboard Box Car Box Prep

3.  Use the flaps and packing tape to create any extra shape to the car you want.  I made a little dashboard in the green car and used small triangular pieces to help support the windshield in both cars.

4. Spray paint the boxes. My red box needed a primer, but the blue box did not.  Both boxes got four coats of paint, plus the red box got a layer of primer.  Let the paint dry thoroughly, preferably overnight.  Mine actually dried for a couple of days, but 4-6 hours should be sufficient.

Tyson Any'Tizers DIY Drive-In Cardboard Box Prep

** If you want to construct cars as a group activity, whether for a movie night, a kids’ party or some other event, you will want to have the above completed prior to your event.  You may want to do some of the following prior to the event as well, such as having things pre-cut.


CONSTRUCT YOUR CARS

5. Use paper plates and construction paper circles to create wheels for your car. Each wheel will need one plate and one circle. Use a glue stick to glue the construction paper circle to the center of the plate and use hot glue to secure the plate to the box. You will NOT want the plate to extend past the bottom of the box or it will get crushed when the box is placed on the floor.

Tyson Any'Tizers DIY Drive-In Cardboard Box Car Wheels

6. Use a small piece of one of the cardboard flap, cut to a rectangle, to make a rear view mirror. Cover the rectangle with construction paper and use a small piece of aluminium foil to make the reflective ‘mirror’ part. Hot glue the mirror to the windshield inside the car.  It won’t fall off, but it’s not super sturdy either. But, it’s hot glue, so no big deal.

Tyson Any'Tizers DIY Drive-In Cardboard Box Car Rear View Mirror & Steering Wheel

7.  Make a steering wheel with a black paper plate.  You can decorate it or not.  One of my boys chose to put a colored construction paper circle on his, the other decided not to.

In the green car, I secured the steering wheel to the dashboard I created with a small piece of cardboard taped onto the dashboard.  I then hot glued the steering wheel plate to the small cardboard.

In the blue car, I used a paper cup covered in black construction paper to make a steering column.  I then hot glued the steering wheel plate to the cup and the cup inside the box where the steering wheel is supposed to be (on the left, in our case).


GOTTA HAVE A SEAT BELT

8. Not only does a seat belt keep you safe, in this car, it holds it up! Create a seat belt with wide black grosgrain ribbon.  I poked small holes in opposite corners of the box.  If you’re standing at the back of the car, I put holes in the front right and the back left so it was like wearing a seat belt on the driver’s side of the car (in the US).

Put one end of the ribbon through one of the holes and tie a knot. Measure on the child how long the ribbon needs to be.  Length will depend on the length of the child’s torso and where they want the car to sit while they are playing.

Have them stand in the car and pull the ribbon up over their shoulder and to the back of the car. Big J wanted his car to sit lower than Little J did, so the best way to figure this out is to actually measure it with the child in the car.  Poke the other end through the hole at the back of the car and tie another knot. In the green car, we hid the front knot under the bumper.

DIY Cardboard Box Cars

9. If you want to create a bumper, use one of the flaps from the short side of the box and cut off a strip abour 3 inches wide.  Wrap it in aluminium foil and use hot glue to secure it to the car.


DON’T FORGET THE HEADLIGHTS!

10. Create headlights with circles of yellow construction paper.  Glue them on with a glue stick.  Yellow plastic cups would also be cute and super easy for this.  Create a windshield with a rectangle of light blue construction paper and glue it on.  I had to use hot glue for the windshield.  You could cut the windshield out, but I knew ours wouldn’t last that long if there were just small pieces of cardboard holding it all up, so I left it intact and used the construction paper instead.  They have no problems seeing over it.

Tyson Any'Tizers DIY Drive-In Cardboard Box Car Front


PERSONALIZE IT!

11. Create a license plate with construction paper.  We used foam letter stickers and Big J and I used a chalk marker to write the large letters on the green car.  Little J just did his own thing on this one.  Make it a fun one!

Tyson Any'Tizers DIY Drive-In Cardboard Box Car License Plate


READY, SET… DRIVE!

Now, your kiddos are ready for a great movie night!  We have a large screen and projector that we like to set up for movie nights at our house.  It was perfect for our at-home drive-in.  And best of all, we didn’t have to wait for it to get dark, which means the kids were still in bed at a decent hour.  Mom win!  But what’s a movie night without some awesome movie night snacks?!  Popcorn is the old standard and there are lots of ways to make just the way you like it.  But, it’s definitely not the only go-to movie snack in our house.

Tyson Any'Tizers DIY Drive-In DIY Cardboard Box Cars


MY TOP FOUR MOVIE SNACKS (besides popcorn)

SWEET AND SALTY COMBO

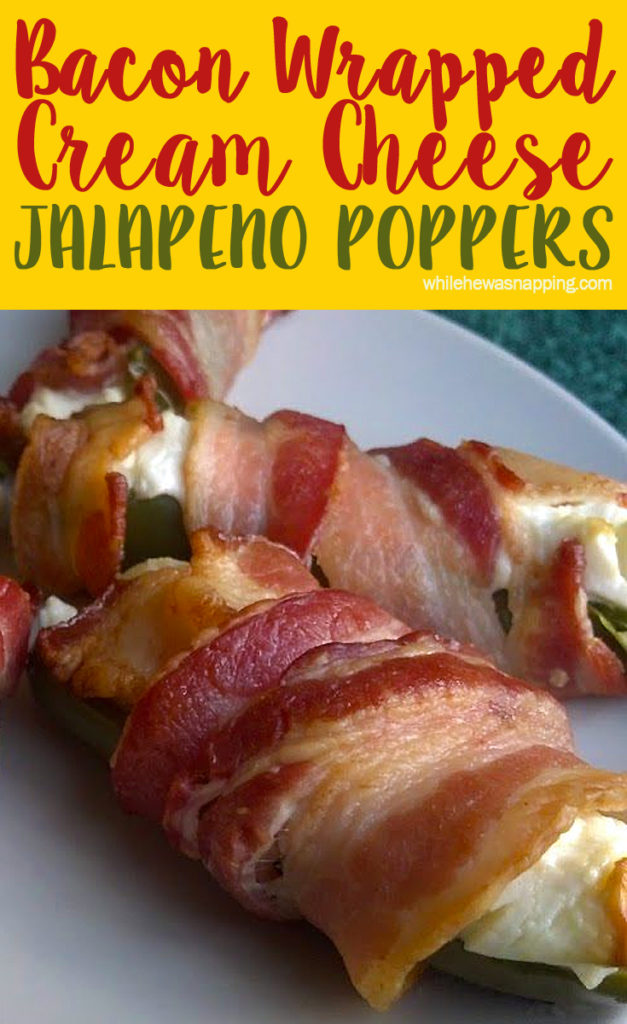
1. Bacon Jalapeno Poppers!  These things are like crack. Seriously, I can promise you won’t be able to eat just one. Or two. Or even three. These jalapeno poppers are so delicious. It takes a little bit of time to cut them, pull out the seeds and then wrap each one – BUT, it is SO, SO, SO worth it! The sweet cream cheese, the salty bacon, the mild heat of the jalapeno. Yum. YUM.

Bacon Cream Cheese Jalapeno Poppers.jpg


HEARTY AND CHEESY

2. Pizza Pretzels.  It’s a soft pretzel with pizza toppings: pepperoni, Italian herbs, Parmesan and Colby Jack cheese.  It’s probably a ton of calories and your entire carbohydrate allowance for the day… but it’s totally worth the splurge!

Pizza-Pretzels


FRESH AND SWEET SALSA

3. Mango Salsa and Tortilla Chips.  This is the perfect way to get a little sweet and salty going on.  It’s a fresh salsa made with delicious sweet mangoes, zippy onions, crunchy peppers and fresh cilantro.  Pair with tortilla chips.  Or eat it out of the bowl with a spoon.  I won’t tell.

Mango-Salsa


SATISFY THAT SWEET TOOTH

4. And, because I’m a chocoholic… Peanut Butter Cup Bars.  It’s all the goodness of peanut butter cups in an easy to make cookie bar-style little treat.  There’s just something about the peanut butter and chocolate combo that hits the spot for me.

Peanut-Butter-Cup-Bars1


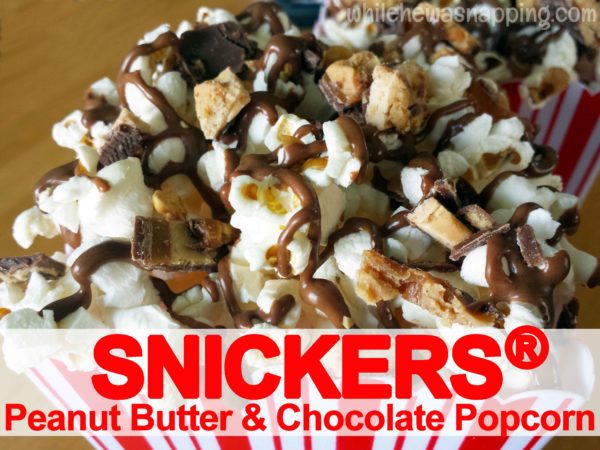
BONUS SNACK: If popcorn is just totally your jam… I got you. This Snickers Peanut Butter Chocolate Popcorn is AMAZING! Almost as addicting as those Jalapeno Poppers up there. But with chocolate. Try it. You’ll love it.

Snickers Peanut Butter Chocolate Popcorn

What are you waiting for?! Get your drive in movie on… at home!

February 17, 2015 by Krista

Mystery Prize Pack Giveaway

So, last weekend I made my 10,000th pin on Pinterest… Yes, hello, my name is Krista and I have a problem.  Lucky for me, a great many other people can relate and I bet I can find a support group when I decide to kick the habit, but that won’t be happening anytime soon.  But I thought it a great excuse for a giveaway…  Because everyone loves a little free sumthin’-sumthin’, right?  After polling my Facebook buddies (come on over and join us!), they let me know that surprises are way more fun than a small gift card.  So that’s what I’ve got for you today.  Your chance to win a Mystery Prize Pack!  Because surprises are so much fun, I’ll give you a few hints but I’m not going to ruin it for the winner.  So, here’s a little peek and some of the stuff in this prize pack.

Mystery Prize Pack Giveaway


Giveaway will close Monday March 2, 2015 at 12:00 AM PST.  Giveaway is open to Continental US residents only.  Sorry, but my pockets aren’t deep enough for international shipping.  Winner will be contacted via email sometime on Monday, March 2, 2015 and given 24 hours to claim their prize or another winner will be chosen.  Winner will be randomly selected with Rafflecopter.  This sweepstakes is sponsored by me, Krista, and mention of other sites, companies and services does not indicate an endorsement or sponsorship or participation from the aforementioned companies.  It’s all me.  Use the rafflecopter widget below to enter.  Good luck and GO!


This giveaway is also being hosted on my Facebook page.

January 13, 2015 by Krista

10 Tips and Tricks for Getting Kids to Help Clean Up

I have been seeing tons of “age-appropriate chore” lists and cleaning schedules and ‘how to maintain a cleaning schedule’ types of pins in my Pinterest feed lately. And I am trying to get my house under control after (nearly) a year of new baby chaos, and then there was the toy factory explosion that was Christmas.

After a week and a half of trying to get things re-arranged and de-cluttered and cleaned, I have come to the conclusion that maintaining a home is NOT a one-person task. Unless only one person lives there. Getting kids to help clean up can be a rough battle of wills, especially mine – who seem to have inherited stubbornness from both their parents. My husband and I also both come from pack rat backgrounds and we both have dropsy syndrome (where you notoriously drop stuff just any old place) and we’ve passed this on to our kids unfortunately. So, sometimes it looks like little natural disasters have occurred around our home. Big J was sick the week before Christmas and missed school, which threw off my routine a week before I expected. And then enter that toy factory explosion I mentioned. It was a rough winter break for my poor house.

My boys have a fantastic talent for pulling out all the toys, mixing up all the tiny pieces and then leaving them on the floor. We’re talking Olympic athlete talent and skill. Not terribly impressive when you step on that Lego rocket ship or helicopter at 3 am. They are also wonderfully skilled at the art of procrastination and bargaining – they get it completely from their dad. And maybe a little from me. I’ve actually had Big J tell me that he can sit on his pillow with his Lightning McQueen car and just drive on his own legs to avoid cleaning his room. Seriously.

Since we had three whole weeks for winter break (P.S. who had that bright idea? Three weeks was too long!), we tackled the boys’ room last Friday before school started again. It can be a chore in and of itself to get my boys to help clean up, but I hit upon some tricks last week in getting kids to help clean up and I thought I’d share what I learned from my two.  Maybe they can make your cleaning endeavors a bit easier too.

10 Tricks & Tips for Getting Kids to Help Clean Up

Getting Kids to Help Clean Up

1. Give them specific tasks. Exactly how specific depends on age and your child. I could tell Big J (5.5) to pick up all the books and put them in a pile, but Little J (3 next month) needed super specific directions like pick up the yellow car and put it in that blue bucket by the train table. When they knew exactly what was expected, things got accomplished.
2. Work on one area at a time.  I divided the room into four corners and we cleaned one corner at a time and then we took a break. This took longer, but my kids were infinitely more helpful and less whiny. This time, it was more about the principle of cleaning up and caring for thei possessions than getting it done as quickly as possible. Breaking the room into areas worked great because, by the time they were ready to quit, there was usually just a handful of things left and then it was break time.
3. Work on one item at a time. When we first started in the room, there was barely walking space. A large part of this was because, at some point, one of my kids decided they should empty the ENTIRE bookcase. So the first task I set before my kids was to put all the books in a corner. This worked well because it got a large chunk of the mess cleaned up first (before my kids were sick of cleaning) and it freed up space to help get things organized. And it was motivation to me because it looked like we were actually getting somewhere.
4. Take frequent breaks. There are several ways to do this.  I started off by saying “Help me clean up and we’ll take a break in 15 minutes.” It took my boys about 3.5 seconds to realize they were just going to run out the clock with whining, playing and other not-cleaning mischief. So, setting a time limit was not the way to go for us. But, when I divided the room up and said, “Okay, when this corner is clean we can take a break,” we got so much more done. Usually, by the time the whining started up again, we were already mostly done with the corner and I found that using tip #1 was super helpful at this point. In my five-year-old’s eyes, all he could see was stuff that was not allowing him to take a break. So, by breaking it down, we avoided a meltdown. It also helped to have them tell me what they wanted to do during our break. This was two-fold: it distracted them from whining and it gave them something to look forward to and motivation to finish the job.
5. Make break time relaxing and fun. Like I mentioned above, I let my kids plan their break time. Some times they wanted a snack. Or to watch a little TV. Or to play with some of the toys I was not letting them play with during clean-up time. Our breaks varied in length depending on the time of day and what else I needed to accomplish. We took a longer break at lunch time and when I needed a bit of time to put Baby N down for a nap, but we typically took about 15 minutes and that was long enough for my kids to re-charge.
6. Listen to upbeat music while you work. Every time we went back to work, I turned Pandora back on. The 80’s Workout Station was fabulous (I was definitely born at the wrong end of that decade…).  Choose something you like with a good beat, too slow and it’ll put you to sleep. Big J asked me at one point why I kept turning the music on. I asked him if it made it easier to work with some fun music. He thought about it for a second and then said, “Yes, Mom. But cleaning isn’t really fun. I like the music, I don’t like the cleaning.” Smart boy. And it was a good distraction for me too.
7. Don’t let your kids get hungry or tired. Or you. The term ‘hangry’, as in being angry because you’re hungry, is a very real affliction in my household. Make sure to keep the tank full and don’t work (or at least don’t make the kids work) right through nap time. Take a break and give them food and sleep when they need it or move naps to a different room. It takes longer, but everyone will be happier.
8. If you get frustrated, take a break. And then take a break from your kids. It’s okay to turn on a TV show or a movie and let the kids watch while you re-group and re-focus. Or eat lunch. If you need a break from your kids, take it. If you don’t, you’ll get more frustrated and they will get more whiny and be much less helpful. And eat a little chocolate while you’re at it.
9. Make it a game. My boys are competitive. The words ‘on your marks’ will almost always light a fire under them and get them moving. When they would stall and not follow directions, making it a little competition would re-focus them on picking up the Legos rather than playing with them. The only downside to this was when Big J would repeatedly ‘win’, Little J would get frustrated. So then I would make a little race against Mommy and he was suddenly the winner again. Small price to pay for a bucket full of Lego bricks.
10. Reward them. I’m not talking a trip to Disneyland or anything.  Just something simple that will let them know you appreciate their work and help.  Big J got some extra screen time and Little J got a leftover Otter Pop from summer. They aren’t begging to help me clean now, in hopes of rewards, but it got the job done and it has been easier to get Big J to do his normal chores lately. Totally worth not worrying about little Lego and Hotwheel land mines when I checked on them that night. It may also be a good time to start (or re-start) a rewards system for keeping the room clean.


Do you have any tips on getting your kids to help clean up?

August 8, 2013 by Krista

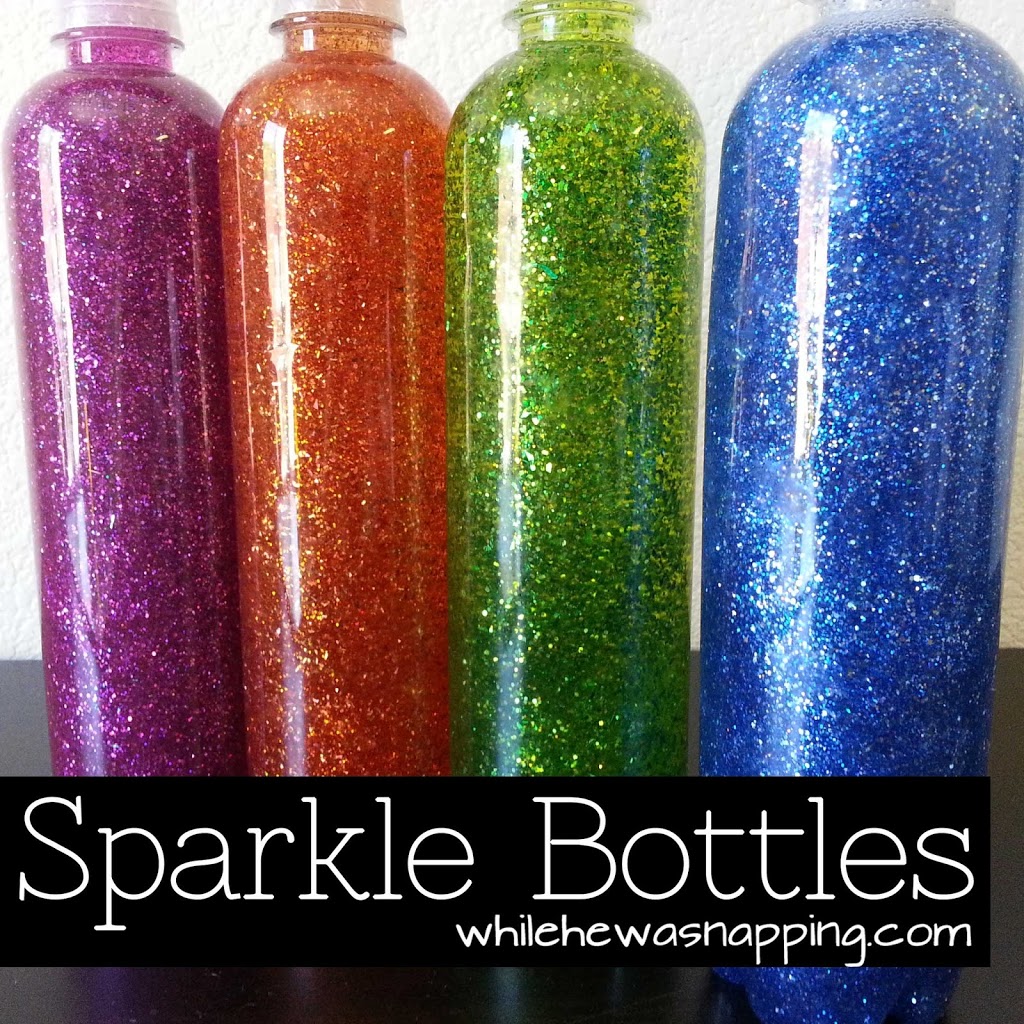
Sparkle Bottles

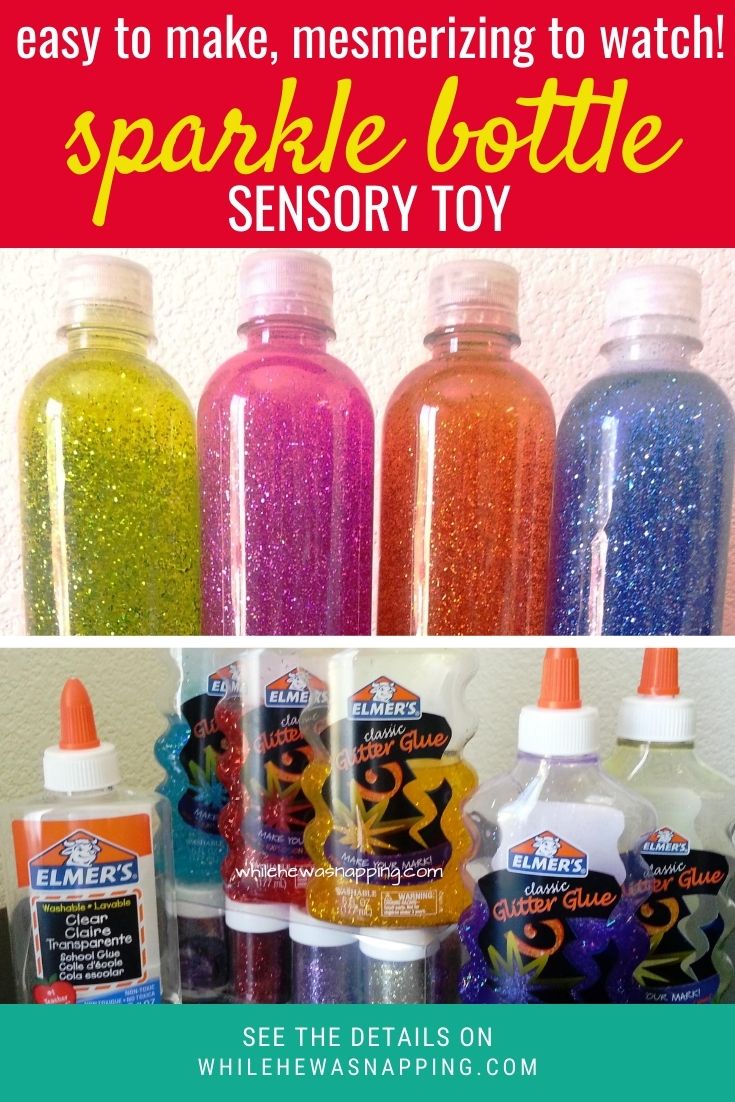
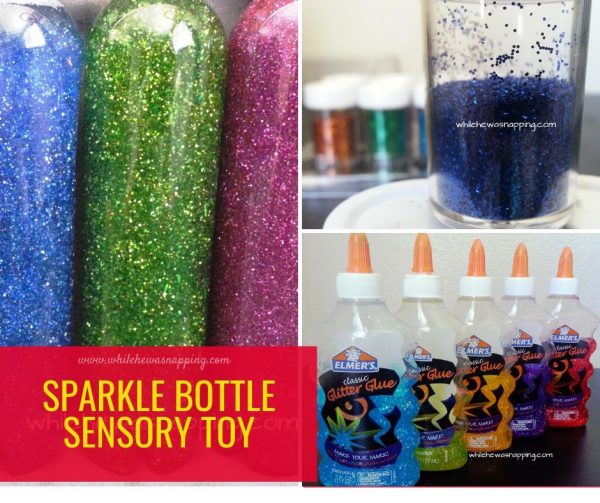
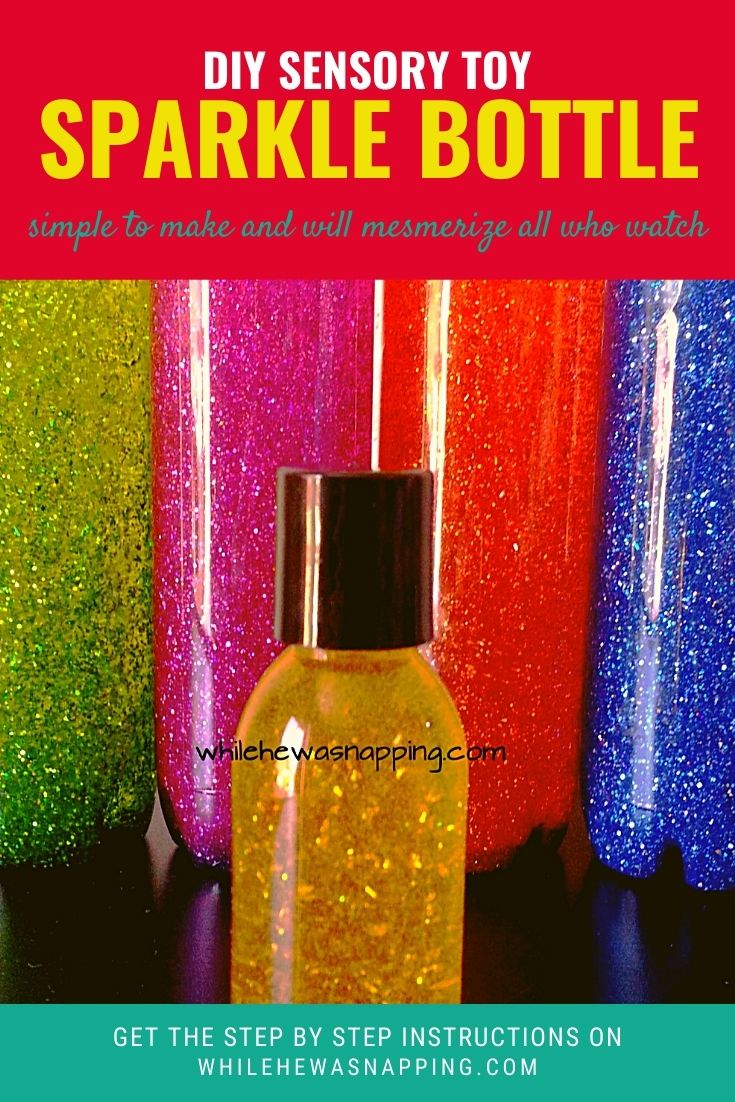
These Sparkle Bottles were actually part of our Travel Kits, which you can find in the {Kids on the Road} Series, we took on our insanely long (and waaay too close together) road trips we took in 2013. But, they are still awesome and we still have one of them nearly a decade later.

WHY SPARKLE BOTTLES?

I found the original idea at My Crazy Blessed Life, and Johanna called them “calm down bottles” and used them with the idea of helping her little girls calm down after a tantrum.  There was the added bonus of a built-in time out timer.

That wasn’t my goal with them originally, though they have been used as such since I first made these.  In the beginning, I just wanted a distraction for my poor children who were strapped down in car seats for hours and hours on end.  Since then, I’ve found they work well as timers or calm down distractions for my kids. Sometimes. Sometimes not. But, they aren’t consistent depending on the temperature; so, while they are pretty, they aren’t functional as precision timing devices.

HOW TO MAKE A SPARKLE BOTTLE

I wasn’t able to find the exact ingredients Johanna used so I had to improvise.  I actually found some other materials that I opted to use instead of what Johanna did.  And it still turned out great – and was even a little cheaper.  So, here’s how I made my Sparkle Bottles.

SPARKLE BOTTLES
Sparkle-Bottles1
 Materials
 

Materials:

– Elmer’s Glitter Glue
– Elmer’s Clear School Glue
– Fine flake glitter
– Hot water
– Clear plastic bottles
– Super Glue
 

Directions:

1. Clean any labels or sticky glue off your bottles.
2. Heat the water.  It doesn’t have to boil, but it should be steaming.  You want it to be hot enough to melt the glue, but not hot enough to melt your container.
3. Pour approximately a 1/4 cup of glitter glue into the bottom of the bottle.
4. Add approximately 2 Tbsp of Clear School Glue to the bottle.
5. Fill the bottle about 2/3 to 3/4 of the way full with the hot water.
6. Tighten the caps back onto the bottles and shake until the glues and water are thoroughly mixed.
7. Remove the cap and pour in as much glitter as desired.
8. Fill the remainder of the bottle with either glue or water.  If you want the glitter to fall faster, put in more water.  For slower falling glitter, put in more glue. The clear glue is thinner than the glitter glue. Glitter glue will make your glitter fall more slowly than the clear glue. If you’re trying to make a timer, I suggest the clear glue. It doesn’t change the
9. Make sure the glue and water is well mixed.
10. Put super glue in the threads of the cap and tighten it down.
11. Shake and enjoy!

HELPFUL HINTS AND TIPS FOR MAKING YOUR SPARKLE BOTTLES

  • Where did you get your supplies?
    I bought all the materials at Walmart and Target.  Target had a couple different glitter glue colors than Walmart. But you can find them in the craft/office supplies department of just about any general retail store, as well as on amazon.
    Glitter-Glue
 
  • The clear glue was at Wal-Mart in the art supply section with the crayons and markers.  You might find it in the back to school section this time of year too.  I used nearly a full bottle of it in my four Sparkle Bottles.
Sparkle Bottles Clear School Glue
  • How did you keep the cost lower?
    The Elmer’s Clear School Glue was about half the price as the Aleene’s Clear Tacky Glue and I didn’t have any problems with it.  I would do that again if I make more of these.
  • How much of each glue did you put in each bottle?
    I tried the quantities in Johanna’s tutorial with my first bottle and that was WAAAY too much glue for the Elmer’s brands.  Our green bottle takes about 30 minutes to settle.  Yeah, thirty.  We use that as the quiet time timer for Big J when I’m trying to trick him into taking a nap…  If you use the quantities listed above you’ll get about a 5 minute timer, if you’re using the bottles to keep time.  Of course, the exact time will depend on whether you fill the last 1/4 of the bottle with glue or water.  Play with it.
  • What kind of glitter is best?
    DON’T use super fine glitter.  I tried this.  All that created was a major goopy clump.  It was not pretty.  I poured it out and started over.  It was that bad.  You want chunky glitters.  Check out the photo for an idea of what size glitter I preferred.  Slightly larger worked out too, like from the dollar store.  I got my favorite set of 12 bottles of glitter at Wal-Mart for about $7.
 
  • How do you get the colors?
    It mostly comes from the colored glitter glue. I DID NOT add any kind of separate coloring agent. The glitter will also lend to the color if you stick to color families.
  • Can I mix and match colors?
    Of course. You can do whatever you want, it’s your project. I do recommend sticking to complementary colors to find the best mixes. This takes a little trial and error to figure out quantities, but it’s not rocket science so don’t stress over it.  Mixing and matching allows you to make some cool colors.  Our orange bottle is actually red and yellow glitter glue with a bit of orange glitter.  Don’t be afraid to play with the colors!
  • These are HUGE! Can you make them smaller?
    YES! One of my best ideas from this project came in the form of a mini Sparkle Bottle.  The big bottles were a little too heavy for my small kids to really hang on to well.  So, I made mini ones with travel sized cosmetics bottles – the kind you can get pass TSA.  He loves it and I love that it can go in the diaper bag without taking up a ton of space – or weighing 400 pounds!

This post was written by Krista and originally appeared on While He Was Napping.

  • « Previous Page
  • 1
  • 2
  • 3
  • 4
  • 5
  • …
  • 10
  • Next Page »

I'm Krista. Ringleader here on While He Was Napping, wife to my handsome Mr. Right & momma to my THREE energetic boys, Big J (9), Little J (6) & Little N (4). We FINALLY added a beautiful little girl to our family last December.

I’m knee-deep in Tonka trucks & Thomas trains. I survive our crazy days with Vanilla Coke, Sonic slushies, sweet snuggles and little giggles. When I tuck them in tight & kiss them good night, I get a little time to create & just be me.


It all happened
while (s)he was napping
Want More of My Story?

Privacy Policy

While He Was Napping respects your privacy and is committed to keeping any personal information collected on this website confidential. To find out what information we collect and how it is used or what options you have regarding your information, see our full privacy policy here. Creative Commons License The website found at whilehewasnapping.com and all subdomainsauthored and published by Krista is licensed under a Creative Commons Attribution-NonCommercial-NoDerivs 3.0 Unported License.

Pretty Chic Theme By: Pretty Darn Cute Design