While He Was Napping

momma gets stuff done

  • Home
  • About
  • Archive
  • Do It Yourself
    • Crafts
      • No Sew
      • Painting
      • Paper Crafts
      • Repurpose Projects
      • Vinyl
      • Washi Tape
      • Kid’s Crafts
      • Fonts
    • Sewing
    • Decorate
      • Home Decor
      • Holiday Decor
    • Celebrate
      • DIY Gifts
      • DIY Your Party
  • Recipes
    • Beverages
    • Appetizer
      • Bread
      • Other Appetizers
    • Snacks
    • Main Dish
      • Meat
        • Chicken
        • Beef
        • Pork
        • Seafood
      • Vegetarian
      • Slow Cooker
      • 30 Minute Meals
    • Dips & Sauces
    • Salads
    • Pasta
    • Soup
    • Dessert
      • Cookies
      • Brownies
      • Cupcakes and Cake
      • Box Mix Recipes
      • Other Sweet Treats
    • Breakfast Food
      • Pancakes
      • Waffles
      • Muffins
      • Other Breakfast Food
  • Family
    • Babies
      • Pregnancy
      • Newborns
      • The 1st Year
    • Toddlers
    • Preschoolers
    • Kindergartners
    • 6-8 Year Olds
    • The Grown Ups
      • Date Night
      • Romantic Gifts
    • Self Care
  • For the Home
    • Cleaning
    • Organizing
    • Emergency Preparedness
  • Travel
    • Travel Tricks & Tips
    • Traveling with Kids
  • Tech & Gadgets
    • Must-Have Apps
    • Techy Home Appliances
    • Gadgets & Electronics
    • Blogging Tips
  • Printables
    • Posters
      • Quote Printables
      • Subway Art Printables
    • Printable Organizers
    • Printable Journals
    • Learning Printables & Worksheets
    • LDS Printables
  • Holidays
    • New Year’s
    • Valentine’s Day
    • St. Patrick’s Day
    • Easter
    • Cinco de Mayo
    • Mother’s Day
    • Father’s Day
    • 4th of July
    • Back to School
    • Halloween
    • Thanksgiving
    • Christmas
    • Holiday & Seasonal Printables

February 9, 2015 by Krista

How to Have More Energy on the Road

This post is part of a social shopper marketing insight campaign with Pollinate Media Group® and DripDrop®, but all my opinions are my own. #pmedia #DrinkDripDrop #DripDropHydrates http://my-disclosur.es/OBsstV”


Since I have become a mom, and the unofficial trip coordinator for our family, I can tell you firsthand that preparing for and traveling with children and a family is A LOT of work.  One of the first things I plan, and the last things I’m still adding to as we run out the door, are our snacks.  It’s easy to overload on junk when you’re stuck inside a moving vehicle, strapped in your seat, with nothing to do.  And how super convenient are all those single-serving, pre-packaged foods?  You can practically just pitch them at your kids and enjoy the ensuing, although brief, silence while they chew…  Awesome, except for the nutritional value, or lack thereof, and it’s effects.  Who really wants to spend hours driving around in a small box with children on a sugar-high, or worse, crashing from a sugar-high?  The trip to your destination is enough to completely wear you out.  That’s not very promising for your vacation.  You’ve got to have energy to explore and keep up with your kids.  Staying healthy is one of the best ways to ensure that your vacation will be a great one!

DripDrop - how to have more energy while you're on the road

I’ve listed 10 snacks that are (mostly) healthy, fill you up so you aren’t snacking for the entire 7-hour trip, and still taste great!  These are our go-to favorites when we are filling up the snack box and piling into the car.

1. DripDrop Hydration Powder.  This stuff is seriously amazing.  It’s medical grade, tastes great and is safe for just about anyone over the age of one year.  It’s like a slightly-less sweet lemonade and has about 6 grams of sugar per packet, so my kids will still drink it and the sugar content is better than juice or soda.  But, this is awesome for me too!  Being the only girl in a car full of boys, bathroom breaks that aren’t along side the road somewhere can be few and far between.  I can stay hydrated and feeling great without needing to find a rest stop every 60 miles.  It gives me more energy that I need to keep up with my family by helping me stay hydrated so I feel good when we finally start the actual vacation part of any trip.

Oh, wait though, it gets better.  You can also use this when little Sally is car sick and you’re only 25 minutes into a six-hour car ride.  Or when Billy starts throwing up because he shared his flu-infested cousin’s apple slices two days ago… and the flu germs.  Because sharing is caring, right?  I always pack a “medicine bag” when we travel, because if I don’t my kids inevitably need some and I hate buying new medication when I know we have the same thing at home in the medicine cupboard.  I love that this saves me space and can double as an oral hydration method when my kids are sick and we’re traveling.

2.  Peanuts.  These are high in protein and leave you feeling fuller longer.  You can mix them with lots of other dry foods if you want a little more variety of taste.  Dried fruit, other nuts and honey mustard pretzels are my favorites.  And it’s an easy one-hand snack the driver can munch on safely.

3. Raisins.  If you mix raisins with the peanuts mentioned above, you actually have a ridiculously amazing snack.  All kinds of energy will be flowing through your body, but not the fidgety, twitchy energy you get from a sugar high.  This is an awesome snack if you’re going hiking, biking, rock climbing or some other physically demanding activity, but also for sitting in the car.  You won’t need much to feel like you’re not hungry anymore.  And you can’t beat the salty and sweet combination.  This is my go-to snack when I’m pregnant, on the go and have a hard time keeping my blood sugars level.  Awesome constant energy here.  If you absolutely hate raisins, substitute dried cranberries.

4.  Protein bars.  Obviously, there is the protein factor, which helps the food stick with you longer and means you are less likely to snack as often.  Often times, protein bars are fortified with additional nutrients and vitamins.  If my kids are going to sit and snack all day, they might as well get their vitamins in there too.  Protein bars usually have more calories than a typical granola bar and sugar content can depend on manufacturer.  What seals the deal for me though, is that I can eat half a protein bar and be content for an hour or two.  I always get to the end of a granola bar and wish it had been longer.

5.  Cheese and crackers.  100% whole grain crackers and creamy cheese make a fantastic snack for road trips.  It takes a little time to prepare, which might even make you eat less, but is so worth it.  A little bit of calcium, a bit of protein, whole grains, and a whole lot of delicious.

DripDrop - the best road trip snacks

6.  Fresh fruits and veggies.  We love fruits and veggies, but they aren’t always easy to eat while you’re in the car.  I will take the time before we leave to cut up apples, peel oranges, slice celery, jicama, bell peppers, broccoli and cauliflower.  I even core strawberries.  Grapes, carrot sticks, and bananas are pretty easy to throw in a cooler and take along too.  This is one of our favorite snacks on the road.  The natural sugars make my kids love these foods and they won’t make them crash then the sugar wears off, saving me from the dreaded whine that follows.  And that just makes me love them even more.

7. Cheese sticks or string cheese.  Because, although my kids would love for me to hand them each a block of cheese to gnaw on, that just isn’t practical.  And probably not very sanitary either.  Ugh, just the thought of all that gooey cheese is enough to make me grateful for the genius idea of pre-packaged, single-servings in some of the healthier foods too!

8. Crackers.  We usually have the peanut butter-filled kind.  My boys love peanut butter and smashed between a cracker is a great way to make it portable.  You can buy these pre-packed and single servings as well, and I keep those on hand for times when I don’t have time to make my own.  On road trips though, I will usually take a jar of peanut butter and a package of crackers (usually Ritz-type crackers) and make my own.  It’s super easy to put together and hand out when the boys are hungry.  The downside to the homemade kind is that they can make a huge mess if they get dropped in the car seat or smashed into the floor.  The pre-packaged ones usually make a little less gooey of a mess.

9.  Veggie chips.  While these aren’t really all that healthy on the general health-o-meter, but they score a little higher than a regular potato chip.  They usually have less fat and less calories per serving than a potato chip.  But, for me, these just seem to sit better in my stomach.  They aren’t as greasy and don’t leave me feeling icky.  My kids love these more than I do, in complete honesty, and some times it’s about making the healthiest choice in comparison to other similar options.  It’s a whole lot easier to convince a 4-year-old to eat veggie chips instead of potato chips than it is to try and trade potato chips for a cheese stick.  And after 3 hours of little feet jabbing into the back of my chair, at least one argument over who gets to pick the next DVD, and another 4 hours of the same looming in front of me, some times I take the easy route.

10. Bottled water.  This serves so many purposes, but keeping us hydrated is a big one.  When there isn’t the option of milk or juice, it’s easier to get my kids to drink water (and adding a packet of DripDrop cuts the complaining exponentially, so sometimes that happens too).  Bottled water is not something we routinely use, it’s usually reserved just for trips or outings.  We all have refillable water bottles, but bottled water makes it easy to take it along when we might otherwise not have any available.  We have found lots of ways to get water into our snacking: using it to dilute the rare cup of juice, for easy water bottle refills without stopping and some times we flavor it with fresh fruit.  (No, Honey, it’s not really bad backwash…)  I love flavoring my water with fresh fruit.  It changes the flavor just enough that I don’t get bored drink another bottle of water, is still super good for you and you get to eat the fruit at the end.  Yum.

DripDrop-hydration powder


Snacks that fill you up and provide some nutrition are essential to keeping everyone happy when stuck in a car for hours.  There are other essential pieces to the keeping-everyone-happy puzzle, of course, and they do vary depending on who you are sharing the car with.  I share my car with three growing boys and a husband with hungry-anger issues, so food tends to be a larger-than-normal piece in our puzzle.

But food isn’t everything.  Keeping everyone hydrated can be difficult when you are trying to cut down on the sugar intake of those in your car.  Sugary juices and sodas are not a great option.  And finding that sweet spot between keeping everyone healthy and stopping every 45 minutes for a bathroom break can be elusive.

DripDrop-Hydration on the go

It’s coming, my friends.  What’s coming, you ask?  Road trip season.  Spring Break and Summer Vacation aren’t so far away.  It’s the time of year when families all over the country pile into the family car and head off for great destinations.  Some of my favorite trips have been family road trips.  Making good snacking choice while on the road has made a huge difference in our traveling experiences.  And adding DripDrop to my daily routine while we’re traveling gives me more energy, keeps me healthier and means I can keep up with my adventurous and rambunctous family.

I bought DripDrop at CVS and you can find it yourself in the baby aisle at your local CVS .  Save $1.00 on the purchase of any ONE (1) box of DripDrop Hydration Powder with this coupon available 1/25/15 – 2/21/15 (while supplies last) and pack more energy into your travels!  What are you waiting for?!

August 25, 2014 by Krista

The Car Toy Box

So, if you’re hanging out with me on Facebook, you know that last week was a bit chaotic.  Big J started kindergarten last Monday – he loves it – and that night Little J stuck corn up his nose.  Like WAAAY up his nose.  Long story short, after two days, an ENT doctor removed it in less than a minute and I’ve sworn off feeding my kids corn for a while.

Back to the point.  We now have to do the pick up routine everyday after school.  On Monday, I was a bit late (way to start off the year, right?!).  Both the little boys had fallen asleep and I had to heft Baby N, car seat and all, through a crowd while dragging poor, half-awake Little J behind me to pick up big brother.  I’m a whopping five feet tall when I stand up straight and my boys, plus the car seat, weight half as much as I do.  It was rough and I was insanely sore the next day – I should probably work out more, huh?  We have opted to do the car pick-up line instead.  Everyone just sits in the car.  I want to kiss whoever came up with that idea.

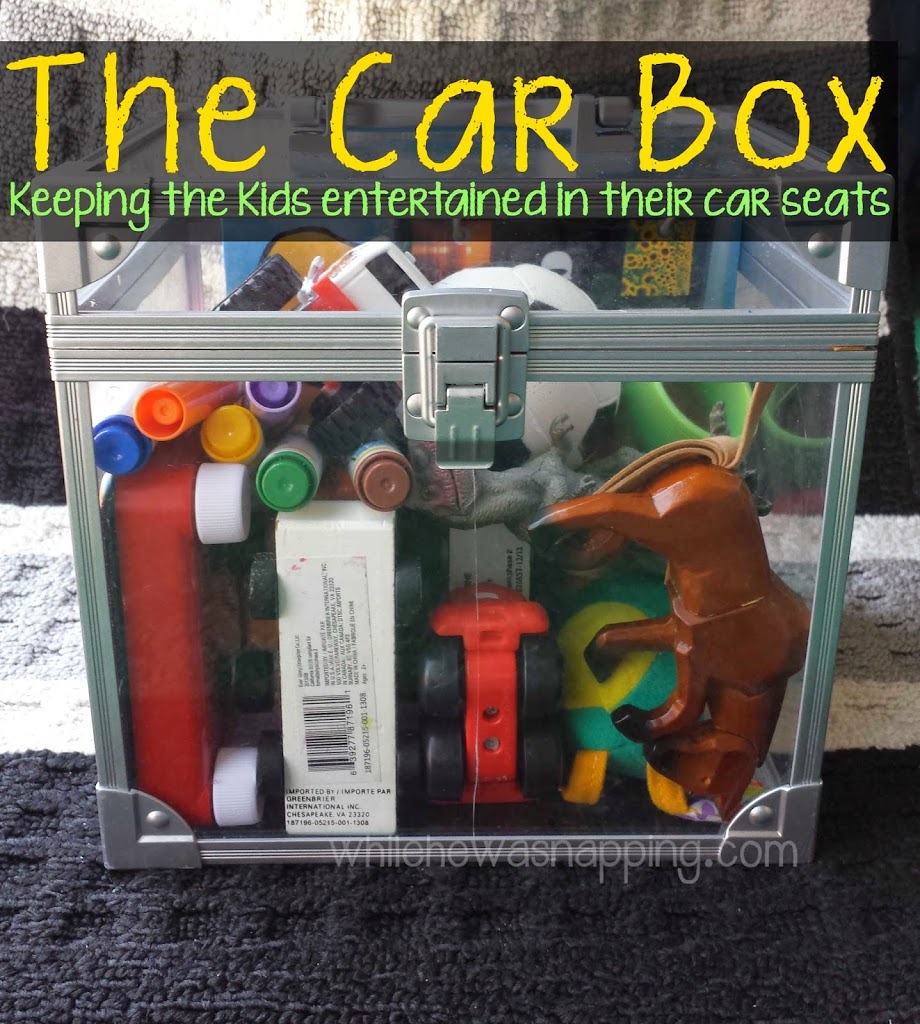
However, two little boys strapped into car seats for an undetermined number of minutes each day, right in the middle of nap time, isn’t exactly a nice relaxing drive either.  So, I made a car toy box for them.  Everything in the box stays in the car.  It’s made the wait a little more bearable.

THE CAR TOY BOX

Materials:
*Adjust these to best fit your kids.  What works for mine may not be what works best for yours.*
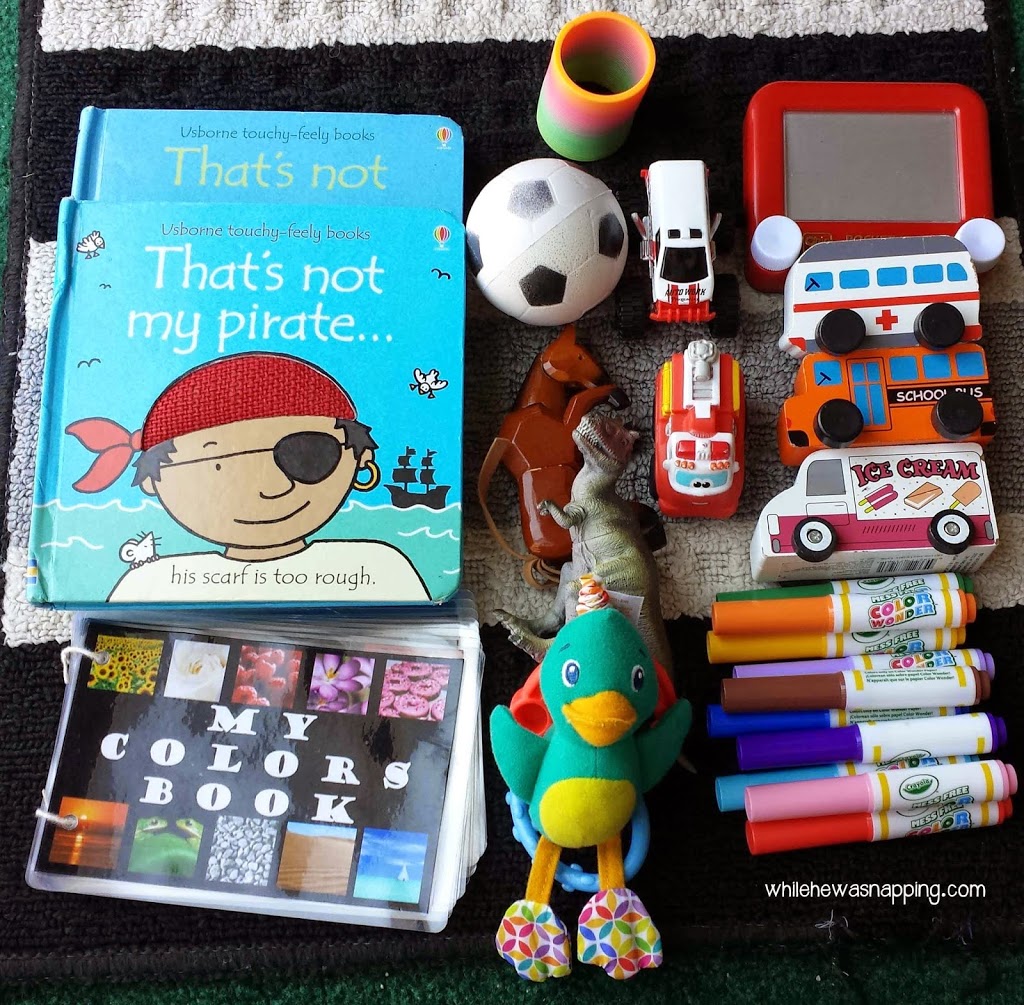
– Toy Cars
– Board Books (Touch and Feel Books are big hits here)
– Travel Size AquaDoodle
– Travel Size Etch A Sketch
– Coloring Book & Colored Pencils or Color Wonder Set
– Small box or container (you might want one with a lid…that latches), size is up to you.  We had a clear toy box that Big J got from a birthday present a year or two ago and it’s working perfectly.

Directions:
– It’s pretty basic.  Fill the box or container with the toys, books and other items.  Stash it in the car (under a seat is a great spot) and pull it out in that car pick-up line, in the line at the bank, while you wait for Dad to run into the store or anywhere you find yourself stuck waiting in the car with the kiddos.   

This post was written by Krista and originally appeared on While He Was Napping.


January 20, 2014 by Krista

Fleece Sleeping Bags

Okay, so I’ll be straight up and totally up front here.  This tutorial isn’t amazing, partially because I don’t really have a lot of process photos; which really are quite vital to a sewing tutorial, in my opinion.  This was a project that I had planned for a year or more and just never got to it.  It wasn’t difficult, I just never did it.  However, two days before Christmas, Mr. Napping gave me the push I needed and I jumped right into it.  Yeah, two days.

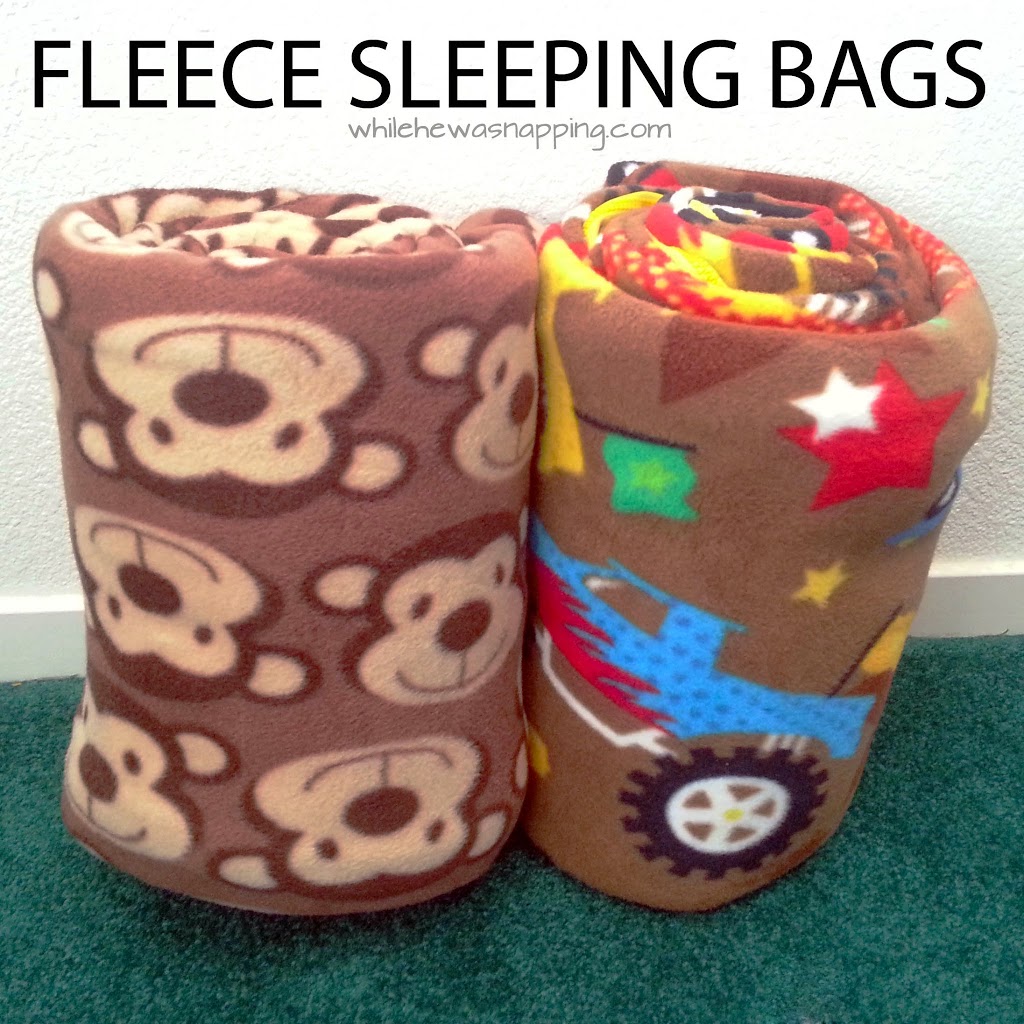
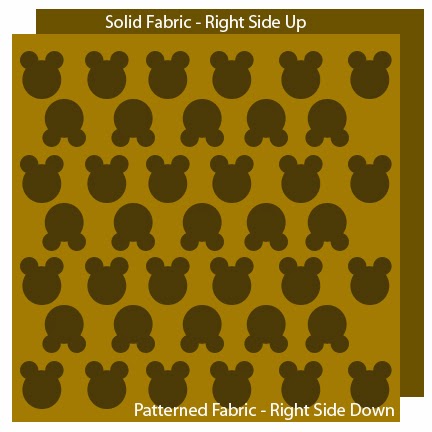
Despite the lack of photos (I was trying to get them done so fast I didn’t take the time to photograph the process), these turned out so dang cute that I had to share them!  I tried to include a few graphics to help you get the idea, but if you have questions, please feel free to ask!

These DIY Fleece Sleeping Bags are pretty easy – two straight (straight-ish, in my case) seams on one bag and four on the other.  If you can muster up the courage to take on that zipper, it’s a walk in the park (really, zippers aren’t that hard, promise!).  Each DIY Fleece Sleeping Bag took me about 2-3 hours to complete, but sewing is not something I am super skilled at, and the majority of the time was spent pinning things on the floor.  And I was six months pregnant and didn’t move very fast to begin with.  Hehe.

DIY FLEECE SLEEPING BAGS

Materials:
* Of course, you can adjust the fabric length for a larger or smaller sleeping bag.  I used a no-sew fleece blanket kit from Jo-Ann Fabric and Craft Stores.  (I am not being compensated for this project, the link, any other purchases made from this site or this post.  The link is to help you get a clear picture of the materials I used.  You could also buy fleece off the bolt.)  If you use a 50% off coupon (or snag one while they are on sale now for 50% off!) you can make these for less than $20.
– No-Sew Fleece blanket kit (Mine were the smaller 48″x60″ kits and included both the patterned fabric and the coordinating solid color).  If you buy off the bolt you’ll need two pieces of fabric, both in the same measurements (check that your fabric is the same width).
– Coordinating 36-inch plastic “Sport” separating Zipper (you can go longer, but that was the longest I was willing to pay for… long zippers get pricey quickly!)
– Sewing Machine, thread and scissors
– Straight pins

Directions:
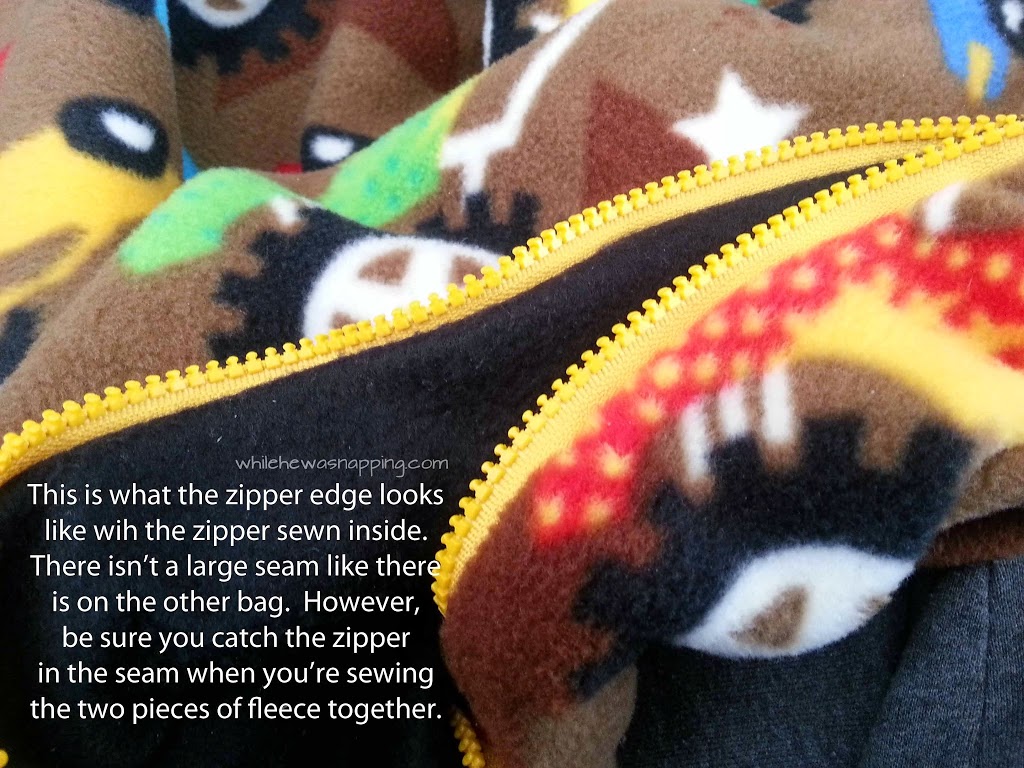
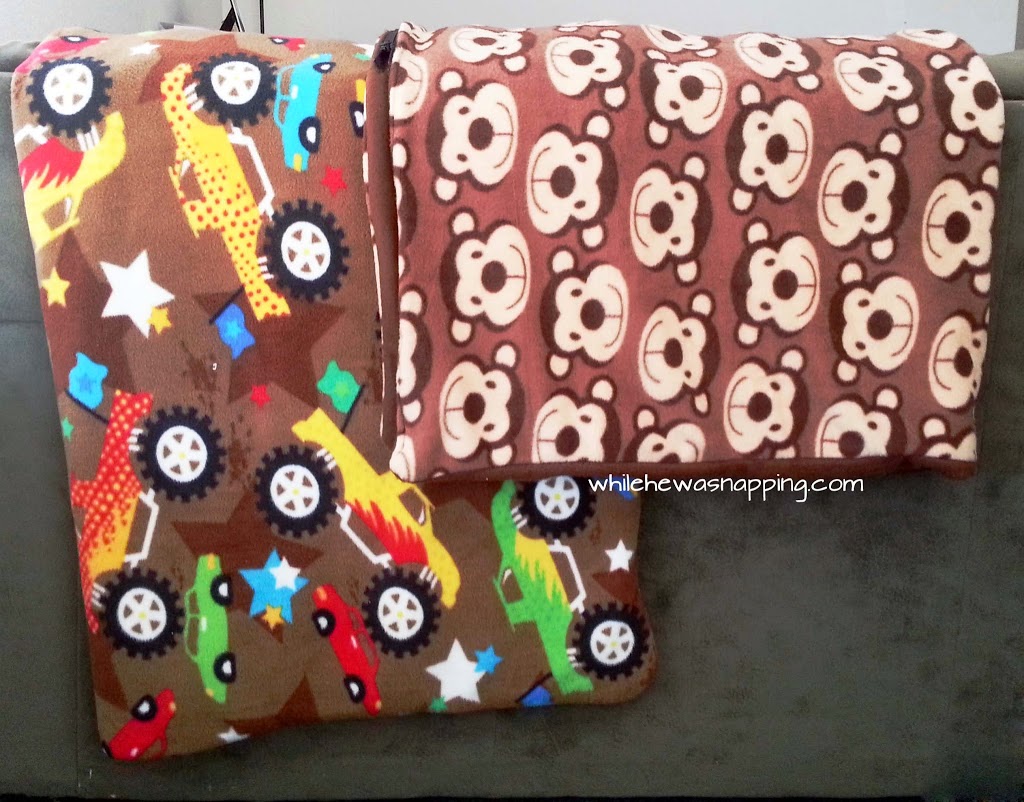
* I actually used two different methods for these.  The first bag I sewed together and then put in the zipper.  The second bag, I sewed the zipper right into the bag.  The first one was a little easier, because it was a one-step-at-a-time process.  The second one combined sewing the fabric together with inserting the zipper, and I actually put the zipper in backward and had to clip the ends, re-thread the zipper and then secure the ends so the zipper didn’t come off.  Take a look at the finished photos below and decide which method you prefer.
– Lay the first fabric piece on the floor, right side up and then position the second piece over the top of the first, right side down.  If you can’t tell the right and wrong sides apart, just pick one.  It’s not going to change the outcome much.

DIY Fleece Sleeping Bags

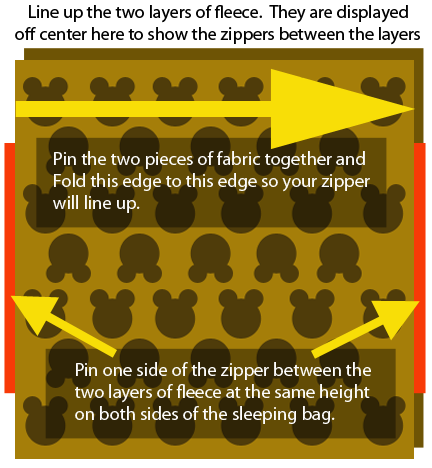
– Pin the fabric together.  I’m usually pretty stingy with pinning, but I would suggest being more liberal with this project.  The fleece is slippery and tends to move around a lot when you’re sewing it together.  If you’re going to put the zipper in now, pin the fabric together, fold in half lengthwise, then separate and pin the zipper between the two layers at the same height on each side.  The zipper will be completely inside the blanket, between the two layers.

DIY Fleece Sleeping Bags
–  Sew the two pieces of fleece together, but leave 6-12 inches open so you can turn the sleeping bag.  The fleece is slippery and had a tendency to slide around.  Use extra straight pins if you need more help holding it all in place.
– Turn the sleeping bag through the hole and then tuck the edges in and sew the hole closed.
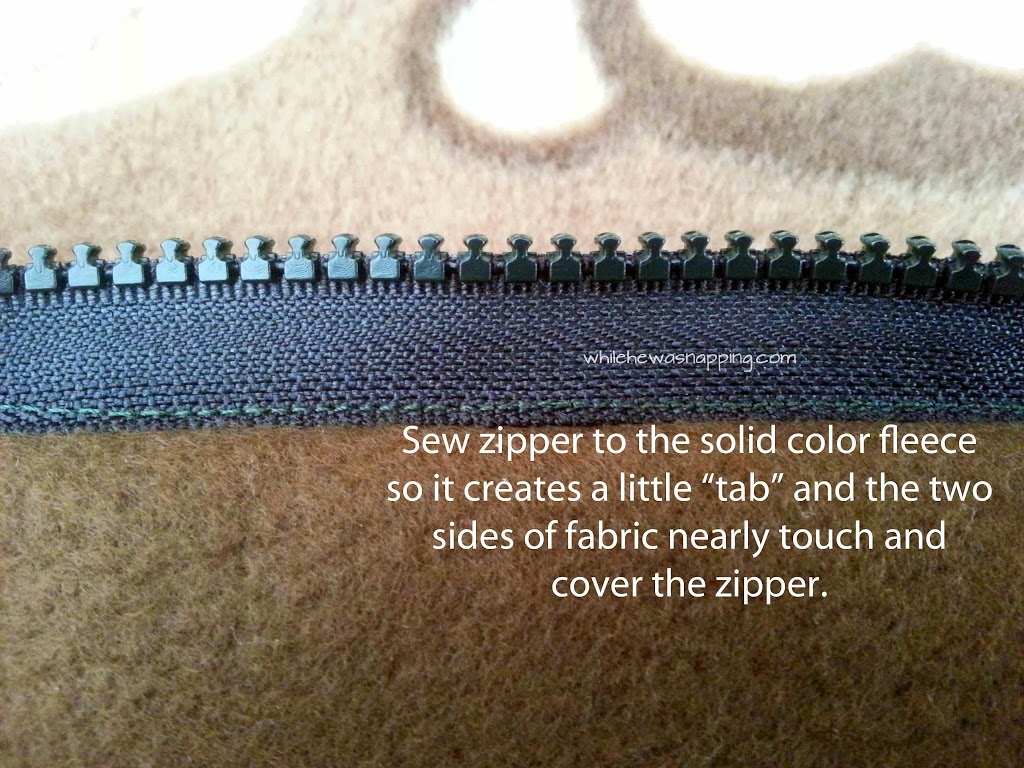
– If you’ve already sewn the zipper in, line up the zipper pieces and zip it back together.  If you haven’t attached the zipper: fold the bag in half, line up the edges and pin the zipper in place with one half of the zipper on each side the bag.  Sew the zipper to the bag.  Zip the zipper back together.

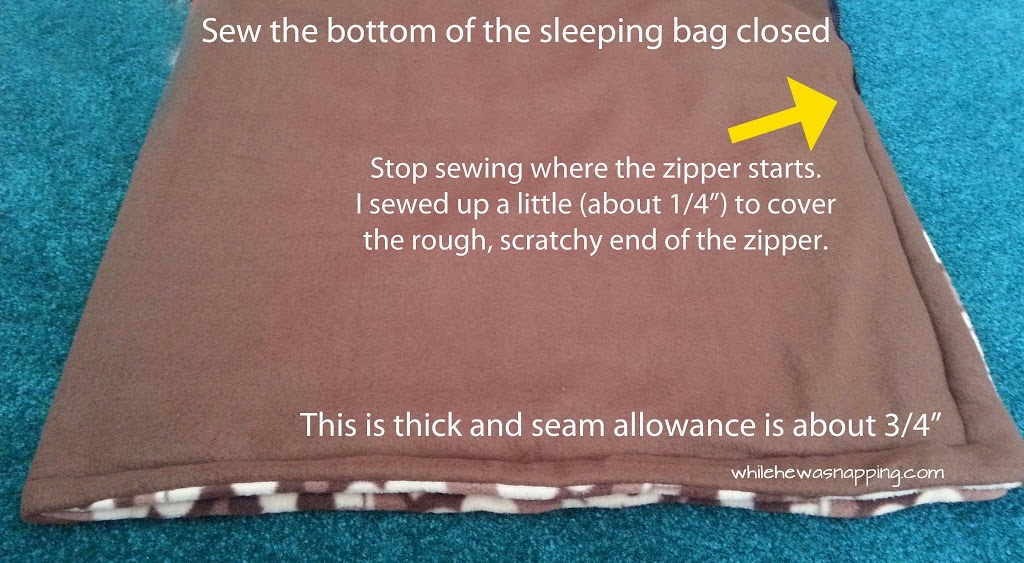
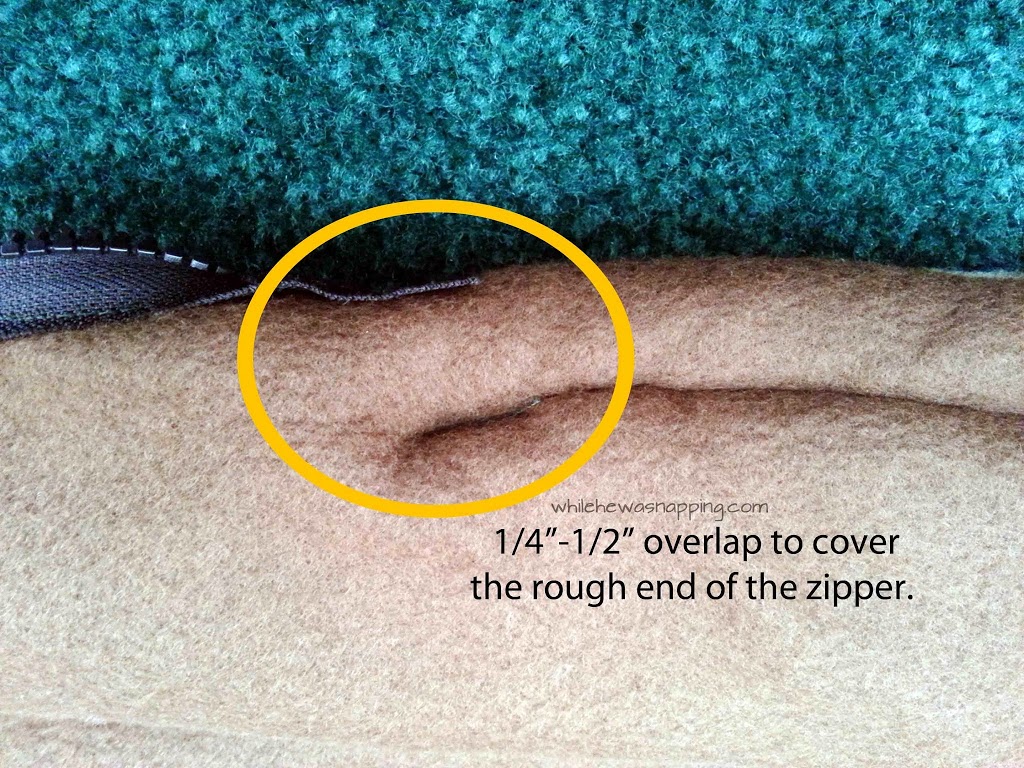
– With the zipper zipped up, flip the bag inside out (so the solid fleece is on the outside, most likely).  Sew up the bottom and side of the sleeping bag.  I sewed up high enough to cover the sharp, rough edge of the bottom of the zipper.  That should keep my boys from getting scratches and hopefully keep some of the cold air out too.


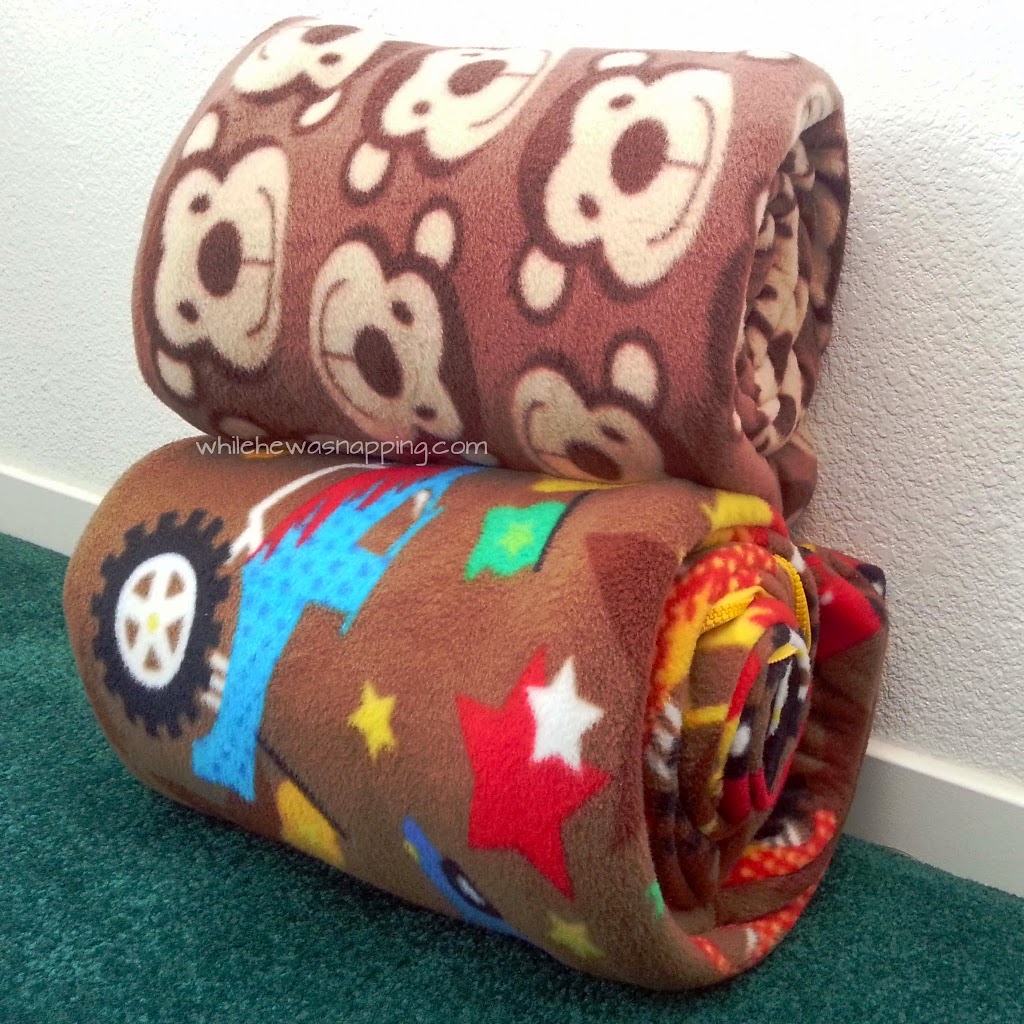
– Flip the bag right side out and press all the corners out.  That’s it.  When we’re storing them, I just use a piece of string to hold them closed.  You could attach some ribbon to the bottom of the bag so you always have ties when you need them.  I will probably do this… eventually, some day…


These are, by no means, cold weather sleeping bags.  But they were perfect for when my niece got married two days after Christmas and we had a house full of people.  The boys ended up having a “sleep over” on Mom and Dad’s bedroom floor.  Total charm.  Neither kid got cold and Big J said “Mom, that’s a perfect bed for when I sleep on the floor.”  My boys love to lay on them for movie nights too.  These DIY Fleece Sleeping Bags are a total hit here… which means I’ll have to make more if we have more kids… What have I got myself into?!

This post was written by Krista and originally appeared on While He Was Napping.

July 25, 2013 by Krista

{Kids on the Road} Activities for Preschoolers

Welcome to part 2 of the car activities list!  This part is geared to a little bit older kidlets.  Still make sure you check out Toddler list because there are ideas on there that you could use for older kids too.  Let’s get right to this!

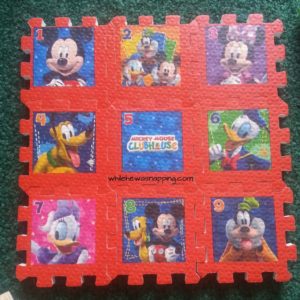
– Puzzles.  Simple with few pieces, but still complex enough to be a bit of a challenge to your little one.  We love these ones from the Dollar Tree.  Foam, soft, easy to hold, they fit together any way and come in lots of characters my boys love.

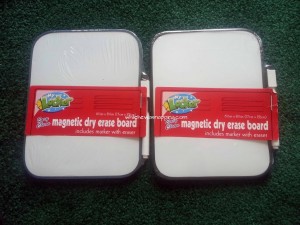
– Dry erase boards.  We love these for lots of things.  We practice letters, numbers and shapes on them.  We play hangman and tic tac toe.  We write notes to each other and we draw pictures.  We have two boards, one for each boy.

-I Spy Sticker Book.  I took a small notebook and two sheets of identical stickers.  I took one page and put the stickers randomly through out the book.  Then I tucked the second page into the notebook.  When Big J was ready to play, I handed him the book and the extra page of stickers.  His task was to find the matching stickers and place them next to their matches.  He loved it!  He loves stickers and the search and find element was so fun.  It took him longer to place the stickers, and that meant more quiet time for me.

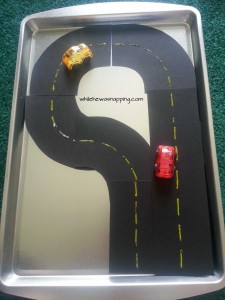
– Magnetic Car Track.  It was a travel version of the Kid’s Felt Track Set I posted about a couple weeks ago.  Big J loves that set so much that I didn’t really want to be without it for two weeks… but it wasn’t a car activity.  So I condensed the idea by cutting track pieces out of paper and used yellow puffy paints to put the lines on.  I stuck magnets on the back of the road pieces.  I also found small cars at the Dollar Tree and they are perfect for the track.

– I also printed out Pre-K and K pack pages for Big J to do.  I shrunk them down to half pages and made them into a little book.  Easy to keep everything all together, but easy to take one out and hand it into the back seat to Big J.  I laminated all the pages and we used dry erase colored pencils on them.  I loved not having to worry about melting crayons in the car (especially since it wasn’t my car!).

– We like to play “I spy with my little eye” while we drive.  We did that a few times… a day.  It’s interesting to look at the world through the eyes of a four-year-old.

– The tablet.  Before you gasp and faint in horror, hear me out.  Tablets are all about what games you let your kids play and the time limit.  Of course, six hours of Angry Birds is probably not the best game plan…  You can check out some of our favorite, educational apps in the Ten Android Apps for Kids and Ten More Android Apps for Kids posts.  I am also a big fan of Spinlight Studios games.  They have games for kids that encourage math, geography, spelling, counting, numbers, shapes and more all designed for kids from 3-10.

– Tangram Puzzles.  I printed off tangram puzzle pieces and then laminated them.  I got a few puzzle cards too to help my little guys get the idea.  My little guys just played with the shapes and made their own pictures too.

FIND EVEN MORE IN THE
Planning Your Trip
What to Pack
How To Pack
Snack Ideas for the Whole Car
Car Activities for Toddlers

This post was written by Krista and originally appeared on While He Was Napping.
Never miss a thing:
http://www.facebookloginhut.com/facebook-login/ Photobucket http://www.facebookloginhut.com/facebook-login/ Photobucket http://www.facebookloginhut.com/facebook-login/


July 24, 2013 by Krista

{Kids on the Road} Activities for Toddlers

Hey there and welcome! I’m glad you stopped by today! Are you heading out on the open road and taking your toddlers with you? Brave soul. Only kidding. Mostly.

Actually, traveling with kids is totally doable! The key is to be prepared!

Our summers are usually full of road trips. While it’s definitely easier to travel sans children, I wouldn’t want it any other way. It’s great family time. We have even been known to spend weeks on the road at a time.

Once such time when I had two little ones, we were getting ready to spend two weeks traveling. The longest we’d gone with kids. I was really nervous about keeping our rambunctious, energetic boys happy in the car for that long.

I spent A LOT of time getting together activities for them to do.  My husband said to me at one point, “I am only going to say this once.  I think you are waaaaay over-preparing as far as entertainment for the boys.”

I just kinda rolled my eyes because I knew that my wonderful husband would do what daddy-drivers do with fussy babies trapped in car seats.  He’d get frustrated, try to distract them only to be screamed at more loudly.  Then he’d get upset that they were yelling. He’d yell, trying to be heard over their racket, then he’d stuff earbuds in his ears and totally drown them out with an audio book or something.

And I’d be stuck with screaming banshees in the backseat.

I will admit that I was very over-prepared.  But most of our problem was location, location, location!  The bag was on the floor in between the boys.  In their car seats, neither kid could reach the bag on the floor and it was too far back for me to reach it.  So… on our next 2,000+ mile trip, we stuck the food box and activity bag closer to momma.  Lesson learned.

 Car-activities-for-toddlers


Ready for the best road trip ever?! Click next to find out what we think is a MUST-HAVE for rest stops! It keeps the kids close and out of all the “puddles”!
Arrow Next

Pages: 1 2 3 4
  • « Previous Page
  • 1
  • 2
  • 3
  • 4
  • 5
  • 6
  • Next Page »

I'm Krista. Ringleader here on While He Was Napping, wife to my handsome Mr. Right & momma to my THREE energetic boys, Big J (9), Little J (6) & Little N (4). We FINALLY added a beautiful little girl to our family last December.

I’m knee-deep in Tonka trucks & Thomas trains. I survive our crazy days with Vanilla Coke, Sonic slushies, sweet snuggles and little giggles. When I tuck them in tight & kiss them good night, I get a little time to create & just be me.


It all happened
while (s)he was napping
Want More of My Story?

Privacy Policy

While He Was Napping respects your privacy and is committed to keeping any personal information collected on this website confidential. To find out what information we collect and how it is used or what options you have regarding your information, see our full privacy policy here. Creative Commons License The website found at whilehewasnapping.com and all subdomainsauthored and published by Krista is licensed under a Creative Commons Attribution-NonCommercial-NoDerivs 3.0 Unported License.

Pretty Chic Theme By: Pretty Darn Cute Design