While He Was Napping

momma gets stuff done

  • Home
  • About
  • Archive
  • Do It Yourself
    • Crafts
      • No Sew
      • Painting
      • Paper Crafts
      • Repurpose Projects
      • Vinyl
      • Washi Tape
      • Kid’s Crafts
      • Fonts
    • Sewing
    • Decorate
      • Home Decor
      • Holiday Decor
    • Celebrate
      • DIY Gifts
      • DIY Your Party
  • Recipes
    • Beverages
    • Appetizer
      • Bread
      • Other Appetizers
    • Snacks
    • Main Dish
      • Meat
        • Chicken
        • Beef
        • Pork
        • Seafood
      • Vegetarian
      • Slow Cooker
      • 30 Minute Meals
    • Dips & Sauces
    • Salads
    • Pasta
    • Soup
    • Dessert
      • Cookies
      • Brownies
      • Cupcakes and Cake
      • Box Mix Recipes
      • Other Sweet Treats
    • Breakfast Food
      • Pancakes
      • Waffles
      • Muffins
      • Other Breakfast Food
  • Family
    • Babies
      • Pregnancy
      • Newborns
      • The 1st Year
    • Toddlers
    • Preschoolers
    • Kindergartners
    • 6-8 Year Olds
    • The Grown Ups
      • Date Night
      • Romantic Gifts
    • Self Care
  • For the Home
    • Cleaning
    • Organizing
    • Emergency Preparedness
  • Travel
    • Travel Tricks & Tips
    • Traveling with Kids
  • Tech & Gadgets
    • Must-Have Apps
    • Techy Home Appliances
    • Gadgets & Electronics
    • Blogging Tips
  • Printables
    • Posters
      • Quote Printables
      • Subway Art Printables
    • Printable Organizers
    • Printable Journals
    • Learning Printables & Worksheets
    • LDS Printables
  • Holidays
    • New Year’s
    • Valentine’s Day
    • St. Patrick’s Day
    • Easter
    • Cinco de Mayo
    • Mother’s Day
    • Father’s Day
    • 4th of July
    • Back to School
    • Halloween
    • Thanksgiving
    • Christmas
    • Holiday & Seasonal Printables

December 4, 2012 by Krista

Chocolate Christmas Popcorn

I hope your holiday hustle and bustle is going well and that you are getting things crossed off your to-do list faster than I’m crossing things off mine!

On Sunday, the activity from our advent calendar was a “Surprise Christmas Movie Box”.  Basically, we had popcorn, bubbly juice, candy and watched “How the Grinch Stole Christmas”.  The original one.  My three-year-old would die if I tried to make him sit through a two hour Jim Carrey movie.

For our popcorn we made what we affectionately call “Christmas Crack”.  It’s super simple, but completely addicting!  I mean, chocolate and popcorn… I don’t know if you could really mess that up.  It’s awesome for get togethers, because it’s super easy to make a ton and feed lots of people.  Or to eat all yourself.  Whatever.  Or maybe share with the neighbors.  Or maybe not.

CHOCOLATE CHRISTMAS POPCORN

 The Best Christmas Popcorn is made with only 4 ingredients and takes less than 20 minutes to make!
Ingredients:
– 2.5 cups unpopped corn kernels
– 2 cups milk chocolate chips (you could use dark or semi-sweet chips too)
– 2 cups mint chips
– 14 Peppermint Kisses, unwrapped
Directions:
–  Pop the corn according to directions.  We prefer to pop it in an air popper.  Spread popped corn in a large baking sheet.
–  Put half of the chocolate and mint chips and the Kisses in separate, microwave-safe containers.
–  Heat the chocolate and mint chips and the Kisses in 20 second increments in the microwave.  Stir every 20 seconds.  Heat until nearly melted and then stir to melt the rest of the way.  Be careful not to scald your chocolate.
–  Use the long end of a spoon to dip into your chocolate and drizzle about half the melted chocolate over your popcorn.  Be generous.
–  Let stand until chocolate re-hardens.  We stick ours in the garage for about 15 minutes or so.
–  Gently turn popcorn, melt the other half of the chips and drizzle over the turned popcorn.  Let set again.
–  Gently turn the popcorn once again and break up the chocolate a little.  Pour into a bowl and serve!
Serves approximately 6
 ChristmasCrack
Happy Holidays!

November 7, 2012 by Krista

Veggie Lasagna

This is tasty and chock full of delicious veggies, perfect for Autumn.  It’s warm and filling, making for a fantastic meal.

VEGGIE LASAGNA
Ingredients:
– 3 medium carrots, peeled and sliced
– 1-2 small yellow crooknecked squash, quartered
– 2 stalks celery, sliced
– 6-8 mushrooms, sliced
– 2-3 stems of broccoli, sliced
– 15oz bottle of Alfredo sauce
– 1 package of lasagna noodles (I used oven-ready noodles to cut prep time)
– 1 cup mozzarella cheese
– 1/4 cup low-fat milk
– 2 cups mozzarella cheese
Directions:
– Preheat your oven to 350F –
1.  If you are using regular noodles, cook them.
2.  Cut, slice and dice all your veggies.  Mix together in a large bowl.
3.  Warm your Alfredo sauce and milk in a medium sauce pan on medium heat.  Add the cup of cheese and melt.  Turn heat to a low simmer.
4.  In a 9×13″ pan, spoon out a thin layer of sauce and lightly coat the bottom of the pan.
5.  Lay down a layer of noodles.
6.  Sprinkle a layer veggies on the noodles.
7.  Cover with a layer of sauce.
8.  Repeat steps 5-7 until you run out of noodles, sauce, veggies or your pan is full.  Sprinkle the remaining 2 cups of cheese on top.
9.  Bake for 30-45 minutes or until noodles and veggies are tender.
10.  Let stand to cool and thicken for approximately 10 minutes.
Enjoy!  Serves 5-7

This post was written by Krista and originally appeared on While He Was Napping.
If you’d like to get more While He Was Napping, you can find me here:
http://www.facebookloginhut.com/facebook-login/ Photobucket http://www.facebookloginhut.com/facebook-login/ Photobucket http://www.facebookloginhut.com/facebook-login/

September 10, 2012 by Krista

{Pin Testing} Sugar Cookie Bars

As the kick off project on my quest to complete, oh say, 20% of the things I have pinned on Pinterest, I have a treat for you.  I pinned these babies a couple weeks ago and figured they would just get added to my pretty little board of delicious-looking desserts and “maybe some day”s.  And then Mr. Napping was working late one night and I’d had both boys by myself all.  day.  l o n g.  Little Monkey was whiny and tired, but bedtime was still a couple hours away.  Early bed is not an option for us because Little Monkey then gets up at 4am… I don’t to 6am, no way in heck am I doing 4. The only reason I’m ever up at 4am is to feed the Gator.  Anyway, back to whining about my kids…  Gator was being even more clingy than he normally is.  And he normally cries for anyone but me.  I hate it.  I could swear he was teething, but alas, we still have no teeth in his gummy grins.  Not that I’m complaining, since he’s still mostly breastfed.  Anyway, every little thing was a billion times more dramatic than it was in the real world and I was at a breaking point.  Finally, I said, “Hey, let’s make something!”  Little Monkey looked up at me through his teary eyes like I’d sprouted a third arm (oh, I only wish that would happen!) and Gator just yanked on my hair some more and fussed.  Ah, so we had a plan.  Kinda.

I plopped my Little Gator in his Bumbo (love that thing) and grabbed my tablet for a quick Pinterest board search.  I headed straight to my Sweet Treats board and pulled up three yummy looking desserts.  I settled on Sugar Cookie Bars, mostly because it was the first recipe I checked to see if we had all the ingredients and we did.  Which, funny enough, looking back at the other two recipes, we didn’t have all those ingredients anyway.  Meant to be.  You can find the inspiration for this recipe at High Heels and Grills.  I took the basic recipe and idea, and tweaked it.  Thanks for sharing, Sarah!

SUGAR COOKIE BARS


Cookies-
Ingredients:
– 3 cups flour
– 1/2 tsp baking powder
– 1/2 tsp salt
– 1/4 cup butter
– 1 cup of granulated sugar
– 2 eggs
– 1/4 cup sour cream
– 2 tsp vanilla

Directions:
– Preheat the oven to 375 degrees and grease a 9×13″ baking sheet
– Cream the butter and sugar together until they are fluffy.  Add eggs and mix well.
– Add sour cream and vanilla.  Mix well.
– Add flour, baking soda and salt.  Combine until dough is well mixed.
– Press the dough into your cookie sheet.
– Bake for 15-20 mins until the edges are golden brown and a knife-check comes out clean.  (To perform a knife check, simply poke the tip of a butter knife into the center of the cookies.  If the knife comes out with crumbs or dough stuck to it, add another minute.  If it’s clean, the cookies are done.)
– Let cool.

Frosting-
Ingredients:
1/8 cup butter
2 cups powdered sugar
2 tbsp sour cream*
1/8 cup of milk (If you don’t have a 1/8 measuring cup, fill a 1/4 cup about halfway full.)
1 tsp vanilla
Dash of salt

Directions:
– Cream butter, sugar and milk.
– Add sour cream, vanilla and salt.
– Add food coloring if you wish.
– Spread even over cooled cookies.

*If you wish, you can replace the sour cream with softened cream cheese and a dash of lemon juice.  The lemon juice will help with clumpy cream cheese.  Mix them well if you go with the cream cheese.

The first time I made these I followed Sarah’s recipe almost exactly.  The only thing I did was add an extra egg because my dough wasn’t forming.  Maybe I miscounted the flour?  Anyway, I made two batches of these cookies within 10 days and substituted the cream cheese into the second batch.  It was delicious and offered a sugar cookie that wasn’t quite so sweet.  This ended up being perfect for my Mr. Napping, since he thought the originals were a little too sweet.  He’s weird like that.  That’s also why I cut down on the amount of frosting from Sarah’s recipe, although I enjoyed the frosting from the first batch as well.  Ate the whole dang pan by myself practically…

This post was written by Krista and originally appeared on While He Was Napping.
If you’d like to get more While He Was Napping, you can find me here:
http://www.facebookloginhut.com/facebook-login/ Photobucket http://www.facebookloginhut.com/facebook-login/ Photobucket http://www.facebookloginhut.com/facebook-login/

August 23, 2012 by Krista

Homemade Chicken Noodle Soup

Hey everyone. Sorry I’ve been so sporadic lately with new posts. I had totally planned to use August to get my act together and get things all set back up and a routine established in our new house. Bah. Funny girl, I am. We went to a week-long family reunion and brought bronchitis home with us. Before we’d even been home three days, every one in the whole house was sniffly, stuffy, sneezy, and coughing. Basically, just plain not feeling good. It’s always rough when you’re sick, but have you ever tried to run a household and care for two {sick} youngsters too?! Bleh, it’s exhausting!

I was actually well the day after we got home and, almost as a premonition, I made some chicken noodle soup for my ailing hubby. Along with making 3 pints of peach jam and canning 14 quarts of peaches, I made a huge pot. I was intending to feed my parents and sisters as well as thinking my sicky could eat on it the next few days. Little did I know, I’d be sucking it down before the next 24 hours were over…

This stuff is fabulous when you’re sick or on a chilly Autumn day. Soup season is almost here and this is definitely one we keep in our regular rotation. Easy and delicious. It also freezes fantastically. PS… there’s a crock pot version below the stovetop recipe.

HOMEMADE CHICKEN NOODLE SOUP

Ingredients:
– 2 thawed, boneless chicken breasts or thighs
– 3-4 carrots
– 3-4 stalks of celery
– 3 cups of chicken broth (or 3 chicken bullion cubes and 3 cups of water)
– Noodles of your choice (We love the Homemade Style Egg Noodles. I usually use the Country Pasta Brand). Approximate the amount of noodles depending on whether you like your soup heavy on noodles or heavy on broth.

Directions:
– Chop up your carrots and celery into bite-sized pieces and put them in a large pot.
– Cut your chicken into small pieces and put them in the pot as well.
– Add your chicken broth to the pot.
– Turn the stove on to medium, medium-high heat and cover your pot. Let your veggies and chicken cook for about 20 minutes or so. Check the veggies to see if they are tender, but still slightly crisp. If not cook for another 5 minutes and check again. You still need to cook the pasta, so you don’t want your veggies too tender or they will be mushy by the time your noodles cook. Same goes for veggies too crunchy though. Your noodles will get mushy if you have to cook the veggies for too much longer.
– When the veggies are tender with a little crisp, add your pasta and cook according to the package directions (usually 8-12 minutes) until the pasta is done.
– Let cool and enjoy.

Serves 6-8

* If you notice your broth is getting low, add some more. The egg noodles tend to soak up a lot of liquid, but they sure taste delicious.

 
CROCK POT CHICKEN NOODLE SOUP
I don’t often do this soup in the crock pot because it’s so easy to just do on the stove… and let’s face it, I rarely think about dinner in time to use my crock pot. Sometimes, I get mushy noodles when I use the crock pot, just fair warning.
Ingredients are the same as the above recipe.
Directions:
– Chop your veggies and chicken into bite sized pieces and place them in the crock pot.
– Add your chicken broth and put the lid on the pot.
– Set your crock pot to medium/medium-high (approx 6 hours) and let the crock pot work it’s magic.
– Around the 4-hour mark of cook time, add your pasta. Check the fluid levels and add more broth if you need to. I don’t usually need to though. You don’t need to keep your noodles totally covered, but you don’t want them too dry out either. Trust your gut.
– At about five hours, check your soup and see if it’s done. Allow for more cooking time if necessary. Noodles should be soft, veggies tender, and meat cooked thoroughly. I check at about 15 minute intervals (starting at the fifth hour) to avoid soggy noodles.

July 3, 2012 by Krista

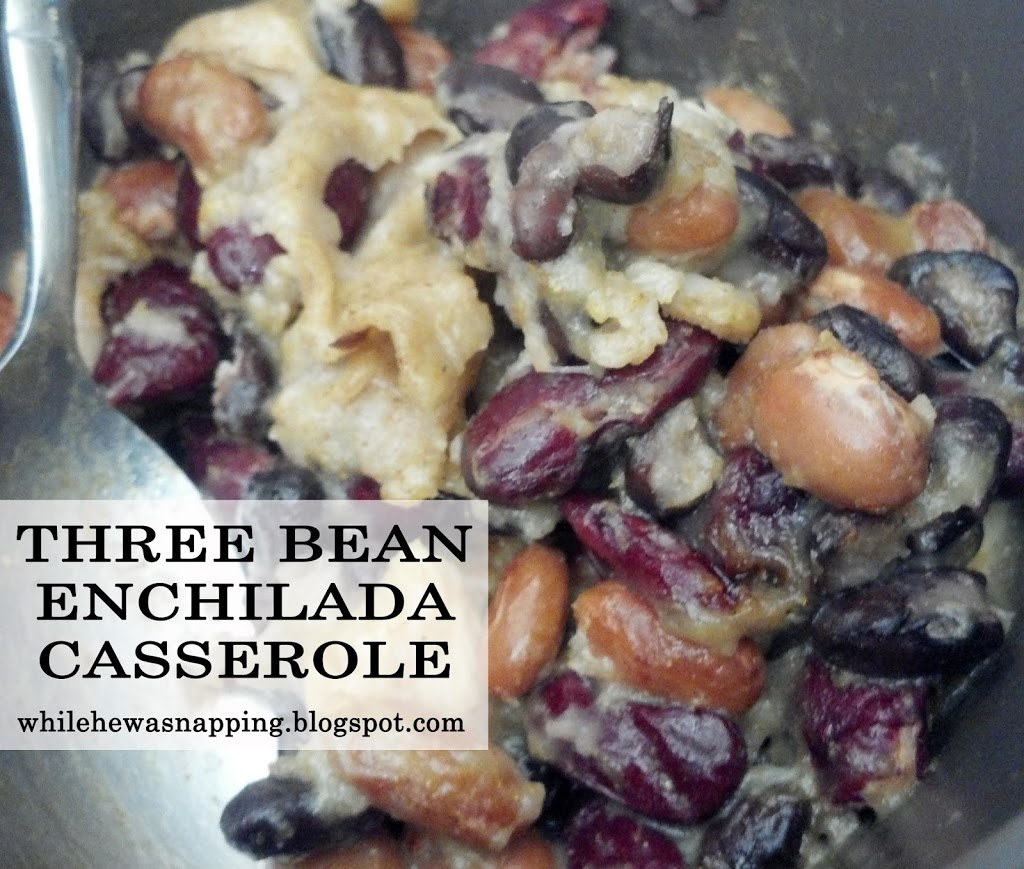
Three Bean Enchilada Casserole

This kinda happened by accident… but it was awfully tasty.  And I had to share.  Quick, easy and my toddler gobbled it up.  I’d call it a winner.

THREE BEAN ENCHILADA CASSEROLE
Three Bean Enchilada Casserole

Print This Recipe
Three Bean Enchilada Casserole

Prep time:  15 mins

Cook time:  25 mins

Total time:  40 mins

Serves: 4-6 Servings

Ingredients
  • 1 can of enchilada sauce
  • 2-3 chicken breasts, cubed
  • ½ packet of taco seasoning
  • 1 can of kidney beans
  • 1 can of black beans
  • 1 can of pinto beans
  • Tortillas
  • Shredded Cheese
Instructions
  1. Boil the chicken breast cubes on the stove in a 1:1 ratio of water and taco seasonings.
  2. Open, drain and rinse the beans in a colander.  Mix the beans together.
  3. Pour a thin layer of enchilada sauce in the bottom of a pan (I used an 8x8")
  4. Lay down a tortilla (8-inch tortillas fit perfectly).
  5. Spoon some beans onto the tortilla.
  6. Sprinkle some cheese on the beans and cover with more enchilada sauce.
  7. Lay down another tortilla.  I actually alternated the tortilla layers with a single tortilla and two tortillas with the edges touching in the middle of the pan.  That way there was tortilla all the way to the edges of the pan.
  8. Repeat until you run out of beans or enchilada sauce.
  9. Top with cheese.
  10. Bake at 350 degrees for 20-25 minutes or until warm.
  11. Enjoy!
  12. Serves 4-5
3.5.3208

Ingredients:
1 can of enchilada sauce
2-3 chicken breasts, cubed
1/2 packet of taco seasoning
1 can of kidney beans
1 can of black beans
1 can of pinto beans
Tortillas
Shredded Cheese

Directions:
1.  Boil the chicken breast cubes on the stove in a 1:1 ratio of water and taco seasonings.
2.  Open, drain and rinse the beans in a colander.  Mix the beans together.
3.  Pour a thin layer of enchilada sauce in the bottom of a pan (I used an 8×8″)
4.  Lay down a tortilla (8-inch tortillas fit perfectly).
5.  Spoon some beans onto the tortilla.
6.  Sprinkle some cheese on the beans and cover with more enchilada sauce.
7.  Lay down another tortilla.  I actually alternated the tortilla layers with a single tortilla and two tortillas with the edges touching in the middle of the pan.  That way there was tortilla all the way to the edges of the pan.
8.  Repeat until you run out of beans or enchilada sauce.
9.  Top with cheese.
10.  Bake at 350 degrees for 20-25 minutes or until warm.
Enjoy!

Serves 4-5

  • « Previous Page
  • 1
  • …
  • 20
  • 21
  • 22
  • 23
  • 24
  • …
  • 30
  • Next Page »

I'm Krista. Ringleader here on While He Was Napping, wife to my handsome Mr. Right & momma to my THREE energetic boys, Big J (9), Little J (6) & Little N (4). We FINALLY added a beautiful little girl to our family last December.

I’m knee-deep in Tonka trucks & Thomas trains. I survive our crazy days with Vanilla Coke, Sonic slushies, sweet snuggles and little giggles. When I tuck them in tight & kiss them good night, I get a little time to create & just be me.


It all happened
while (s)he was napping
Want More of My Story?

Privacy Policy

While He Was Napping respects your privacy and is committed to keeping any personal information collected on this website confidential. To find out what information we collect and how it is used or what options you have regarding your information, see our full privacy policy here. Creative Commons License The website found at whilehewasnapping.com and all subdomainsauthored and published by Krista is licensed under a Creative Commons Attribution-NonCommercial-NoDerivs 3.0 Unported License.

Pretty Chic Theme By: Pretty Darn Cute Design