As my kids become more aware of the world around them, they tend to come down with a terrible illness every so often, usually around birthday and gift-giving holidays, although it has been known to make an appearance at other times too. Symptoms include jealousy, selfishness, envy, and it’s accompanied by begging, whining and pleading. This terrible condition is what we call “Get-itis”. My kids see commercials for new crap – because, seriously, most of it is crap – or hear about a new toy from a friend and their little child minds and instincts kick in to high gear. “I want one too!” “Let’s get one of those!” “But so-and-so has one!”
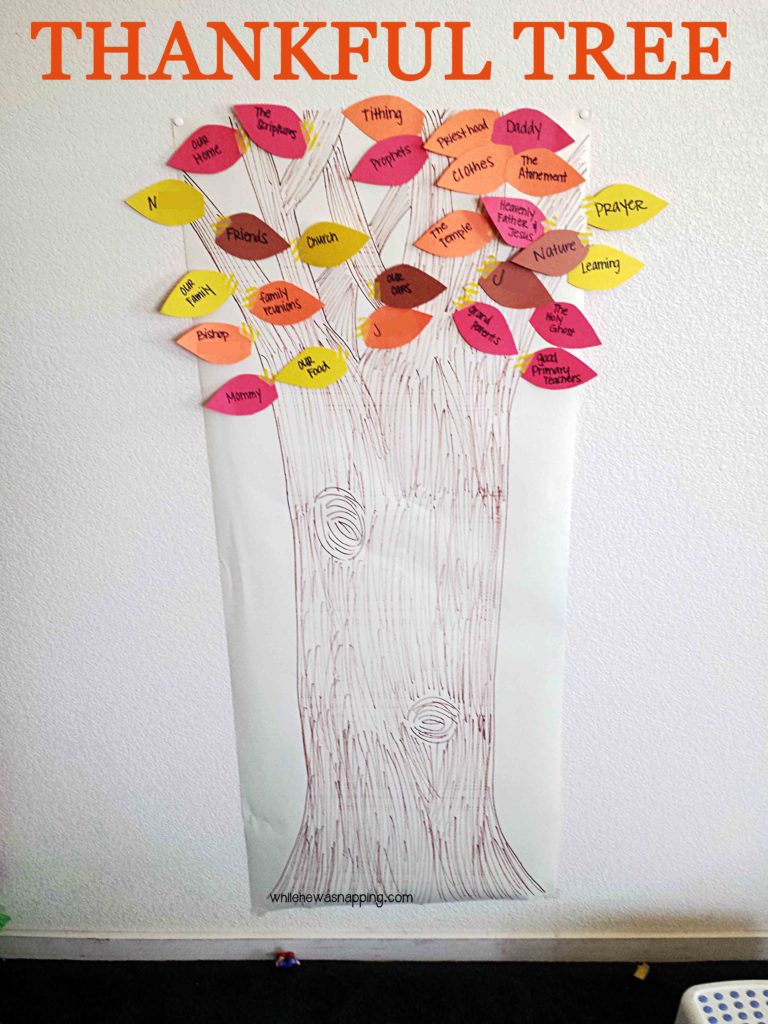
So, this month we are making a Thankful Tree. It’s simple, it’s basic and easy… and it’s working. Seriously. We were at the store the other day and Big J asked if he could get some dumb toy that 1. we didn’t have the money for and 2. would’ve been on my floor later that night while I was stumbling around in the dark while on baby duty. Rule #1 of toy purchases is to always ask yourself “how badly will it hurt when I step on that?” We looked at it, talked about why he liked it and then I asked him where he’d put it. He stopped and thought, throwing out 3 or 4 “possibilities” – on my bed, under the bathroom sink, and under Baby N’s bed (uh… no, no, and no). Then I asked him if he really needed it and I reminded him of all the things on our Thankful Tree. He decided to leave the toy there. Willingly! It’s human nature to want new things, but one of the most important skills I can think of is self-control. When he left that toy in the Lego aisle all on his own, I had a glimpse of the responsible and logical man that is slowly developing. It was one of those awesome-mom, everybody-saw-that-right? moments. I don’t have a lot of those it seems, so each one is a notable victory for me! And all it took was some time, construction paper, a marker and glue.
THANKFUL TREE
Materials:
- large paper roll (ours is from IKEA, but you can find them on Amazon
too (affiliate link))
- red, yellow, orange and brown construction paper
- scissors
- glue stick
- permanent marker
Directions:
1. Use the permanent marker to draw a tree trunk and branches. It doesn’t have to be perfect, just go with it.
2. Cut out leaf shapes from the construction paper. I just free-handed one and then used it as a template for the rest of them.
3. Use the scissors and cut the leaves out.
4. Write one blessing or thing you’re thankful for on each leaf and glue it to the branches of the tree with the glue stick. Super simple!
Week 1
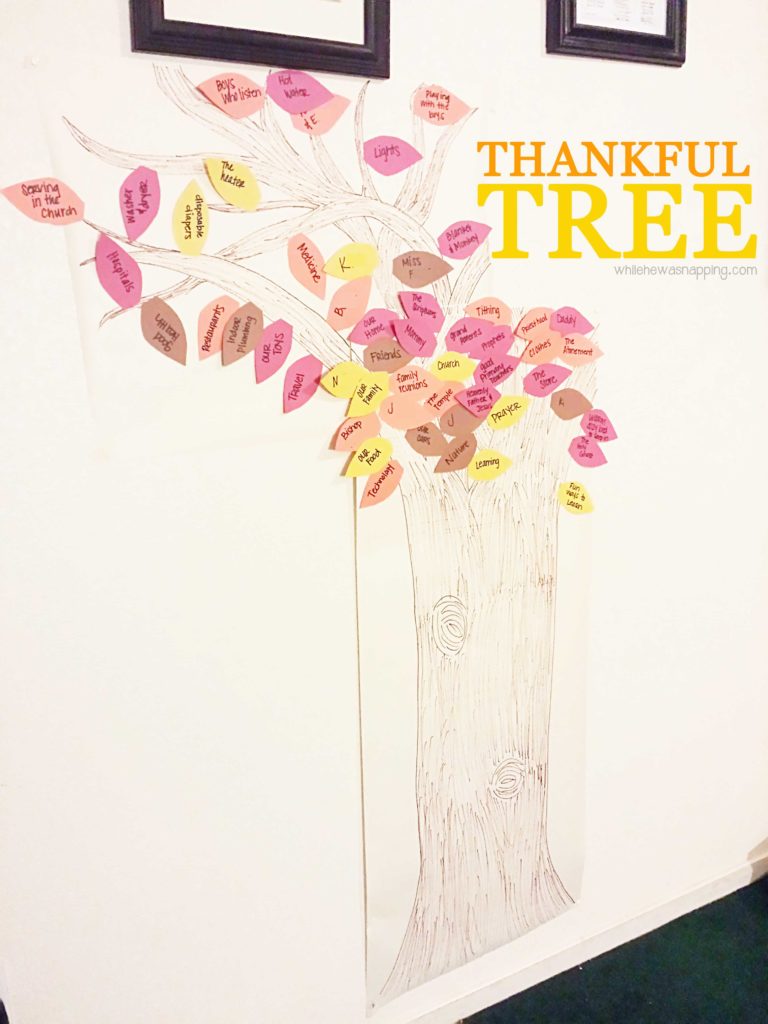
Week 2
We have been working on our tree for about two weeks. We don’t do it every night, but we take ten to thirty minutes, two to four nights a week and take turns writing down things we are thankful for. It’s gotten a little more difficult, but we haven’t run out of things yet. This has been a great visual for my kids and a good reminder to me of all the blessings we have in our lives. There’s a lot of things we don’t have – new cars, big house, expensive toys, bottomless bank accounts – but the important things are the ones we do have.