I have been converted to the art of glass etching. I’ve actually done it before, but it’s been several years. But it isn’t hard to remember, thank goodness! This is my newest little treasure. I am sorely tempted to keep them, but at the moment I don’t have anywhere to put them. Our space is severely limited. So, into the Etsy shop they go.
October Spooktacular: Halloween Hurricanes
I failed to take “before” pictures! I know, shame on me! I bought two large vases and two small vases from the Dollar Store. I also bought two tall candlesticks and two small ones (the small ones came in a package together). I spray painted the candlesticks…. told you I have a spray paint obsession. This is the step I added to all the other Hurricanes I’ve seen around. I really like the way they turned out. I let that dry, then used LockTite to glue each of the candlesticks to a vase. I opted to vary the heights of my hurricanes by putting a tall vase on both a tall candlestick and a small one. Thus, giving me four different heights. I let those dry… it took like three or four days because I wasn’t thinking and the glue in the holes took a while longer to dry. Anyways.
Craftsy ‘Cause I Can: TP Pumpkins
I’ve seen these around and thought they were cute, but wasn’t totally smitten. I did have some fall fabric and TP, of course, so I thought “meh, why not?” I put these together and guess what?!? I love them. I had to post about them to get everyone in the mood for the Halloween Party this weekend! Check ’em out!
All I did was take some fat quarters, put my TP rolls in the middle, wrap the fabric up around the toilet paper and stuff the ends in the TP tube. Then I took the cardboard that the fat quarters came wrapped around, rolled it up and shoved it in the top. (Actually I did use half of an old TP roll that I saw in the trash – the other half was too squished to use though – on the fattest pumpkin. That’s why the stem kinda goes off at a slight angle.) That box of raffia I got off of Craigslist… yeah, took some of the ginormous pile of green that was in the box and tied it around the cardboard stems. Fluff to perfection. All done! Easy peasy, and oh, so cute!
October Spooktacular: Halloween Tiles
First off, I want to say “Welcome, October! And all my crafty friends, a great big welcome to you!” Today is October 1st, which means we get to kick off October Spooktacular! I’m so excited for this event! I hope you are too. So let’s get to it!
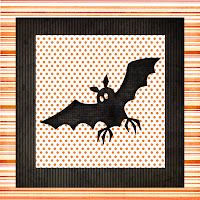
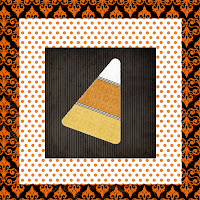
Today is Fanciful Friday: Halloween Tiles! I found this super cute digi scrapbook kit from Summertime Designs. She’s got great stuff (and it’s free!(and for personal use only, of course.)). Make sure you check her out! I seriously spent like two days downloading her kits because they were all so great I had to have ALL of them! Anyway, she’s got some incredibly cute Halloween kits. I used “Happy Halloween” and “Fangs for the Memories” Kits to create this project.
This was super simple but I think it turned out fantastic. Here’s what I did:
Take four 4 in standard tiles. Mine were white, so out came the black spray paint. I think I may have a spray paint addiction! While that was drying, I opened up my ever trusty Photoshop (I heart Photoshop!) and put together my four collages. One with a cat, a candy corn, a pumpkin and one with a bat. Then I printed those on white cardstock and cut them out. After making sure my tiles were dry, I put a layer of mod podge on the BACK of the cardstock and stuck it to the tile. Don’t put mod podge on the front or it will smear your ink. EEK! Repeat with the other three tiles. You may use these images for your own personal use, but please keep it to that.
Then I got this box of raffia on Craigslist… I have to show you this box… Any guesses how much I paid for it? Ok, actually my hubby went and got it. He’s my master bargainer… $5. That’s right I got this whole box for $5. I love my husband. Hehe. Back to the tiles.
I took some of the raffia and added little embellishments to each tile with tacky glue. I let that all dry. Then, I used TiteLock glue to glue Halloween ribbons to hang them from. Waa-lah! All done! I just love how they turned out.
Want to get yourself a set? Well, you’re in luck… I’m going to give one away. Now, like I said earlier, Summer’s kits are for personal use only. So… This giveaway set won’t look exactly like this set, but it will be the same idea and very similar. I will get a picture of it up tomorrow The picture below is the set that is being given away. Who doesn’t love free stuff?
Here’s how to enter:
Leave a separate comment for each.
1) Follow While He Was Napping. Leave me a comment saying you do.  2) Leave a comment telling me your favorite thing about October or Halloween.
3) Become a Facebook fan.
Good Luck! Giveaway will end next Sunday, October 10th at 11:00pm PST. Open only to US residence, due to postage. Sorry. Winner will be chosen by Random.org and announced Monday morning I will send you an email (so leave a valid address, if it’s not accessible on your profile). If I can’t contact you another winner will be chosen. Good Luck!
Check my side bar or link parties page for places I may have linked this to.
Couple’s Subway Art Giveaway!
So, I have another giveaway! I’m trying to get you all excited for my October Spooktacular… there will be several giveaways then too. So, be on the look out… cuz’ who doesn’t like free stuff?
Let me introduce you to the project first. I love the subway art movement out there right now. Each piece is the same idea, but no two pieces are the same. So, no matter what, your piece is one-of-a-kind. I love personalized things. They mean so much more when they aren’t in everyone else’s homes too. So, I’ll just let the pictures do the talking… each one is worth a thousand words, right?
The Details:
Winner will receive an 8″x10″ framed, personalized subway art tribute to their sweetheart. Don’t have a sweetheart? Give it as a gift, perhaps? Or choose a different theme, still in the subway art format. Frame color, whether the frame is distressed or not, whether your frame is backless or not, and vinyl words are all customizable. I put our last name and wedding date on ours… you can do whatever you want. Vinyl will be a matte black.
Now, if you want one of these little lovelies for yourself, here’s what you gotta do:
1) Become a follower of While He Was Napping. Leave a comment saying you did. If you already are, thank you, and just leave a comment saying you already are!
For extra entries, complete the following and then leave a SEPARATE comment for each.
1) Visit my Etsy shop and “heart” your favorite item. (1 entry)
2) “Heart” my Etsy shop. (1 entry)
3) Buy something from my Etsy shop (5 entries)
4) Become a fan on Facebook. (1 entry)
5) Post my button (code on sidebar) on your blog… not picky, I don’t care where. Include a link to it in your comment though. (2 entries).
Giveaway ends this Thursday, Sept 30 @ 11:59pm PST! Open to US residents only. Hurry and get your entries in! And check back on Friday for the winner, as well as the beginning of October Spooktacular: Crafty Tricks and Neat Treats! There just might be another giveaway…….!
GOOD LUCK!!
See my side bar for some of the parties I’m linking to.


