While He Was Napping

momma gets stuff done

  • Home
  • About
  • Archive
  • Do It Yourself
    • Crafts
      • No Sew
      • Painting
      • Paper Crafts
      • Repurpose Projects
      • Vinyl
      • Washi Tape
      • Kid’s Crafts
      • Fonts
    • Sewing
    • Decorate
      • Home Decor
      • Holiday Decor
    • Celebrate
      • DIY Gifts
      • DIY Your Party
  • Recipes
    • Beverages
    • Appetizer
      • Bread
      • Other Appetizers
    • Snacks
    • Main Dish
      • Meat
        • Chicken
        • Beef
        • Pork
        • Seafood
      • Vegetarian
      • Slow Cooker
      • 30 Minute Meals
    • Dips & Sauces
    • Salads
    • Pasta
    • Soup
    • Dessert
      • Cookies
      • Brownies
      • Cupcakes and Cake
      • Box Mix Recipes
      • Other Sweet Treats
    • Breakfast Food
      • Pancakes
      • Waffles
      • Muffins
      • Other Breakfast Food
  • Family
    • Babies
      • Pregnancy
      • Newborns
      • The 1st Year
    • Toddlers
    • Preschoolers
    • Kindergartners
    • 6-8 Year Olds
    • The Grown Ups
      • Date Night
      • Romantic Gifts
    • Self Care
  • For the Home
    • Cleaning
    • Organizing
    • Emergency Preparedness
  • Travel
    • Travel Tricks & Tips
    • Traveling with Kids
  • Tech & Gadgets
    • Must-Have Apps
    • Techy Home Appliances
    • Gadgets & Electronics
    • Blogging Tips
  • Printables
    • Posters
      • Quote Printables
      • Subway Art Printables
    • Printable Organizers
    • Printable Journals
    • Learning Printables & Worksheets
    • LDS Printables
  • Holidays
    • New Year’s
    • Valentine’s Day
    • St. Patrick’s Day
    • Easter
    • Cinco de Mayo
    • Mother’s Day
    • Father’s Day
    • 4th of July
    • Back to School
    • Halloween
    • Thanksgiving
    • Christmas
    • Holiday & Seasonal Printables

December 10, 2013 by Krista

{Somewhere in the Middle} Sled Ornament

Rebekah from Somewhere in the Middle is back again today to share a fun little sled ornament with us.  These would be so perfect for a fun crafty afternoon with the kiddos.  Write everyone’s name on their ornament and the year for a fun little keepsake!  Here’s Rebekah with the how to:

____________________________________

Sled Craft Stick Ornament found on while He Was Napping

I adore homemade ornaments for the tree and I especially love ornaments that kids can help make. It’s so fun to unpack them every year and see how excited the little ones get about the ornaments they’ve made in the past. These little sled ornaments are super quick to put together and a great project for the kids to help with. Here’s the super short supply list:

Sled Craft Stick Ornament found on while He Was Napping

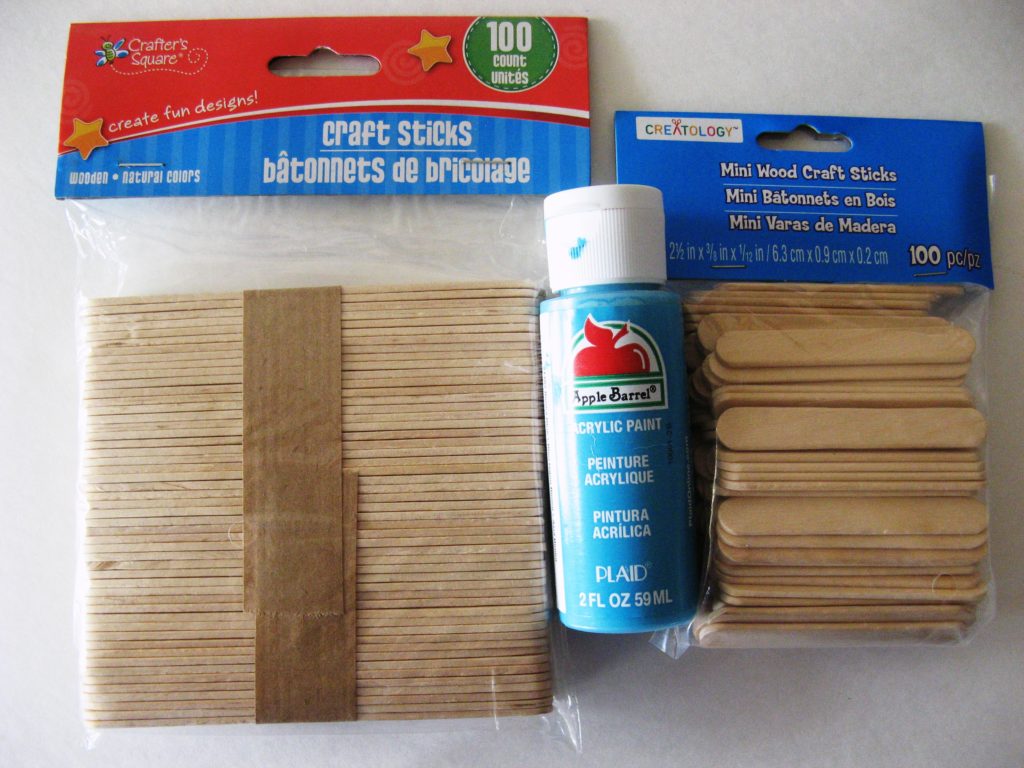
  • Craft Sticks (regular size)
  • Mini Craft Sticks
  • Glue gun
  • Twine (or yarn/string)
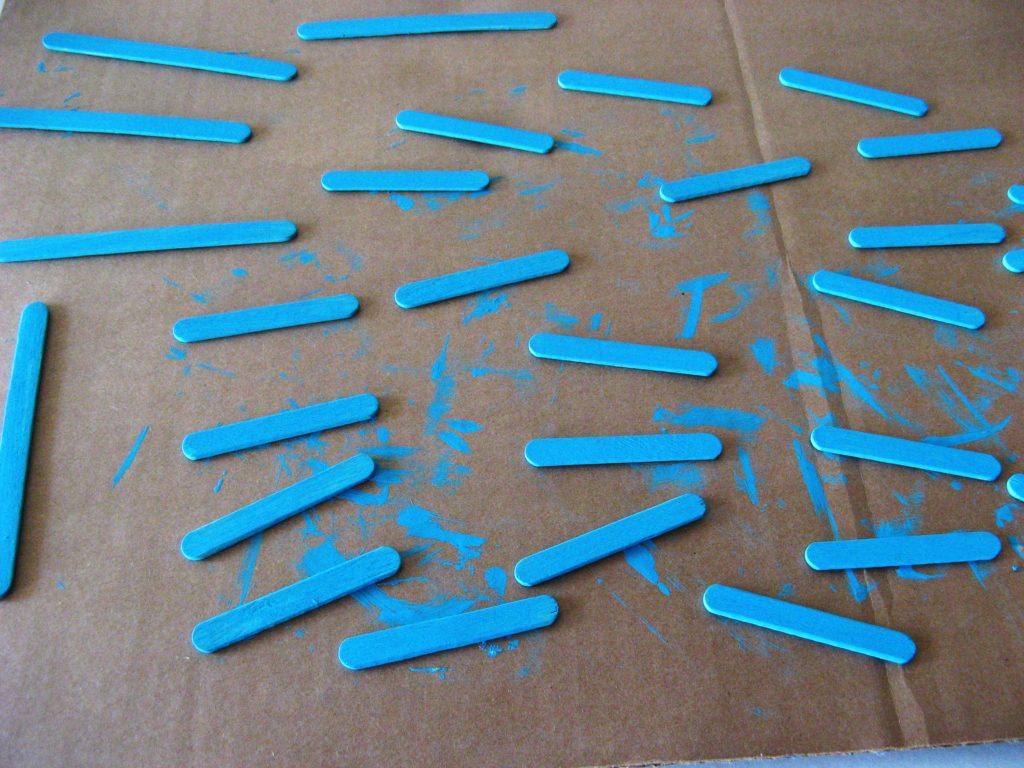
  • Paint (I think they’d be really cute in red, but we went with turquoise)

Paint both sides of the craft sticks. You need 6 mini sticks and 3 regular sized per sled.

Sled Craft Stick Ornament found on while He Was Napping

You’ll need to cut one of your large sticks in half and trim off the ends. I just used an old pair of scissors.

Sled Craft Stick Ornament found on while He Was Napping

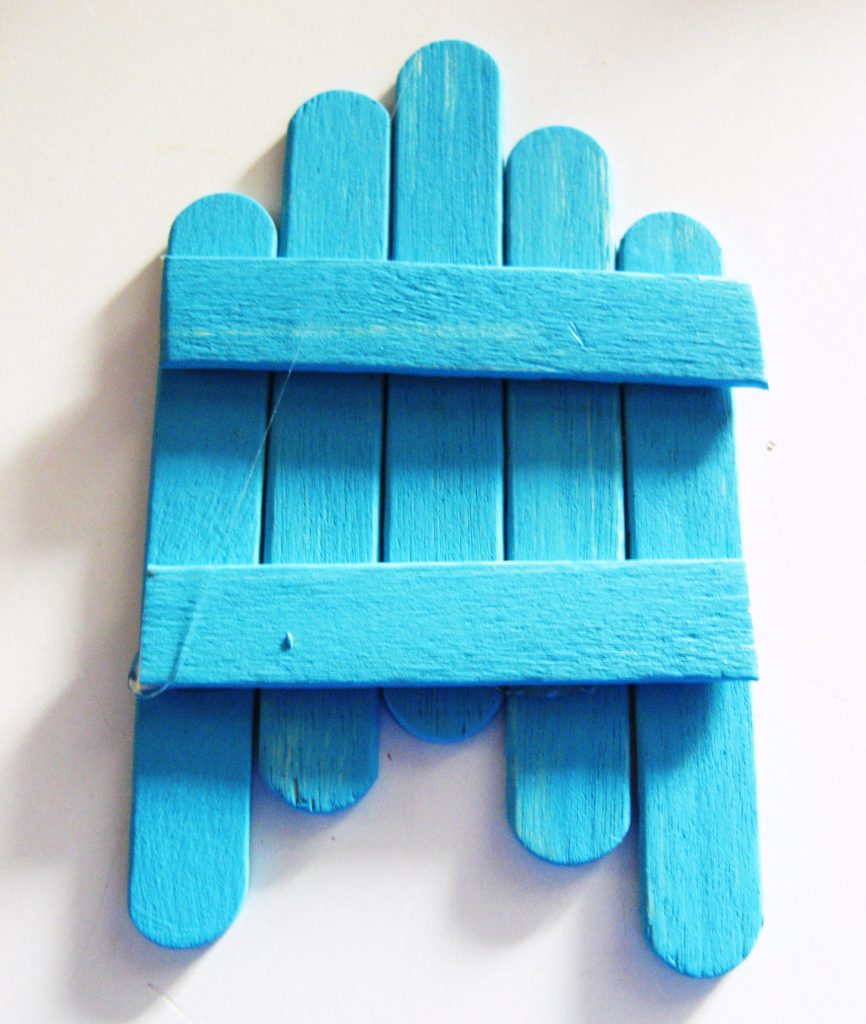
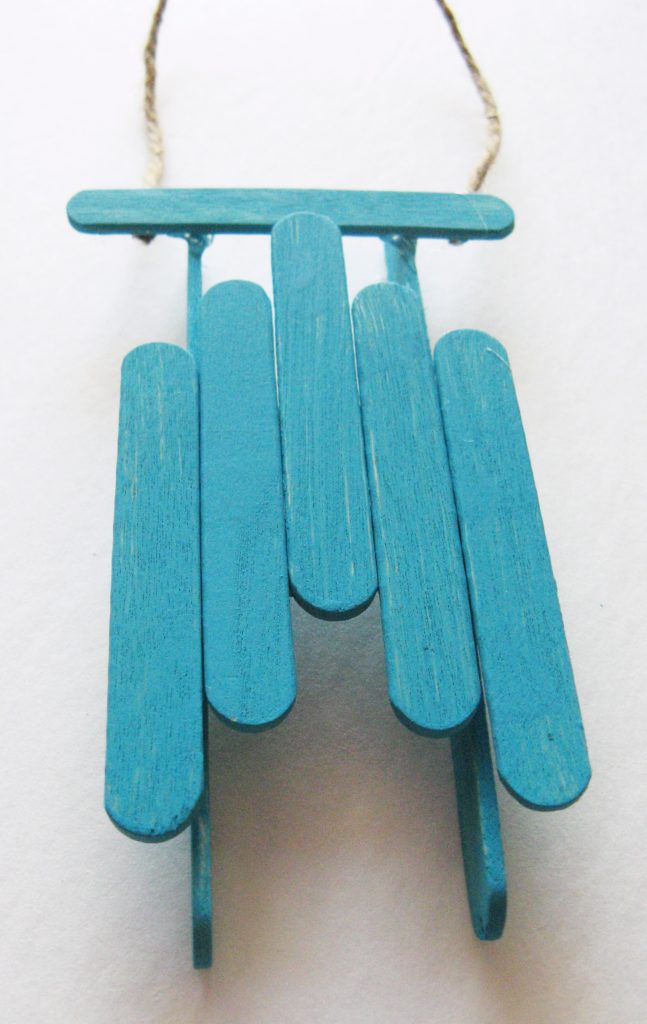
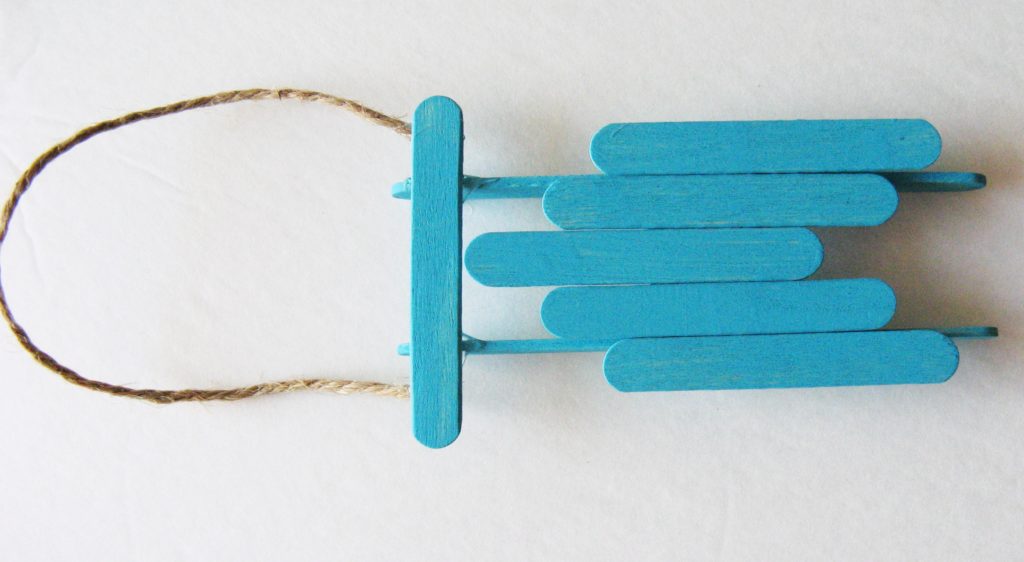
Heat up your glue gun and put the sled ornament together as show in the photo below.   Then add the remaining sticks to the sides and front as shown in the next photo.

Sled Craft Stick Ornament found on while He Was Napping

Add the twine.

Sled Craft Stick Ornament found on while He Was Napping

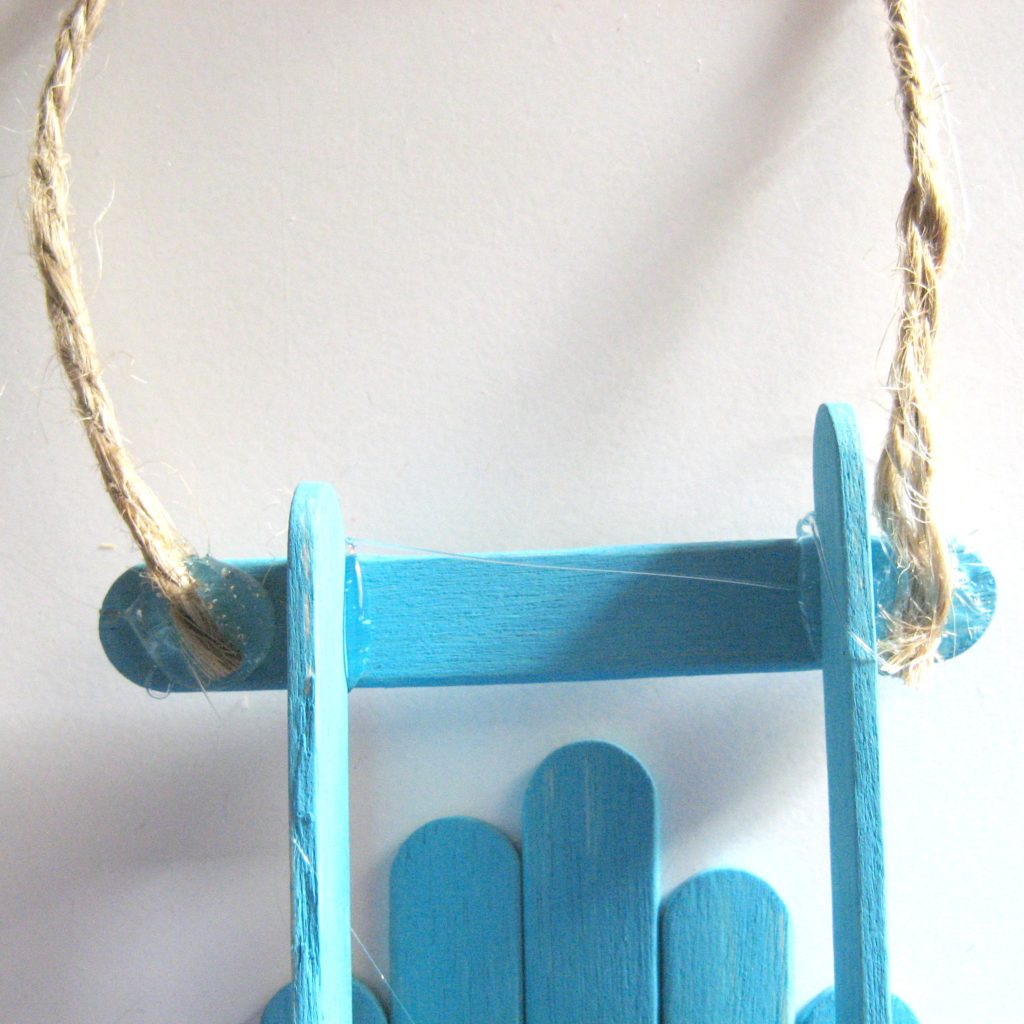
And there you have it – a cute little sled ornament. Now if we could only get some snow so my girls would understand what a sled actually is. 😉

Sled Craft Stick Ornament found on while He Was Napping

____________________________________
Super cute, right?!  I love these. I’m going to have to make some of these sled Ornaments for my boys! They are just darling and I love that you could decorate the sleds differently for each person – or let the kids decorate them!  Thanks for sharing, Rebekah.  Check out more great ideas at Somewhere in the Middle.


Find Rebekah Here:
 

This post was written by Krista and originally appeared on While He Was Napping. 
 

December 6, 2013 by Krista

{Gift Guide 2013} For Teachers

Do you have a teacher that is totally rocking your year?  Give a thoughtful, useful gift this holiday season to say “thanks for your hard work!”  Check out the twelve ideas below, both DIY and purchasable.  Is that a word?  Spell check didn’t underline it.  Anyway…

1.  Savory Sweet & Cinnamon Popcorn (recipe via Creative Home Keeper contributor post on While He Was Napping)
2.  Handmade Jewelry.  It’s functional, cute and doesn’t have apples on it…
3.  The Everything Pouch.  While I originally designed this to take in the car on road trips, it could easily be used to keep in a desk and hold things like band-aids, hand sanitizer, Tylenol, nail clippers and file, change for the vending machines and other things teachers need.
4.  Bird’s Nest Necklace.  Cute and personalizable with the color of beads you include in the nest.
5.  App Store (or Play Store) Gift Card.  Granted the App(le) a Day is super cute and the link includes the  printable tag, maybe double check to see if the App Store card would be useful.  Guest post from My Sister’s Suitcase on Everything Etsy.
6.  So Thankful You’re my “Tea”cher Tea Gift Set via Ledford Life
7.  Helping Hands Gift Set via Teach With Me.  Stuffer gifts included in the post!
8.  Coffee Cup Gift Card Holder via Sprinkled with Glitter.  I would probably tuck a couple tea bags or hot cocoa packs into the cup too.  No sense wasting the cup, after all.  Cute gift wrap and functional.
9.  Personalized Tumblers via ExpressivelyOurs on Etsy.  You could also DIY this project with some vinyl and a blank tumbler.  I liked these ones that were for a teacher, but weren’t covered in apples and rulers.
10.  DIY Personalized Coffee Cups via Que Rica Vida.  Don’t worry, the tutorial is in English and it’s a great tutorial.  A fun way to gift something useful and made by the kiddos.  I remember most of my teachers carrying around coffee mugs all day long, even if they were full of cocoa or tea or soda.
11.  DIY Hand Sanitizer/Soap Dispensers at The Idea Room.  We did these at Super Saturday this year and they were cheap and super easy to mass assemble.  And what teacher isn’t sanitizing or washing their hands a hundred times a day?  All the sick ones, that’s who.
12.  Stamped “teach” Necklace via Simple Starfish.  The price tag on this baby is pretty steep ($65), but it’s incredibly cute.  If you want to try your DIY hand at stamping, you can find a cheap stamp set at Harbor Freight and you can use washers or find stamping blanks on Etsy as an experimental project.  If you have never stamped and lack in the patience department, this would probably be one time to buy the gift.  

This post was written by Krista and originally appeared on While He Was Napping.


December 5, 2013 by Krista

{Mabey She Made It} Burlap Poinsettia Ornament

Lisa is back today with a super cute ornament for your tree.  Take it away, Lisa!

____________________________________________

There’s something beautiful and simple about burlap. And poinsettias are undeniably an easily distinguishable symbol of Christmas. So when you combine them to make a Burlap Poinsettia, you get a beautifully simple Christmas ornament. Burlap Poinsettia | Mabey She Made It #Christmas #Poinsettia
Hi there! I’m Lisa Mabey and I blog at Mabey She Made It about DIY projects, crafting, and sewing. I’m excited to show you how to make this beautiful Burlap Poinsettia to decorate your tree or add to your decor. To make a Burlap Poinsettia, you’ll need just a few simple supplies and the results are really fabulous. You’ll need:

  • Burlap
  • Floral wire
  • Wire cutters
  • Brown floral tape
  • Hot glue
  • Berries
  • Glitter

Ready? Ok, here we go!

  1. Cut your floral wire in half. Create the shape of each petal by bending the wire in half then making additional bends at the base of the petal. Twist the wire ends together.
  2. Glue the wire petals to the burlap.Burlap Poinsettia | Mabey She Made It #Christmas #Poinsettia
  3. Cut around each one.Burlap Poinsettia | Mabey She Made It #Christmas #Poinsettia
  4. Group the petals together, then wrap the wire with the floral tape.Burlap Poinsettia | Mabey She Made It #Christmas #Poinsettia
  5. Edge the petals with glue and glitter, and let dry.
  6. Glue some berries in the center, and you’re done!

Burlap Poinsettia | Mabey She Made It #Christmas #Poinsettia Burlap Poinsettia | Mabey She Made It #Christmas #Poinsettia  
I hope you’ve enjoyed making a Burlap Poinsettia with me, and that you’ll come visit me at Mabey She Made It for more craft ideas, DIY projects, and sewing!

______________________________________________

Thanks, Lisa.  These are super cute!  I love the way it looks against the greenery, so Christmas-y.  Go chekc out some more of Lisa’s awesome ideas at Mabey She Made It.

This post was written by Krista and originally appeared on While He Was Napping.


December 4, 2013 by Krista

Holiday Goody Tin Neighbor Gifts {My Favorite Holiday Treats}

This year for our Neighbor Gift, we have decided to do edible gifts.  As much as I would have loved to have been able to just purchase gifts, it wasn’t in the cards this year.  We visited several friends and family over Thanksgiving and, to save on postage, we delivered the gifts in person.  So, these needed to be done in time to deliver as we made our trip north (and a little east).  I made them up a couple days before we left and packaged them in some cute holiday tins for safe keeping and easy gifting.

Holiday-Goody-Tin1

In our circle of friends, we’re known for our talent in the kitchen and love of baking and cooking.  My inspiration has always been my sweet tooth.  I enjoyed eating these goodies as much (or more!) than I did making them.  Over the past several years, I have discovered and tweaked some of my favorite holiday recipes, adding a new one or two each year.  By now, I have a reliable stash of go-to recipes that I know will be a hit.  Three of the last five Christmases, I have been pregnant.  So, these recipes are still pretty easy without sacrificing delicious flavor.

Holiday-Goodies1

My Favorite Holiday Treats (in no particular order):

1.  Cream Cheese Mints.  This was the first time I’d ever made these.  I found the recipe at Chocolate, Chocolate and More.  These are like butter mints, but better.  The recipe is super simple and everyone loves them.  They are pretty rich, so a few mints will go a long way.  That’s a good thing when you’re making goodies for a crowd.  This is a no-bake recipe with only three ingredients.  We’ve definitely added these to our holiday favorites.
2.  English Toffee Bites.  This was also the first time I made these.  It’s probably not the wisest move, to try a bunch of new recipes when you’re planning to give them as gifts.  Luckily, the recipes were all easy enough that all the goodies turned out delicious!  This recipe came from Shugary Sweets, with a couple tweaks.  I doubled the vanilla and left out the almonds.  I made mine in mini muffin tins, which made them a little bigger than “bite-size”, but I didn’t want to have to deal with cutting the toffee.  I would totally do it again.  Delicious and cute too.

Toffee-Bites1

3.  Super Simple Fudge.  This is a recipe I got from my grandma.  I always loved her fudge growing up.  And when I found out the recipe had three ingredients and is almost impossible to mess up, I loved it even more.  It always makes an appearance at our house during Christmastime.

Fudge1

4.  Peanut Butter Cup Bars.  I adapted this recipe back in February and have been using it ever since.  It’s one of our favorites and makes a bunch all at once.  Again, great for when you’re feeding a crowd.  I definitely think the presentation found in the original recipe from Fifteen Spatulas looks fabulous, so I may have to try this again in cup form this holiday season… we’ll see….

5.  This is just the simple fudge with walnuts on top.  Some times I like a little more to my fudge than just creamy smooth chocolate.
6.  This was another newbie this year… guess I was a little more adventurous than I realized with all the untested (by me) recipes.  However, all of these recipes were so awesomely easy that I had no problems with any of them.  They turned out great.  This recipe comes from Oh Nuts! and, to be totally honest, was probably my favorite of this goody tin.  They are just like a York patty.  Strong and refreshing.  I tried dipping the mints in melted chocolate chips and almond bark, as I was out of dipping wafers and there was no way I was going to haul my hooligans around Wal-Mart in my powdered sugar dusted sweatpants at 7:30 pm.  The almond bark definitely turned out better.  You can see the difference in the photo below.  I think I liked the flavor better even, but they for sure set up prettier.  I will be making these again… this year.  I could eat a whole batch by myself.

Peppermint-Patties1

Honorable Mention:
Barely Stir Caramels.  I found this recipe about three years ago on Leafy Treetop Spot.  I was intrigued by the “barely-stir” in the title.  I remember watching my grandma make caramels one year and I swore I’d never bother with all that work.  I was intrigued enough to try it.  Although my first two attempts were total failures – think one huge brick of Worther’s Hard Caramels kind of failure and mushy sugar goo the next time – when I finally got it, these were amazing.  My biggest suggestion:  Use an accurate digital thermometer for this recipe.  Set it in and let it go.  Just check on it every few minutes.  It’s an easy recipe to multitask with (like when you’re making the fudge).  I actually made this for these tins, but I forgot how much volume the boiling caramel takes up and had to switch pans half way through, messing up the heating stage.  I got another huge hard caramel brick that wasn’t really fit for gifting.  So, if you try this recipe use a LARGE pot and you should be good to go.  I’ll have to make this again before Christmas though… in the right pot.  They are just too delicious to not actually get to eat any!  My failure shot:

Do you have any favorite Christmas goody recipes?

This post was written by Krista and originally appeared on While He Was Napping. 

December 3, 2013 by Krista

{Artsy VaVa} A Sucker for Christmas

Virginia is here from Artsy VaVa today for another post!  Come check out the super cute little craft she’s put together this time!

___________________________________________
A SUCKER FOR CHRISTMAS
Adding a new Christmas ornament to the tree every year is a tradition for many of us. When it is an ornament made by our children, it is even more special. This lollipop ornament is fun and simple to make and will be a sweet treat for your tree.
What you’ll need:
Oven bake clay in colors of your choice. (We used 1 ounce each of 4 colors.)
Lollipop Stick: Found in the baking section of craft and grocery stores.
Eye Screw
Ribbon
Cookie Sheet
Parchment or Wax Paper
You will first need to condition the clay to make it pliable and easy to work with. Older children can do this on their own, but smaller children may need help.
Once the clay is soft enough to work with, lay it on a flat surface and begin rolling the clay out to form pieces that are approximately 18 inches long. The pieces will look like snakes. Yikes! 

Once you have all 4 pieces of clay rolled out, make sure they are the same length. If they aren’t, simply tear off the ends to make them all the same.
 

Press all 4 pieces together at one end.
 Then start twisting the 4 pieces of clay around each other.

When the clay is twisted the entire length, start at one end and roll the twisted clay into a circle to form the lollipop. 

Insert a lollipop stick into the clay.

Insert an eye screw into what will be the top of the lollipop.


With the lollipop stick and the eye screw inserted into the clay, 
place on parchment paper on a cookie sheet, & bake according to package directions.
 

When the lollipop has cooled completely, 
tie a ribbon around the stick. 
Add an ornament hook to the eye screw and your ornament is ready to hang and add a sweet touch to your tree.
___________________________________________

Check out that super cute ornament!  I wonder if Big J is old enough to enjoy this?!  Otherwise I might have to have a little girls night… Thanks for sharing, Virginia!  To find more of Virginia’s awesomeness, check out Artsy VaVa or find her here:

This post was written by Krista and originally appeared on While He Was Napping.


  • « Previous Page
  • 1
  • …
  • 75
  • 76
  • 77
  • 78
  • 79
  • …
  • 231
  • Next Page »

I'm Krista. Ringleader here on While He Was Napping, wife to my handsome Mr. Right & momma to my THREE energetic boys, Big J (9), Little J (6) & Little N (4). We FINALLY added a beautiful little girl to our family last December.

I’m knee-deep in Tonka trucks & Thomas trains. I survive our crazy days with Vanilla Coke, Sonic slushies, sweet snuggles and little giggles. When I tuck them in tight & kiss them good night, I get a little time to create & just be me.


It all happened
while (s)he was napping
Want More of My Story?

Privacy Policy

While He Was Napping respects your privacy and is committed to keeping any personal information collected on this website confidential. To find out what information we collect and how it is used or what options you have regarding your information, see our full privacy policy here. Creative Commons License The website found at whilehewasnapping.com and all subdomainsauthored and published by Krista is licensed under a Creative Commons Attribution-NonCommercial-NoDerivs 3.0 Unported License.

Pretty Chic Theme By: Pretty Darn Cute Design