While He Was Napping

momma gets stuff done

  • Home
  • About
  • Archive
  • Do It Yourself
    • Crafts
      • No Sew
      • Painting
      • Paper Crafts
      • Repurpose Projects
      • Vinyl
      • Washi Tape
      • Kid’s Crafts
      • Fonts
    • Sewing
    • Decorate
      • Home Decor
      • Holiday Decor
    • Celebrate
      • DIY Gifts
      • DIY Your Party
  • Recipes
    • Beverages
    • Appetizer
      • Bread
      • Other Appetizers
    • Snacks
    • Main Dish
      • Meat
        • Chicken
        • Beef
        • Pork
        • Seafood
      • Vegetarian
      • Slow Cooker
      • 30 Minute Meals
    • Dips & Sauces
    • Salads
    • Pasta
    • Soup
    • Dessert
      • Cookies
      • Brownies
      • Cupcakes and Cake
      • Box Mix Recipes
      • Other Sweet Treats
    • Breakfast Food
      • Pancakes
      • Waffles
      • Muffins
      • Other Breakfast Food
  • Family
    • Babies
      • Pregnancy
      • Newborns
      • The 1st Year
    • Toddlers
    • Preschoolers
    • Kindergartners
    • 6-8 Year Olds
    • The Grown Ups
      • Date Night
      • Romantic Gifts
    • Self Care
  • For the Home
    • Cleaning
    • Organizing
    • Emergency Preparedness
  • Travel
    • Travel Tricks & Tips
    • Traveling with Kids
  • Tech & Gadgets
    • Must-Have Apps
    • Techy Home Appliances
    • Gadgets & Electronics
    • Blogging Tips
  • Printables
    • Posters
      • Quote Printables
      • Subway Art Printables
    • Printable Organizers
    • Printable Journals
    • Learning Printables & Worksheets
    • LDS Printables
  • Holidays
    • New Year’s
    • Valentine’s Day
    • St. Patrick’s Day
    • Easter
    • Cinco de Mayo
    • Mother’s Day
    • Father’s Day
    • 4th of July
    • Back to School
    • Halloween
    • Thanksgiving
    • Christmas
    • Holiday & Seasonal Printables

July 12, 2011 by Krista

Black Bean Enchiladas

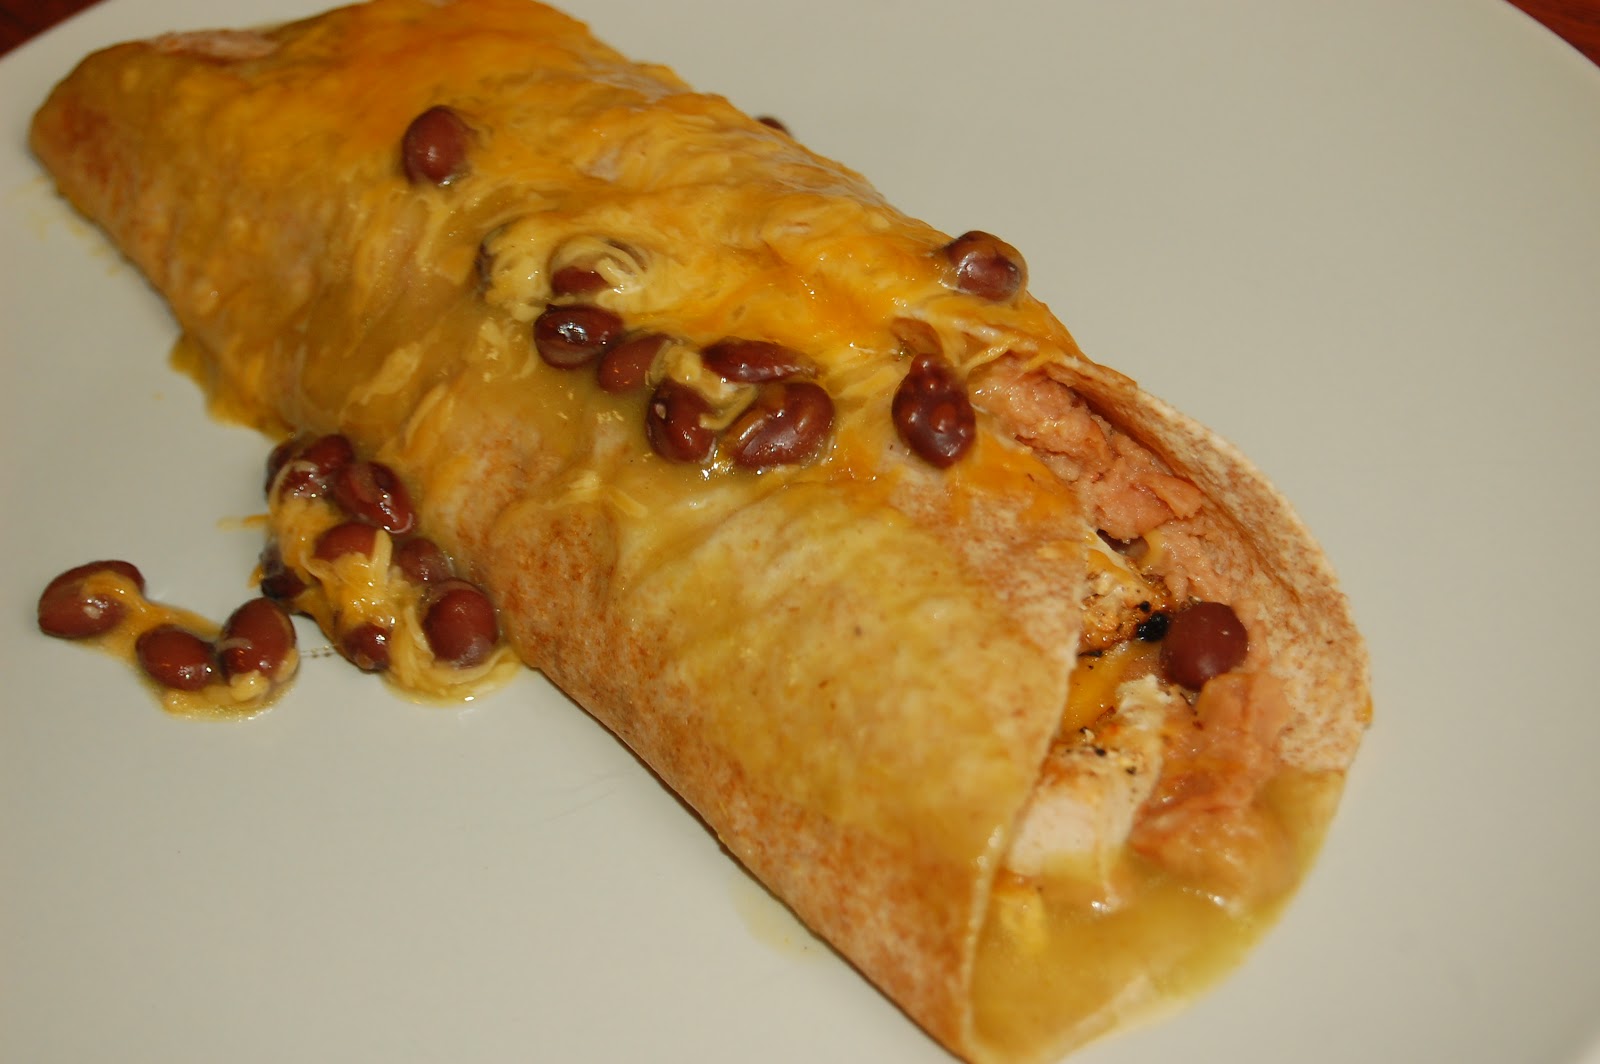
We have a serious love affair with Mexican food in this house.  I love enchiladas because they are easy, tasty and they feed a lot of people (or make great leftovers).

BLACK BEAN ENCHILADAS
INGREDIENTS:
9×13” Pan
Shredded Cheese
1 can Enchilada Sauce
Tortillas (about 6 per each 9×13” pan)
Grilled Chicken (already cooked)
1 can Black Beans
1 can Refried Beans
DIRECTIONS:
Lay out the tortilla and spread the refried beans on half of it.  Then put some chicken on the tortilla.  Add some black beans and some cheese.  Roll the tortilla up and place it in the pan.  Repeat with the remaining five tortillas.  Open your enchilada sauce and dump it over the tortillas. Spread any extra black beans on top of the enchiladas. Sprinkle shredded cheese on top.  Bake at 350F for 20 minutes.  Serve.

Krista

July 11, 2011 by Krista

Guest Post: Creating an Email Contact Button by First Floor Flat

Today, Susie from First Floor Flat: The Computery is here with a great blog tutorial for you guys!  I was so thrilled when Susie offered to do a guest post.  I’ve stumbled across Susie’s site a few times and her tutorials are fantastic.  Definitely a blog worth checking out (and following!).  Here’s Susie!

In an earlier post, I showed you how to add your code to one of my email buttons. In this tutorial, I’ll show you how to make your own!

FIRST STEP: YOU NEED AN IMAGE

Choose an image to use for your email button – maybe one of your own, or a copyright-free image (from my Freebies page or similar site).

You need an image which will fit in your sidebar – so ideally it needs to be anywhere between 180pixels – 220pixels wide (height isn’t so important) and 96dpi.

You can create this on your computer using your favourite graphics program. Add text if you want. You then need to upload this image to an external site, eg: Flickr, Picasa, photobucket.com (free). Here I’m showing you examples on Photobucket (all other programs will be very similar).

First, sort out the upload settings then click UPLOAD to browse your My Pictures folder for an image to use. You need to set a smaller size for two reasons: the image may look too large on your blog, and also you don’t want to use up unnecessary bandwith on your account..

When the image is uploaded, you need to insert the url of the image into the coding for the email. This is where you’ll find it.

Follow the directions below to create your email button and insert the code into an html box on your blog, per the instructions. Go and take a look – if you aren’t happy with the image, you may want to edit the size, the appearance, add some special effects… Pass your cursor over the image to bring up the Share/Edit/Delete/Move bar (in blue, below) and click on Edit.

Once you are happy, either replace the original image, or save a copy (to be on the safe side). If you replace the image, you should see the change immediately on your blog (although if you’ve edited the size, it doesn’t always show up straight away for some reason). If you have saved a copy, you’ll need to use that code to replace the image coding in your email button code.

SECOND STEP: WRITE YOUR EMAIL BUTTON CODE

  1. Go to Layout > Page Elements > Add A Gadget and click on the HTML/JavaScript box.
  2. Copy & paste the code exactly as shown, and substitute your own email address where I’ve typed YOUR EMAIL ADDRESS, in between the ” ” marks.
  3. DO NOT DELETE the mailto: code, or it won’t work.
  4. Don’t leave any spaces between the mailto: and your email address, or the end of your email address and the ” symbol, or it won’t work either.
  5. Don’t leave any spaces between the ” symbols and the url of your image code – or, again, it won’t work.
  6. Click Save and then go and test it!

<a href=”mailto:YOUR EMAIL ADDRESS”><img border=”0″ src=”YOUR IMAGE CODE”/></a>

Your email coding should look something like this:


<a href=”mailto:susie@anemailaddress.com”><img border=”0″ src=”http://myimagealbum@somesite.com”/></a>

Now all you need to do is copy and paste this into an HTML widget box, right into your sidebar!

________________________________________________________

Thank you so much Susie!  This is something I need to do here on While He Was Napping.  One more thing on my to-do list.   It’s never ending, right?!  Make sure you go check out Susie’s other awesome tutorials.  They are really great!  Thanks again, Susie!

July 8, 2011 by Krista

Weekend Wander #38

Welcome to this week’s party!  I’m running out the door, so I’ll do a few features a little later.  But, here’s the linky, so link ’em up!

July 6, 2011 by Krista

Guest Post: Scrap Fabric Magnets by Boy, Oh Boy, Oh Boy!

Today, Stacey from Boy, Oh Boy, Oh Boy (what an adorable blog name) is here with a great tutorial for magnets!  So, here she is:  Stacey, take it away!

Hi, there While He Was Napping readers! I’m Stacey guest posting today from over at Boy, Oh Boy, Oh Boy!   I’m a Foreign Service wife and mom to three boys, ages 5, 2 1/2, and 1 year old. Which means no matter where we’re living, my life is full of spice. And noise. And dirt.

My crafting/sewing corner is where I go to find a little piece of sanity. Besides the usual ranting and raving about raising three boys and living in foreign countries, here are some of the crafty things you can find at Boy, Oh Boy, Oh Boy!

Things I make for my boys,

and handmade gift ideas, 

I also enjoy planning parties, making seasonal decorations for our house, and getting crafty with the kids.

I’m also a bit of a fabric scrap-aholic,  so today I thought I’d share  a scrappy, homemade gift idea.  I made a set of these Glittery Fabric Scrap Magnets a few weeks ago to give as an end-of-the-year gift for my oldest son’s preschool teacher.  I think they’d also make a great housewarming gift.

Supplies:
Cutting board, ruler, rotary cutter, fabric scraps (at least 2 inches by 2 inches), 2 by 2 inch canvas’, Sparkle Mod Podge, magnet sheets (individual craft magnets or adhesive magnet tape would also work), Clear Acrylic Sealer, glue gun and hot glue
Step 1:  Cut 2 by 2 inch squares of fabric scraps, one for each magnet.

Step 2:  Place one layer of Mod Podge down on the canvas and position the fabric square on top.  Squirt a small amount of Sparkle Mod Podge on top of the fabric and use paintbrush to create a thin, smooth layer.  Allow Mod Podge to dry for at least 15 minutes and apply a second coat.  Once dry spray with a clear Acrylic Sealer.

Set 4:  When dry, hot glue a magnet to the back of each 2 by 2 inch canvas. I’ve used a sheet of printable magnet paper which was left over from a previous project, cut into 2 by 2 inch squares.  A roll of magnet tape or individual, round, craft magnets would work as well.

Hang them up on any metal surface and sit back and enjoy the beauty your fabric scraps have created.

Thanks for letting me visit today. If you’re ever over in my neck of the woods, please make sure to leave a comment letting me know you found me over here at While He Was Napping.

_________________________________________________

Thanks for coming by Stacey!  It was so much fun to have you over!  Now make sure you go check out the other cool stuff at Stacey’s blog.

July 5, 2011 by Krista

Blogging: Custom Favicon

Do you know what a favicon is?  It’s that little image next to the address bar.  Mine is the While He Was Napping logo.  This is actually really, really easy to change to your custom image.  Back when I changed mine I had to copy and paste all the code and put it in the template and everything.  Blogger now lets you change it and makes it super easy.
Here’s the How:
1)  First, you need to set your dashboard to Blogger in Draft.  You can do this by going to your dashboard.  Scroll all the way to the bottom and under the Tools and Resources heading in the middle of the “Other Stuff” you will find the option to use Blogger in Draft.  Blogger in Draft is the beta for all the new features that Blogger comes up with before they are officially part of Blogger.  The downside of this is that the new features don’t always work.  Once you’ve set it so you are using Blogger in Draft, head to your design tab.  At the top of the page elements is the little favicon edit option.  Click it!

2)  This window opens up.  When it does, click the chose file button.

3)  Open your image editing software of choice (for me, that’s Photoshop) and construct an image.  Typically between 16×16 pixels and 32×32 pixels.  You may have to play with the sizing.  I did mine big since it’s easier to resize smaller than it is larger.

4)  Go back to the blogger window and upload your file.  When it finishes, make sure you save the widget.  And that’s it.  Easy peasy, right?!

If you have trouble using blogger’s method, check out this tutorial that has great step-by-step instructions to do it yourself.  There is some coding involved, just so you’re aware.

UPDATE:  You may also want to know that favicon customization doesn’t work in a Chrome browser.  The option is not available yet.  However, it will work in Internet Explorer and Firefox.  I don’t use a Mac, so I don’t know if it’s an option in Safari or not.  The majority of my traffic is from users in an IE browser (47%).  And another 24% are using Firefox.  Only 14% of my visitors are using a Chrome browser (which, ironically, is what I use).  To me, it’s worth having my personalized logo visible to that 71%, even if some people can’t see it.

Enjoy your new favicon!

Krista

  • « Previous Page
  • 1
  • …
  • 164
  • 165
  • 166
  • 167
  • 168
  • …
  • 231
  • Next Page »

I'm Krista. Ringleader here on While He Was Napping, wife to my handsome Mr. Right & momma to my THREE energetic boys, Big J (9), Little J (6) & Little N (4). We FINALLY added a beautiful little girl to our family last December.

I’m knee-deep in Tonka trucks & Thomas trains. I survive our crazy days with Vanilla Coke, Sonic slushies, sweet snuggles and little giggles. When I tuck them in tight & kiss them good night, I get a little time to create & just be me.


It all happened
while (s)he was napping
Want More of My Story?

Privacy Policy

While He Was Napping respects your privacy and is committed to keeping any personal information collected on this website confidential. To find out what information we collect and how it is used or what options you have regarding your information, see our full privacy policy here. Creative Commons License The website found at whilehewasnapping.com and all subdomainsauthored and published by Krista is licensed under a Creative Commons Attribution-NonCommercial-NoDerivs 3.0 Unported License.

Pretty Chic Theme By: Pretty Darn Cute Design