I love peach cobbler. My Mr. Right loves peach cobbler. And Little Monkey, yep, he’s a big fan, too. But I do not love spending 2 hours slaving away in the kitchen, peeling peaches and mixing batter. Especially, since you have to turn the oven on and our AC unit has a hard time without all the extra heat. So, I decided to try an idea I had. It still involved the oven, but only about 20 mins of slaving. I determined it was worth it. I rummaged through my mom’s baking cupboard and snagged a box of yellow cake mix. It was expired, so I figured she’d probably never even notice it was gone. She hadn’t noticed when I told her…
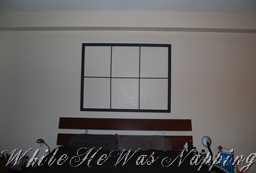
DIY Faux Window Frame
My father-in-law has a piece of property that is kinda his pride and joy. He has spent countless hours fixing and repairing and clearing and mowing and building and in all ways improving this piece of property. On this property is an old train station he has turned into restrooms (which makes camping on this property a whole lot more inviting). In this train-station-turned-restroom building were some old windows. Yeah? See where I’m going with this? So, he gave me a handful of them and I have wanted to put one in our bedroom. Above our bed. But… there where a few issues. One of which is the paint that is one them… It’s probably lead-based. That’s a no-no for pregnancy, so they’ve been off limits since the end of May. Also, they are HEAVY! I have this (irrational?) fear that it would fall on our heads in the middle of the night. That’s not an awakening I want to experience… so, I concocted an idea…
I’ve had the materials for this project for a few months now and it finally got done after I tripped over them one too many times. It was the kick-in-the-pants (bruise on my shin) that I needed to find the motivation to get this done. I love how it turned out! And it’s secured to the wall, so I’m worry free. Now, I just need to figure out what to put in this awesome faux window.
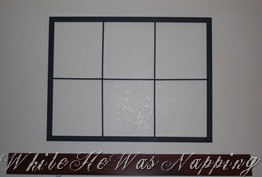
Here’s the How:
1) As mentioned above, this was a “just get it done” project. I don’t have a lot of process photos. I apologize if this ends of being confusing. If you have any questions, please feel free to ask me. You can click on the photos and view them larger.
Supplies:
These will make a 3×4’ window.
– One piece of 8ft pre-primed moulding board
– One piece of 6ft pre-primed moulding board
– Four 3/8”x36” square wooden dowels
– paint in your desired color
– nails and hammer
– staple gun and staples
– wood glue and wood filler
2) Begin by cutting both moulding boards in half and then cut the corners to 45 degree angles, so they form a square when put together. The photo illustrates how the moulding pieces should fit together.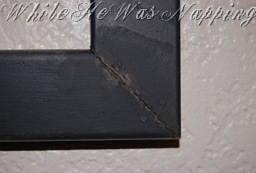
3) Paint the moulding your desired color and let them dry well. I did three coats of paint.
4) Measure the inside length of the short side. Mine was about 30” long. You’ll need to divide that in half and then subtract the width of your dowels. I had two dowels, so 3/8+3/8=3/4. So, I cut two of the dowels into 14 and 1/4 inch lengths. Leave the other two alone.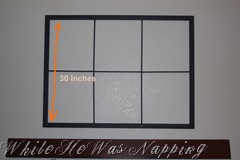
5) Flip the boards over and use the wood glue to glue the corners of the moulding together. I actually ended up using LocTite glue. It held the weight better and dried faster. But, that’s your call. Use the staple gun to secure the corners with a couple staples.
6) Take the two long dowels and place them 15” away from your side boards. Secure them with nails or staples. All of your staples should be on the back of the frame. I did staples because that’s what I had on-hand. I did two staples per dowel, securing it to moulding boards.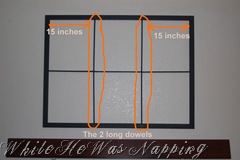
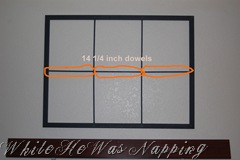
7) Take your 15” pieces and slide them into place between the dowels, making the long rectangles into small rectangles. Secure with more staples and wood glue. Fill any cracks/gaps between the moulding and dowels with wood filler.
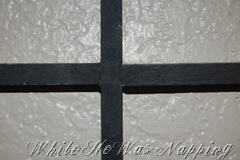
8) Drill small holes in your moulding pieces. Nail your window to the wall. Step back and admire. Ta-DA! Bask in your beautiful faux window. And welcome to my dilemma of what else to put on the wall. =)
Krista
Weekend Wander #48
Wow, Thursday came fast this week. I almost forgot to post the party! But, here it is, with some quick features from last week:
Need some elegant, yet easy, cupcakes? Check out these little beauties over at Sew Delicious. Roslyn did a fantastic job!
While this totally goes against my first instinct, this is something I’m going to have to try. I hate flat soda, but I don’t drink much of it, so my soda more often than not goes flat before it’s all gone. Yuck. Anna @ Ask Anna will tell you how to make it last for weeks.
Ok, thanks to everyone who linked up last week. You’re all amazing and it’s always so hard to pick just a few features. Well, let’s get the party started. You know what to do:
1. Keep it family friendly, please.
2. Don’t link a commercial site up.
3. Mingle. Make some visits to the other party-goers. No one likes a wall flower.
GO!
DIY Mason Jar Soap Dispenser
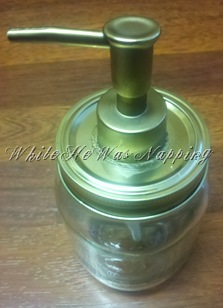
If you follow my Pinterest Boards, you know I’m obsessed with these little babies. I love them! Vintage, functional, and just all around lovely! So, I’ve been scouring thrift stores for just the right soap dispenser top. Of course, it came with the bottle too, but I’m not sure what to do with that yet. For now, it’s sitting on my counter…
Here’s the How:
1) Supplies:
1 pint size glass jar (you could totally up cycle some other jar you already have too…)
1 soap dispenser top (the part you pump)
drill and drill bits
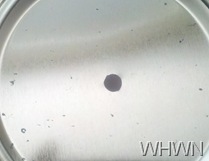
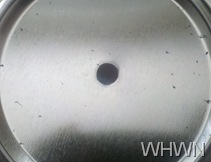
2) This was soo easy I almost didn’t take pictures. Good thing I hit a snag, huh? Ok, first start with a small drill bit (I used a 3/32 bit) and drill a hole in the center of the jar lid or the seal, if you’re using a canning jar.
3) Gradually increase the size of hole by using a little larger drill bit. I used a 9/64 bit and then a 13/64 bit, followed by my 1/4 bit.
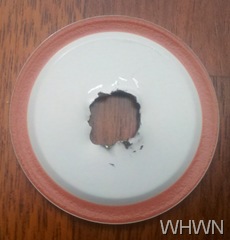
And then, I hit my snag. I didn’t have any larger bits than 1/4” and my husband had the tool box with the big bits in it. So… I took my little bit again and drilled small holes all the way around the diameter of my circle. The hole has to be large enough for the soap pump and straw to fit inside. It wasn’t pretty, but it worked and you can’t see it with the soap dispenser assembled. If I’d had the right sized bits, this would have taken like ten minutes (instead of half an hour).
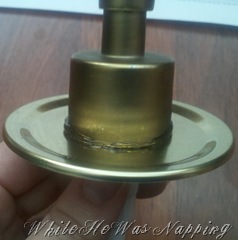
4) After I got my hole drilled big enough, I put the soap pumper through the hole and used LocTite glue to secure it to the canning jar seal. Let that dry well and ta-da! All finished.
Krista
Guest Post: Henry Happened
Hi! I’m Stephanie, a mother of two with a DIY addiction! I blog about stylish and crafty adventures at Henry Happened. I love to create fun accessories and I’m especially fond of making bracelets (like this one and this one).
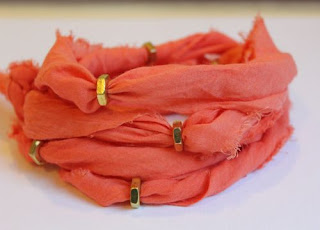
So, when Krista asked me to guest post, I thought, let’s make a bracelet!. I see these fun, colorful wrap bracelets everywhere, and they are sooo easy that even this craft-challenged mom can’t resist.
And seriously J. Crew, $36 for this?
Step 1: Get thee to Goodwill and buy a crazy heinous skirt for $3 (or use something from the closet). Then stop by the hardware store for a dozen or so brass hex nuts at 15 cents each. (You might want to pick up a few extra to make this bracelet.)
And you’ve shelled out about $5.
Step 2: Cut a piece about 4 inches wide. Thinner is okay (not too much or it will just look sad), but you can’t go much thicker because your hex nuts won’t fit. Length can vary – the longer it is the more times it will wrap on your wrist. Also, the ragged edges are cool so don’t stress about hemming or fraying.
Step 3: Tie a knot in one end and twist the entire length.
Step 4: Feed your hex nuts on, spacing them however you want. Don’t glue them on – the width of the fabric will be enough to keep them in place. Plus then you can adjust them after you put the bracelet on.
Step 5: Tie the two ends together in a knot so it forms a circle.
Step 6: Wind it around your wrist! You can move the hex nuts around for a better visual.
I love the chance to wear a bold color. So, obviously, I’m a bracelet person. What types of jewelry do you favor? Thank you for letting me visit here today!! I hope you will stop by Henry Happened and say hi!
Thanks for visiting today, Stephanie! Isn’t that bracelet super cute?! Go check out Henry Happened and be amazed by Stephanie’s other fantastic tutorials! She’s got some great stuff. And come back here tomorrow for some awesome Mason Jar goodness… see you there!
- « Previous Page
- 1
- …
- 155
- 156
- 157
- 158
- 159
- …
- 231
- Next Page »


