I know we’re already a whole week into March, but I didn’t remember how much time a newborn takes up. I figured 29 days would be enough to recover and get settled… HA. Anyways, here is the March subway art. Click the link to download watermark free versions. Enjoy! I am still working on getting the entire set up in my Etsy shop.
Bundles of Baby: Scented Heat Bag
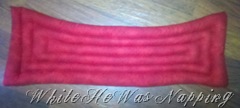
With this pregnancy, my primary complaints have been back pain and some raging migraines. I’m banned off all the good drugs for the headaches, so I spend those days wallowing on the sofa. But my back has been killer this entire pregnancy. Like from day numero uno. KILLER. I’m sure part of that is that I have a two-year old to tote around this pregnancy, as well. It only took me twice of being so stiff and sore at night and hardly being able to move the next morning before this little baby came to light. Meet my new best friend:
Here’s the How:
1) I apologize for the lack of photos of the process, but it’s fairly self-explanatory. You will need:
-Approximately 1/4 yard of flannel
-coordinating thread
-6 cups of rice
-essential oils (optional)
2) You can make your rice bag however large you’d like. I wanted one that I could use all over my entire back all at one time, so long and skinny is what I decided to do. I folded my flannel with the right sides together and sewed together the three open sides, leaving about a three inch gap to turn and fill my bag.
3) I turned the bag right side out. This is where you fill the bag (typically) but, I had a problem. The rice in all my little bags always fell to the bottom of the bag. Thanks for that, gravity. So, I sewed a square swirl pattern onto the bag. This made tubes and ensured the rice would stay put. Here’s the downside to that: the heat pack doesn’t stay warm as long as it would if I could move the rice around in it easier. However, it still serves it’s purpose and actually helps keep the temperature low enough that I don’t overheat (being too hot makes me nauseous and it doesn’t take much when you’ve got your own little heater on board. It also works well for Little Monkey if he’s achy and sore without being too hot). If you opt to put tubes in your bag, I would suggest only sewing together two of the sides and leaving one side open. Then sew tubes down the bag and fill them through the open end. This will make step 5 WAAY easier than what I did!
4) Fill a bowl with your rice and add some essential oil to scent your rice. I used lavender and eucalyptus mint, relaxing and invigorating. This step is optional; but, it can have a slightly funky smell if you don’t scent it. Mix the rice well.
5) Fill the bag with the rice. Because I did the spiral design, filling the bag took a million years. Ok, it probably took a few hours. I had to put in just a little at a time and push it all the way to the end. Then I used straight pins to hold it in place while I put in a little bit more and repeated the process… for hours. This is why I suggested sewing tubes instead of a swirly spiral pattern.
6) After you fill the bag, sew up your fill hole. I just hand stitched it, but you could use a machine. Your bag is now ready to use. Pop it in the microwave for 1-2 minutes, depending on size, and sit back and enjoy the warmth. 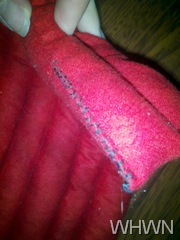
This has worked wonders for my back and I know it has not seen the last of it’s useful days! Here’s to sore-no-more muscles!
Bundles of Baby: Car Seat Strap Covers
So, my Little Monkey has recently moved from a rear-facing to a forward-facing car seat. He LOVES it. But, seriously, who wouldn’t?!? Staring at the seat back every time you go anywhere in the car… BORING!!! Well, with his new car seat the straps look like they dig into his poor little chubby neck. So, car seat straps to the rescue. Now, we had one pair that we used on his infant carrier, but we invested in 2 car seats (one for our car and one for my mom’s car). The strap covers we had before came from Wal-Mart and were a whopping $4. Not that bad, but… Hi, my name is Krista and I have “I-could-do-that-cheaper” syndrome. Also, we got them at a Wal-Mart in Idaho and I couldn’t find any here. So, I decided to just make them.
First, I cut two identical sized pieces of fabric. If I were to do this again, I would make them about and inch or two longer. That’s what I get for being too lazy to measure I guess. Then I pinned them to hem, allowing an 1/8″ seam. Hmm, maybe my subconscious knew they were too short from the very beginning…? If you make them longer, you can allow for a bigger seam. Then, I hemmed all the long sides. Iron the seams and short edges of the fabric flat. It makes it a lot easier to put on the Velcro if the fabric will lay smoothly.
Next, fold the short edges of the fabric in 1/4″ to 1/2″. Use a strip of Stitch Witchery to “glue” the fabric in place. I hadn’t used Stitch Witchery in so long I forgot how awesome it is, definitely something I won’t be without in my sewing supplies ever again… but I digress. If you’ve never used it before just follow the package instructions. It’s pretty simple. However, I will reiterate to place a paper towel between you fabric and your iron. You don’t want to get glue on your iron!
Next, take a strip of Velcro, cut to size, and pin it on top of one of the raw edges that you just glued down. I prefer Velcro with an adhesive back, it seems to help it stay in place while I’m sewing better than just pinning it. I stitched around the edges of the Velcro, although you could just use some heat and bond if you want a no-sew solution. And, since your raw edge is underneath the Velcro, it wont fray. For the other side where the Velcro won’t cover the raw edge, I just did a quick seam to help hold it together before I sewed the Velcro down.
And, Ta-Da! You’ve made a pair of cute, simple car seat strap covers! Easy peasy, right? Just a side note… These are not padded. My little boy still has a lot of his baby fat in his face and the padded set we have sometimes seemed to squash his face when it was getting close to needing to readjust his straps. If you want a set of padded covers Serena at Nap Time Crafts has an awesome tutorial on how to do that. She’s got a lot of other cool stuff too, so if you don’t know her blog yet I highly suggest you check it out! Have fun!
Weekend Wander #70
I’ve missed you all! It’s been awesome having some time off and I am loving all the snuggles and cuddles happening around here, but I sat down at my sewing machine yesterday (only for a few minutes) and it was like seeing an old friend again. Totally worth not eating a hot lunch. That’s what the microwave is for, right? I miss the creating that has been taken over by pumping, nursing, dirty diapers and spit up. By the way, come back next week to meet our new little man. Sans all the aforementioned ick, of course.
Anyway, welcome to the party. I wanna do a couple shout outs from the last few parties. I haven’t been around much, but I have spent my fair share of time checking out the parties while I nurse and pump. So… the most clicked links from the last three parties… in no particular order…
Bundles of Baby: Double Duty Diaper and Wipes Case
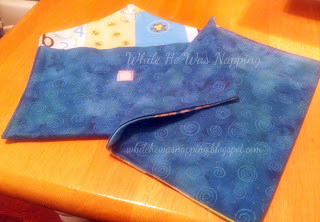
We have two kiddos in diapers at this point. Not ideal, and not what we were hoping for, but the three or four times we tried potty training Little Monkey didn’t even notice (let alone, care) that he’d wet his big boy undies. And potty training is exhausting even when you aren’t hefting around an extra 15 pound belly. So, we decided to wait. But that means double the diapers. Ugh. I have never really been a big fan of the diaper bag. It’s so gigantic and I’m already trying to wrangle a wiggly two-and-a-half year old and a baby in an infant carrier. The diaper and wipes cases are nice for quick trips (you know, like when you’re out of milk and there’s a cake waiting to be mixed… or infant ibuprofen and your kiddo has a fever of 103…oh, and My Mr Right is out of town, of course), it’s a grab and go. But with two kids, we needed something a little more hefty (and with a little more room…)
Here’s the How:
Ok, sorry I don’t have many photos of the process. I lost the battery to my good camera and the camera on my phone was suffering some serious lag issues (like ten seconds to take one photo… and no one can hold perfectly still for ten whole seconds, so a lot of the ones I took were really blurry). Bear with me and, if you have questions, leave a comment. I’ll get back to ASAP with more explanation that will help you understand better. It’s actually fairly simple, but sewing is kind of hard to explain. If you can’t figure it out, let me know.
Supplies-
– 1/3 yard outer fabric
– 1/3 yard liner fabric
– Velcro or other fastener (you’ll need a set of two pieces)
– Thread
– Scissors
– Sewing Machine
Directions-
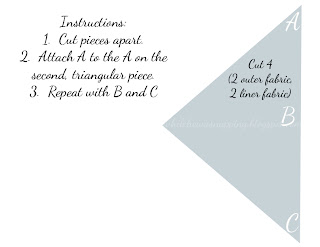
1. Cut out your pattern. I included one below that you’re more than welcome to use. I ended up making mine a little bigger so Little Monkey’s size 5 diapers would fit. The pattern below should fit up to a size 3, no problem. And you could probably get a few size 4’s in there too. It’s two pages. You’ll have to print and tape them together. The first should be the size of an 8.5×11″ piece of paper.
2. Pin one of the liner pieces to one of the outer pieces, right sides together. Repeat with the other set. Stitch as close to the edge as you dare (I did about a 1/8″ seam and then put some Liquid Stitch on the seam to help it hold) around three sides of the pouch. Doesn’t matter which three sides. Snip your corners to reduce bulk and turn your pouches right side out through the side you left open. Stitch up the open side.
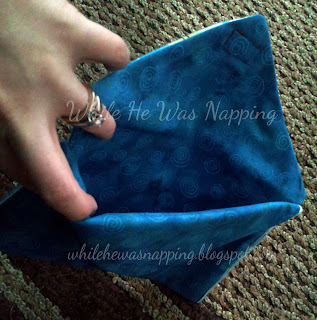
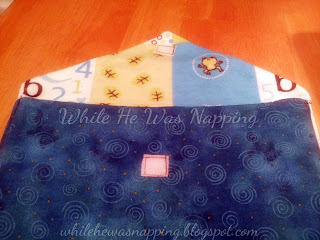
3. Lay out each piece of fabric. Fold the pieces so they create pockets. Determine where you want your fasteners. You’ll have to put one half of the velcro or snap or whatever on the pointy top part. Then fold the flap down and mark where it hits on the bottom part of the pouch. Unfold the pouch and pin the other half of the velcro to your mark. You only want to sew through the one layer, not both or your pouch won’t open. Sew your velcro on. Repeat with the other pouch.
4. Pin the top halves of your pouch pieces together with the outer fabrics touching. Fold the bottoms of the pouches up to create the pockets, like you did in the previous step. Double check that your closures still match up. Sew as close to the edge as you can around the sides and bottom of the pouches. I ended up with about a 1/4″ seam. My sewing machine and needle weren’t quite up to the job of sewing through all 8+ layers of the fabric, so I had to sew on the inside of the previous seam. For this reason, my pouch ended up being a little short for the size 5 diapers. They still fit, you just have to kinda scrunch them up on the end. I already enlarged the pattern a little, so you should be ok.
5. Fill the pouches with diapers, wipes and other diapering accouterments. Bask in knowing you’re ready to run out the door, should the occasion arise. Just don’t forget to grab your supply bag. Or keep it in the car, for those times when you do forget.
* If you’d like the pocket between the pouches to close (to store desitin, powder or hand sanitizer, sew one half of a strip of velcro (or a zipper) across the back side (on the outer fabric) before step 4. I probably would have done this if I’d thought about it before I sewed the two pouches together. Alas, pregnancy brain strikes again. *
- « Previous Page
- 1
- …
- 133
- 134
- 135
- 136
- 137
- …
- 231
- Next Page »


