I have a cousin, my very bestest cousin actually, and she is going to be a teacher. She graduates next May. So, for their Christmas gift I decided to give all her hard work a little shout out!
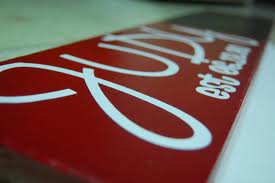
This sign is personalized with a name and wedding date. I think everyone should have one something that shouts out how long they’ve been married to the love of their lives. It’s also got a section painted with chalkboard paint for them to write messages or grocery lists or whatever.
How to make this:
1) I used a piece of 1″x6″x24″ for this project. I primed the board and then spray painted it red. After I was satisfied with the shade of red, I applied a thin layer of modge podge. This step isn’t really necessary, but that’s what I did.
2) After it was super dry (like a night and a day spent drying) I used masking tape to mark off a 10″ area of the board. I then painted inside the tape with chalkboard paint. It took about three coats of that to get it to cover sufficiently. As a side note, before you complete this step, make sure you are doing it on the end of the board that is the smoothest. Or take the time to fill some of the imperfections in your wood before you paint it. I had plans to use the smooth end and then somewhere along the way the board got flipped and the wrong end got painted with the chalkboard paint. It was kind of lame, but I didn’t have time to redo it before we had to deliver it.
3) Then I used white vinyl to cut their name and wedding date out. It was self-adhesive so it was super easy to get it to stick. IF you have already laid down a layer of modge podge, or even the paint, be careful with your transfer medium so it doesn’t pull that up. I had a spot that stuck. It wasn’t noticable to the normal person. My Mr Right noticed it, but he’s oober observant. I can’t ever hide anything from him! He’s also a perfectionist and was also just as disappointed that the board had gotten flipped and the chalkboard painted on the wrong end. Anyway. Cover all of that with another layer or two (or three) of modge podge. If it had been warmer, I probably would have sprayed it with a clear sealant too. But, I opted to forgo spraying paint fumes in the house…
Oh, and if I’d had more time, I would have either sanded out a little dish on the top of the board or drilled a diagonal hole on the side for the chalk to sit in. But I didn’t. Maybe you will. I just said “Merry Christmas, sorry, but you’ll have to figure out what to do with the chalk.”
Ok, if I gave you this gift, stop reading… Thanks! =]
Time: About two hours spent priming, painting and cutting out the vinyl. This was super easy to put together, but it did need to be done in stages.
Cost: This was another piece of my 1″x6″ board. It was less than a dollar for this piece. I did buy spray paint (it was actually for another project but didn’t get used on that, so I used it on this). That was about $1 worth of paint. The primer was less than a dollar’s worth. I already had the vinyl. And the chalkboard paint I got at Wal-Mart for $2, but I didn’t use all of it. I would put this project around $5-7.
Two down… and a whole long list to go.


