Ok, I am definitely not a pro at this blog thing. I’ll be the first to admit it. But, I am the sole force behind While He Was Napping. I design my background, my buttons, my links, the navigation bar, my logo and icon, and the favicon (the little icon next to the URL in the address bar). Everything you see, I did. Now, I’m not trying to toot my own horn or anything, just giving you an idea of how much time and work I put into this. Because I spend so much time doing these things, I have learned a thing or two. I thought I’d share some of my findings with you.
When I want to do something to While He Was Napping, I typically have to Google it. I know a little HTML code, but definitely not enough to just sit down and write out a new element in HTML. Ha, that stuff can be really confusing! You miss one period or bracket and it messes up EVERYTHING! So, pre-written code will totally be your friend. Just make sure you copy every little thing.

Today, I’m gonna walk you through designing your own background:
I cheat when I do my backgrounds. I just don’t have time to make them from scratch, so I will use digital kits I find on the internet (I always give credit to the designers, although I should probably post it permanently instead of in a post). Or I take photos of scrapbook paper/elements I actually have, upload them and then edit and use them that way. My current background is from the Chore Day kit and the Courage kit available at Summertime Designs computerscrapbook.com. Ok, the kit isn’t by Summer. Correen Silke is actually the author. But both of these ladies are SUPER talented. Seriously, these girls are Ah-MAZE-Zing!
Ok, first, you’ll have to download the kits or upload your photos. Then, open up PhotoShop or another editing software. PhotoShop is my preferred program. Open a new project. There isn’t really an industry ‘standard’ as for dimensions on your site. It depends on screen size and since everyone has different size screens, it will vary. You have to decide what you want. The two most common dimensions are 800×600 pixels and 1024×768 pixels. Not very many people have a screen resolution of 800×600, but there are some. It all depends on what you want. Anyway… good luck with that decision (I use 1024×768, in case you care).
Layout your design as you wish. It’s just like scrap booking on the computer! With less mess! That’s my favorite part. If you don’t know how to do this, do some Googling on “digital scrap booking”. Or email me. I’ll answer what I can. When you get it laid out like you want, save it as a .jpg image.
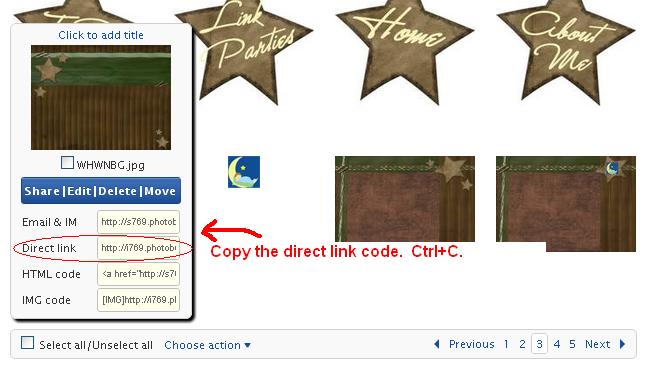
Now, you will need somewhere to host your image. Photobucket or Flickr work well, I use Photobucket just because I had that account before I had Flickr and all my stuff is already there. Photobucket also provides the code is an upfront and easy to access html code for your image. I’m not sure if Flickr provides all that or not. After you sign in, upload the image from your computer to your Photobucket. Save the image to your account. On your home screen, hover over your image. A box should pop up with a bunch of different html codes. Click on the “Direct Link” code and copy.

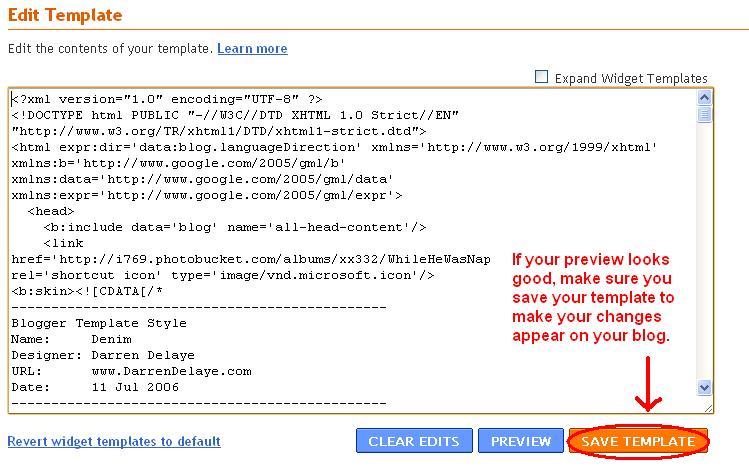
Once that code is in there, hit the preview button to make sure it worked. In editing your blog, the preview button will become one of your most treasured friends.

A new window or tab will open, showing what changes your code has made. In the preview, you should see your new background. If it’s not there, double check your code and make sure it looks exactly like mine does in the photo above.
If everything looks good, make sure you save your template in order for the changes to take effect. Now go visit yourself and admire all your hard work! =]
Good Luck!
