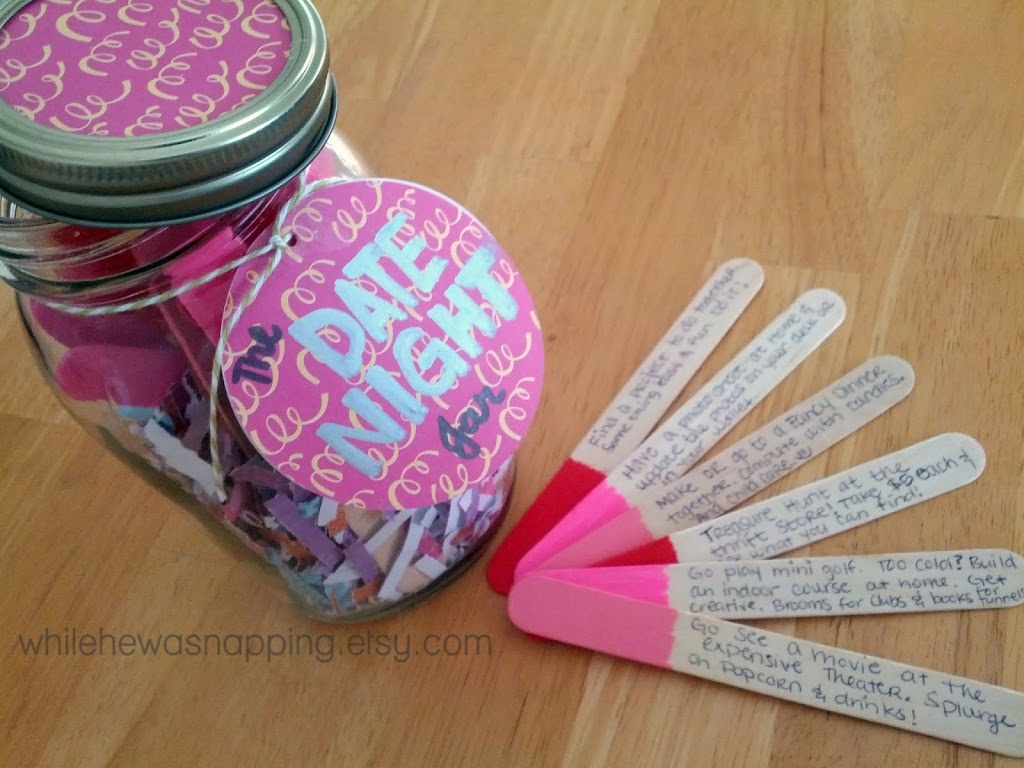
With Valentine’s Day coming up, you might be on the look out for a romantic gift for that someone special… yeah? Well, my fifth anniversary of wedded bliss to my amazing husband is coming up early next month and tradition dictates we exchange gifts made of wood. I asked my husband if there was anything he wanted and mentioned that the fifth anniversary gift theme is wood. He just snickered and made a dirty comment. Not a single mention of anything he wanted. Men. =)
Well, I am a big believer in Date Night. At least a couple times a month. You get so caught up in being Mommy, Daddy, Provider, Nurturer, Housekeeper, Nurse and all the other roles and responsibilities you have to fill that sometimes you forget to be Sweetheart and Lover too. Or is that just me?
I genuinely enjoy spending time with my husband and, while I love being “Mommy”, sometimes I need to just be “Honey”. So…. it’s Date Night to the rescue. But Date Night won’t happen if you don’t make it happen. And sometimes it’s hard to come up with new ideas, or ideas at all, of things to do. And that’s where the Date Night Jar comes into play. Basically, the idea is to have all your date ideas already thought up. All you have to do is pick one and then do it!
DATE NIGHT JAR
Materials:
– Jar
– Fat Craft Sticks
– Ultra Fine-tip Permanent Marker
– Scrapbook Paper
– Markers, Stamps or Stickers
– Paint (I used acrylics)
– Baker’s Twine or other string
Directions:
1. Begin by painting the ends of your craft sticks. I decided to plan a whole year’s worth of dates, 52 to be exact. I knew that we have a budget and that our dates need to not be a cause for breaking the bank. I also knew that every once in a while, you do need a special splurge. And I knew there were going to be dates where we couldn’t pawn off, er I mean… leave the kids. I wanted to plan for all of those occasions. So I decided to paint my sticks three different colors. One for at-home dates, one for inexpensive dates out and one color for our splurge dates. I planned on one splurge date a month (12) and then split the other dates equally (20 each). It worked out quite nicely.
(Disclaimer: the photos are actually of two different date night jars. The red and pink one is one I made my cousin and the red, white and black photos are of an Etsy order I received. That’s why there are so many different colors.)

2. While the paint on my craft sticks was drying, I started gathering date ideas. Everything I could think of that Mr Napping and I enjoy doing together, things we want to try, places we want to visit, ect. This was absolutely the HARDEST pat of the whole project.
3. I made my date night jar from a quart mason jar. I used a 2.5 inch circle punch and punched out a piece of scrapbook paper and used that in the top of my jar to hide the ugly gold seal. You could also paint the ring if you wanted to with a quick light coat or two of spray paint.
4. I punched another 2.5 inch circle and then used a 1/8 inch punch to make a hole to string my Baker’s twine through. This is my label that I tied around the neck of my bottle. It also has the key on it. “Key” as in the code breaker for the different colored sticks.
5. Then came the daunting task of writing down all 52 dates. Actually, it wasn’t that bad. I just worked on it while watching TV after my kids were asleep. Because guess what kids like to put in their mouths…? Uhm, yeah, sticks. And if they are painted and have ink on them, all the better, right?!
6. Then, I put all the sticks in the jar, tied it up all cutesy and got it gift-giving ready. I made my first jar for my cousin and her hubby for Christmas. I’ve made a couple as Etsy orders… P.S. You can also purchase your own Date Night Jar from my Etsy shop. I’ll do all the work and you get to have all the fun.


