Hey, hey everyone! Did ya miss me? We are finally back from our… let’s call it a trip, because vacation implies lying on beaches and nice, relaxing activities with happy children. We did enjoying seeing lots of family and friends, but it was a long time to all sleep in the same room, live out of suitcases and sit in the car all together and all STUCK. I wouldn’t trade the last couple weeks for anything, but I might hesitate a little longer the next time we start planning to be gone for so long.
Part of what kept me so busy was entertaining our kids in the car. Let me say upfront that they were awesome, all things considered. 1300+ miles in a car seat is a lot for anyone, especially wiggly little boys. Especially, MY wiggly little guys… they NEVER, EVER hold still. Not even when they are asleep. Sound familiar, anyone? So, how did I do it you ask? Well, buckle up (hehehe) and I’ll tell ya. This is the first in a little mini series titled “Kids on the Road”. Throughout the series, and over the next couple weeks, I will go through planning and organizing your trip, what and how to pack, snacks – keep your food costs budget-friendly, entertainment and activities, potty breaks and rest stops, and car organization. I can’t promise a perfect road trip, but I can promise an easier road trip.

First up is planning your trip. Things will go more smoothly if you have a plan! I cross my heart and hope to die that this is true! I am a list-maker; but, even if you aren’t, a list can save you some serious frustration later on. I actually tried an experiment one time: We went on a weekend-long camping trip and I didn’t make a single list. It wasn’t a total nightmare or anything, be we did forget a few things. The most frustrating part was the things I forgot, but had thought about getting and just got distracted with the madness that is packing before they were put into suitcases and bags. Usually, I carry a small notebook around while packing for a trip and, when I think of something I need to grab, I can write it down. The worst item I forgot on our camp-out… the chocolate for s’mores. It’s just not the same without chocolate… Lesson learned. Make the list(s)!
Lists you may want to compile:
– For Baby
– Individual Packing List
– Beach Trip
– Camping Trip
– Day Trip
– Food List
– Toys & Other Entertainment
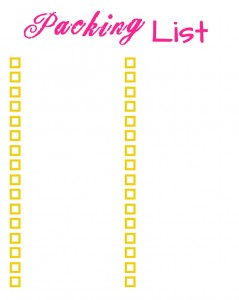
Right click the image and open in a new tab or window, then “save as” to your computer and print as many copies as you want or need.
If you want a little more guidance and a little less work, you can get a pre-written set of printables in my Etsy Shop. The printable pack includes six lists: for baby, camping, day trips, beach outings, a basic individual list for personal items, and a blank list. All include basic items to complete each list, as well as blank spaces for you to add any extras or favorite items. Items can be downloaded instantly after you submit payment – even if it’s 3:30 in the morning.
I like paper lists, but there are lots of digital ways to compile your lists as well. Mr Napping is a big fan of the digital method. Typically, he uses his cell phone and a basic notepad app. Sometimes, he’ll just compose an email and use that as his list. There are also packing list apps (for various costs), but in my brief search for a free app, I didn’t find one I really liked. Perhaps some of the paid apps are better.
If you’re kids are older, you can hand them a list and let them do their own packing. Oh, how I look forward to this day… {sigh}. They can physically check off each item as they pack it, you can be fairly sure the items actually are packed (depending on the responsibility level of your kids) and you don’t have to pack them! YAY!
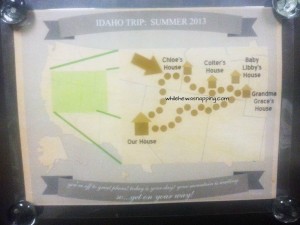
Another major part of planning is mapping out your route. Our last trip took us in an odd-shaped oval. It was helpful for Monkey to know where and when we were going to different destinations. I made him a little map that he could tick off the miles as we drove them. It was a huge help in the “Are we there yet?” game.
There are several maps available at Mr. Printables that offer lots of possibilities. I used the US map found at I Heart Family Travels. I pulled it into Photoshop and then created a blown up layer of the area we were going to be traveling in. Then I MapQuest-ed the directions and mileage and added dots onto the blown-up layer in Photoshop approximately every 50 miles of our trip. I also added all the major stops we’d be making. This was great because Monkey knew where we were, were we’d been and were we were still going. Since it was such a long trip, it helped him figure out how much longer until we went home too, which cut back on the occasional “I wanna go home” tantrum because he knew we had to go to all the checkpoints before we went home.
Sorry the photo quality isn’t very good, but hopefully you get the idea. The arrow was just printed on card stock, laminated and then I used a piece of masking tape to stick it to the laminated map. I kept a strip of tape on the back of the map and replaced the tape on the arrow when it quit sticking. I also stuck a couple strips of tape on the map and taped it to the window. The map acted as a sunshade too. Next time I would attach some cheap suction cups to the map – easier to move the map around to block the sun and no tape goo residue to worry about sticking to the windows.
Planning is a critical part of any trip and will make the rest of your trip go more smoothly. I promise it will be worth it.
Never miss a thing:


Join the newsletter for exclusive content and giveaways!
