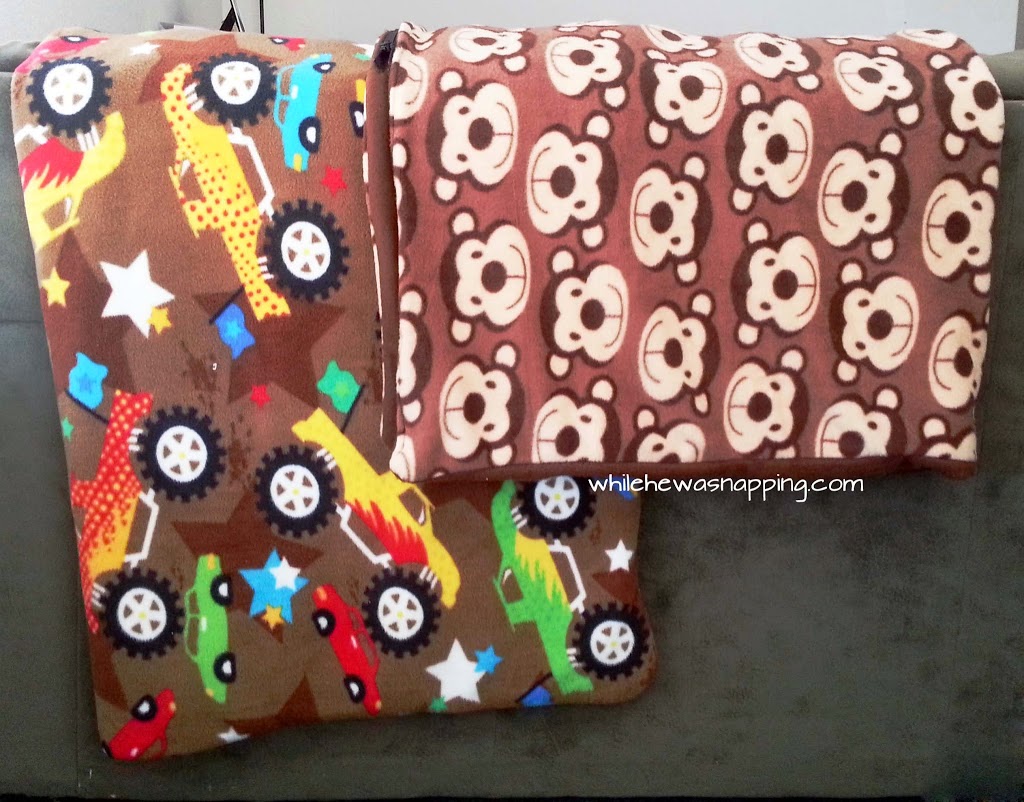
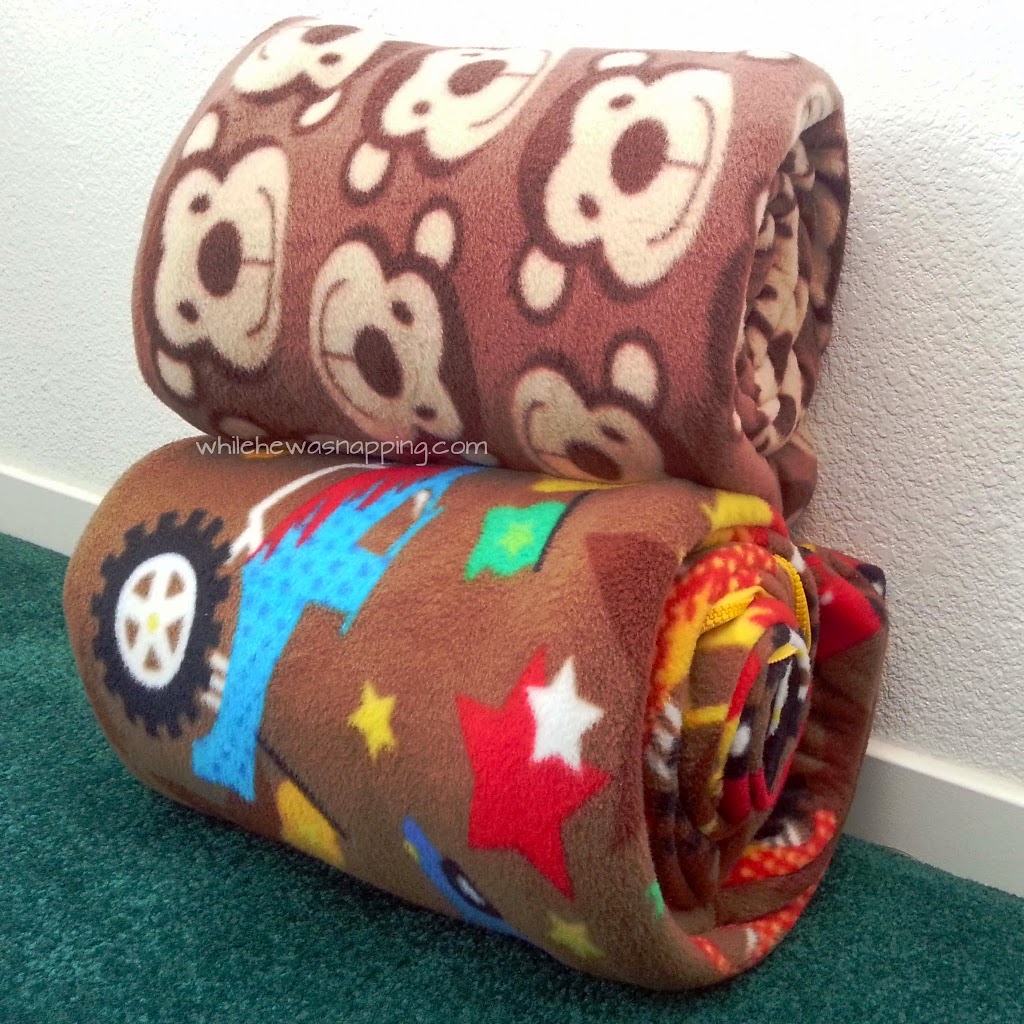
Okay, so I’ll be straight up and totally up front here. This tutorial isn’t amazing, partially because I don’t really have a lot of process photos; which really are quite vital to a sewing tutorial, in my opinion. This was a project that I had planned for a year or more and just never got to it. It wasn’t difficult, I just never did it. However, two days before Christmas, Mr. Napping gave me the push I needed and I jumped right into it. Yeah, two days.
Despite the lack of photos (I was trying to get them done so fast I didn’t take the time to photograph the process), these turned out so dang cute that I had to share them! I tried to include a few graphics to help you get the idea, but if you have questions, please feel free to ask!
These DIY Fleece Sleeping Bags are pretty easy – two straight (straight-ish, in my case) seams on one bag and four on the other. If you can muster up the courage to take on that zipper, it’s a walk in the park (really, zippers aren’t that hard, promise!). Each DIY Fleece Sleeping Bag took me about 2-3 hours to complete, but sewing is not something I am super skilled at, and the majority of the time was spent pinning things on the floor. And I was six months pregnant and didn’t move very fast to begin with. Hehe.
DIY FLEECE SLEEPING BAGS
Materials:
* Of course, you can adjust the fabric length for a larger or smaller sleeping bag. I used a no-sew fleece blanket kit from Jo-Ann Fabric and Craft Stores. (I am not being compensated for this project, the link, any other purchases made from this site or this post. The link is to help you get a clear picture of the materials I used. You could also buy fleece off the bolt.) If you use a 50% off coupon (or snag one while they are on sale now for 50% off!) you can make these for less than $20.
– No-Sew Fleece blanket kit (Mine were the smaller 48″x60″ kits and included both the patterned fabric and the coordinating solid color). If you buy off the bolt you’ll need two pieces of fabric, both in the same measurements (check that your fabric is the same width).
– Coordinating 36-inch plastic “Sport” separating Zipper (you can go longer, but that was the longest I was willing to pay for… long zippers get pricey quickly!)
– Sewing Machine, thread and scissors
– Straight pins
Directions:
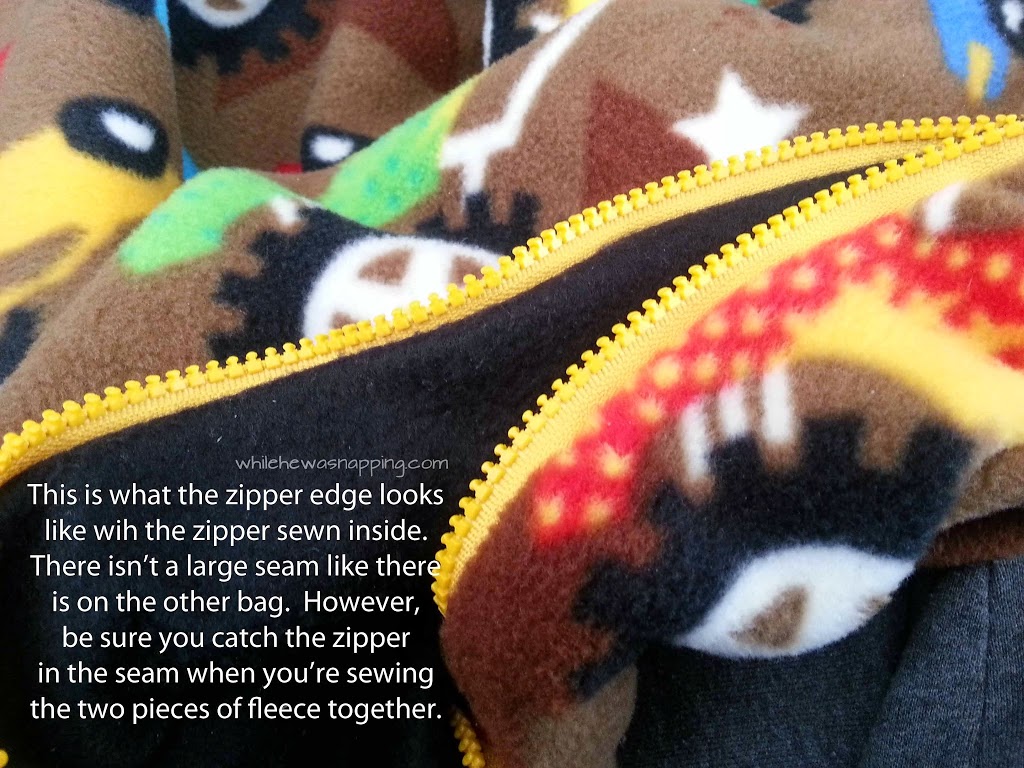
* I actually used two different methods for these. The first bag I sewed together and then put in the zipper. The second bag, I sewed the zipper right into the bag. The first one was a little easier, because it was a one-step-at-a-time process. The second one combined sewing the fabric together with inserting the zipper, and I actually put the zipper in backward and had to clip the ends, re-thread the zipper and then secure the ends so the zipper didn’t come off. Take a look at the finished photos below and decide which method you prefer.
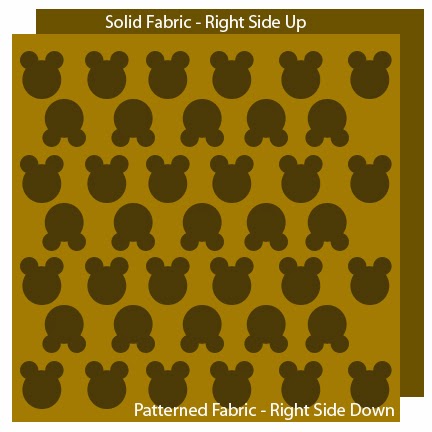
– Lay the first fabric piece on the floor, right side up and then position the second piece over the top of the first, right side down. If you can’t tell the right and wrong sides apart, just pick one. It’s not going to change the outcome much.
– Pin the fabric together. I’m usually pretty stingy with pinning, but I would suggest being more liberal with this project. The fleece is slippery and tends to move around a lot when you’re sewing it together. If you’re going to put the zipper in now, pin the fabric together, fold in half lengthwise, then separate and pin the zipper between the two layers at the same height on each side. The zipper will be completely inside the blanket, between the two layers.
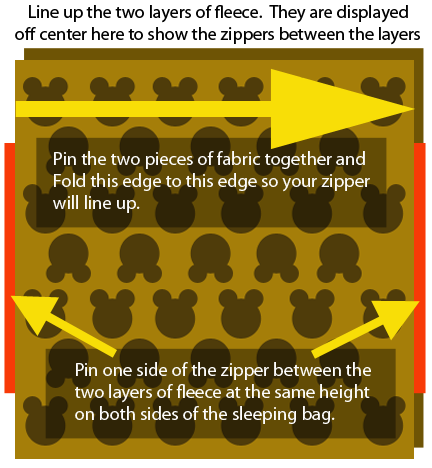
– Sew the two pieces of fleece together, but leave 6-12 inches open so you can turn the sleeping bag. The fleece is slippery and had a tendency to slide around. Use extra straight pins if you need more help holding it all in place.
– Turn the sleeping bag through the hole and then tuck the edges in and sew the hole closed.
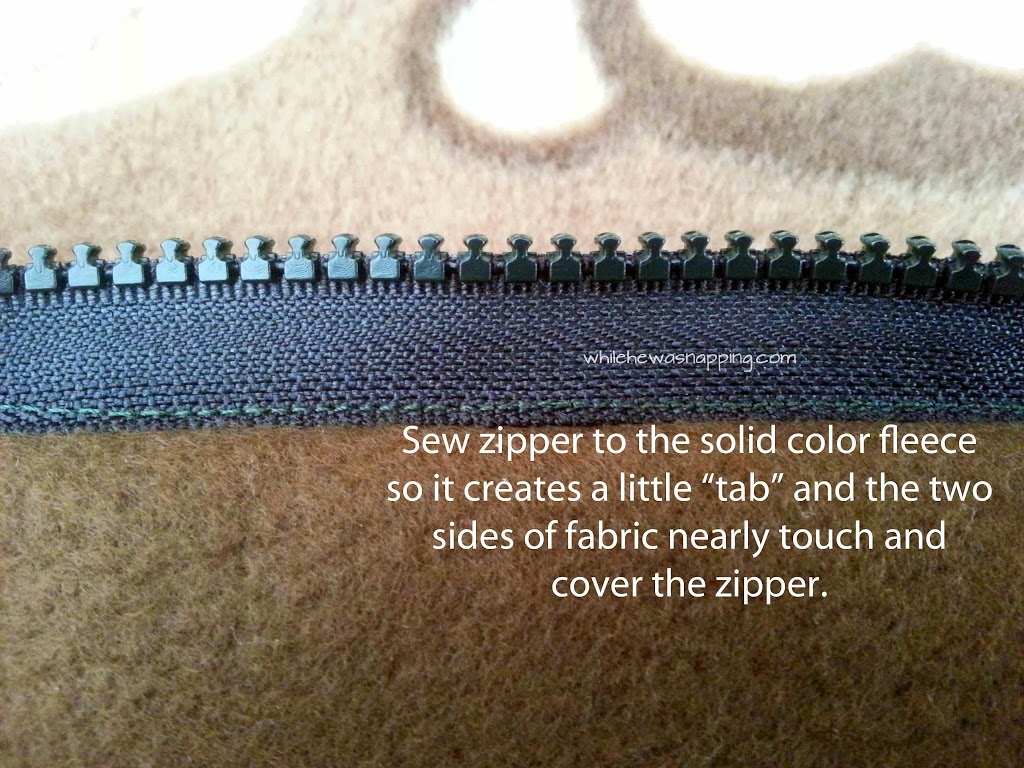
– If you’ve already sewn the zipper in, line up the zipper pieces and zip it back together. If you haven’t attached the zipper: fold the bag in half, line up the edges and pin the zipper in place with one half of the zipper on each side the bag. Sew the zipper to the bag. Zip the zipper back together.
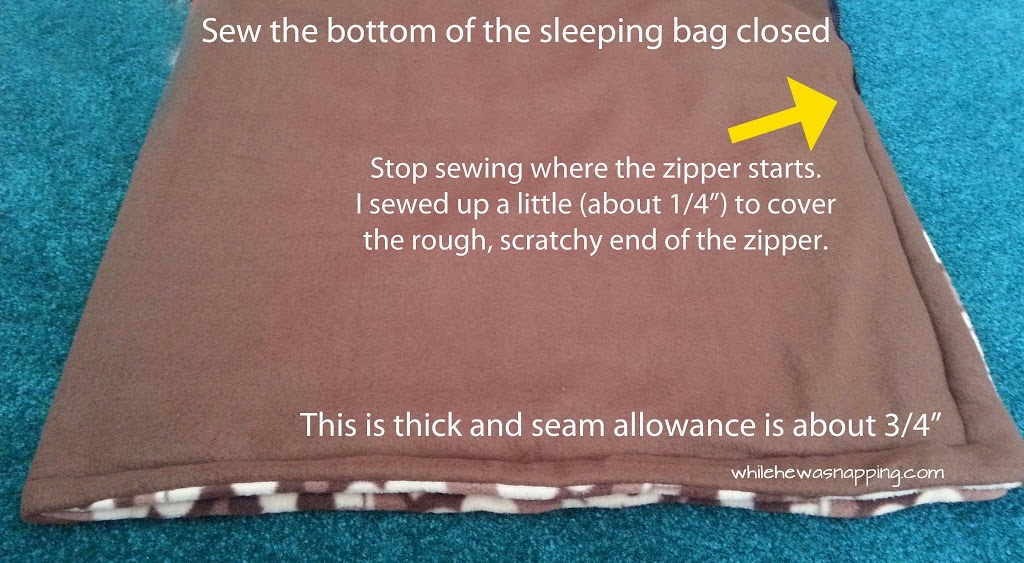
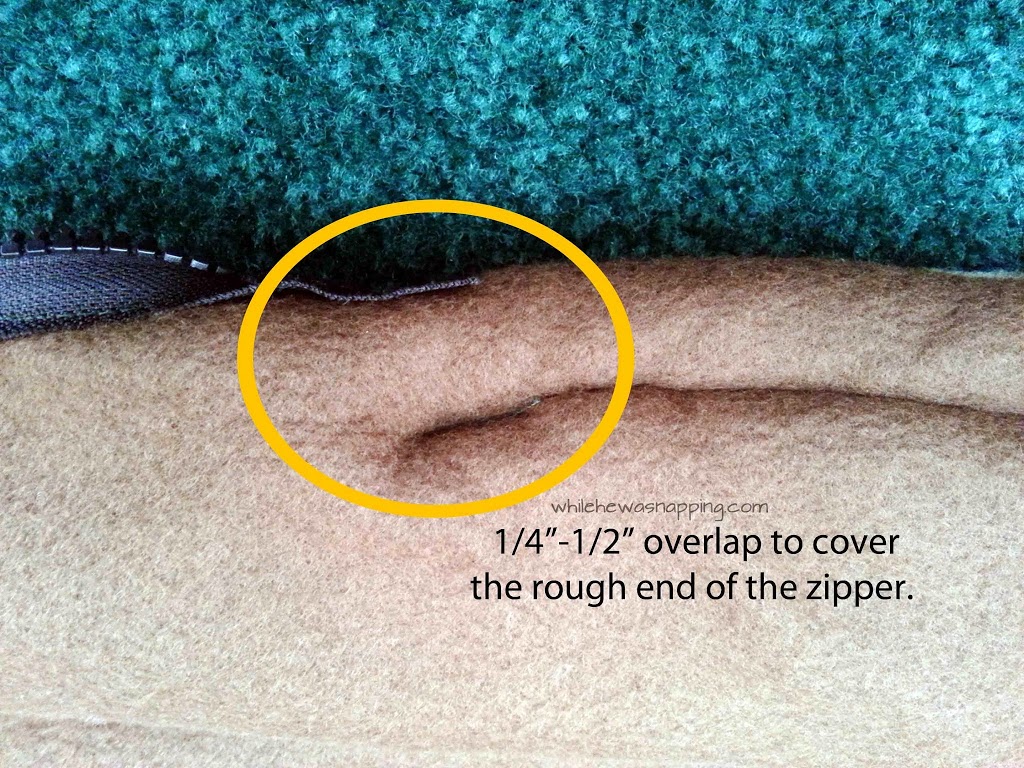
– With the zipper zipped up, flip the bag inside out (so the solid fleece is on the outside, most likely). Sew up the bottom and side of the sleeping bag. I sewed up high enough to cover the sharp, rough edge of the bottom of the zipper. That should keep my boys from getting scratches and hopefully keep some of the cold air out too.
– Flip the bag right side out and press all the corners out. That’s it. When we’re storing them, I just use a piece of string to hold them closed. You could attach some ribbon to the bottom of the bag so you always have ties when you need them. I will probably do this… eventually, some day…
These are, by no means, cold weather sleeping bags. But they were perfect for when my niece got married two days after Christmas and we had a house full of people. The boys ended up having a “sleep over” on Mom and Dad’s bedroom floor. Total charm. Neither kid got cold and Big J said “Mom, that’s a perfect bed for when I sleep on the floor.” My boys love to lay on them for movie nights too. These DIY Fleece Sleeping Bags are a total hit here… which means I’ll have to make more if we have more kids… What have I got myself into?!

