While He Was Napping

momma gets stuff done

  • Home
  • About
  • Archive
  • Do It Yourself
    • Crafts
      • No Sew
      • Painting
      • Paper Crafts
      • Repurpose Projects
      • Vinyl
      • Washi Tape
      • Kid’s Crafts
      • Fonts
    • Sewing
    • Decorate
      • Home Decor
      • Holiday Decor
    • Celebrate
      • DIY Gifts
      • DIY Your Party
  • Recipes
    • Beverages
    • Appetizer
      • Bread
      • Other Appetizers
    • Snacks
    • Main Dish
      • Meat
        • Chicken
        • Beef
        • Pork
        • Seafood
      • Vegetarian
      • Slow Cooker
      • 30 Minute Meals
    • Dips & Sauces
    • Salads
    • Pasta
    • Soup
    • Dessert
      • Cookies
      • Brownies
      • Cupcakes and Cake
      • Box Mix Recipes
      • Other Sweet Treats
    • Breakfast Food
      • Pancakes
      • Waffles
      • Muffins
      • Other Breakfast Food
  • Family
    • Babies
      • Pregnancy
      • Newborns
      • The 1st Year
    • Toddlers
    • Preschoolers
    • Kindergartners
    • 6-8 Year Olds
    • The Grown Ups
      • Date Night
      • Romantic Gifts
    • Self Care
  • For the Home
    • Cleaning
    • Organizing
    • Emergency Preparedness
  • Travel
    • Travel Tricks & Tips
    • Traveling with Kids
  • Tech & Gadgets
    • Must-Have Apps
    • Techy Home Appliances
    • Gadgets & Electronics
    • Blogging Tips
  • Printables
    • Posters
      • Quote Printables
      • Subway Art Printables
    • Printable Organizers
    • Printable Journals
    • Learning Printables & Worksheets
    • LDS Printables
  • Holidays
    • New Year’s
    • Valentine’s Day
    • St. Patrick’s Day
    • Easter
    • Cinco de Mayo
    • Mother’s Day
    • Father’s Day
    • 4th of July
    • Back to School
    • Halloween
    • Thanksgiving
    • Christmas
    • Holiday & Seasonal Printables
You are here: Home / Travel / {Kids on the Road} The Everything Pouch Road Trip Bag

July 23, 2013 by Krista

{Kids on the Road} The Everything Pouch Road Trip Bag

Find more {Kids on the Road} posts HERE.
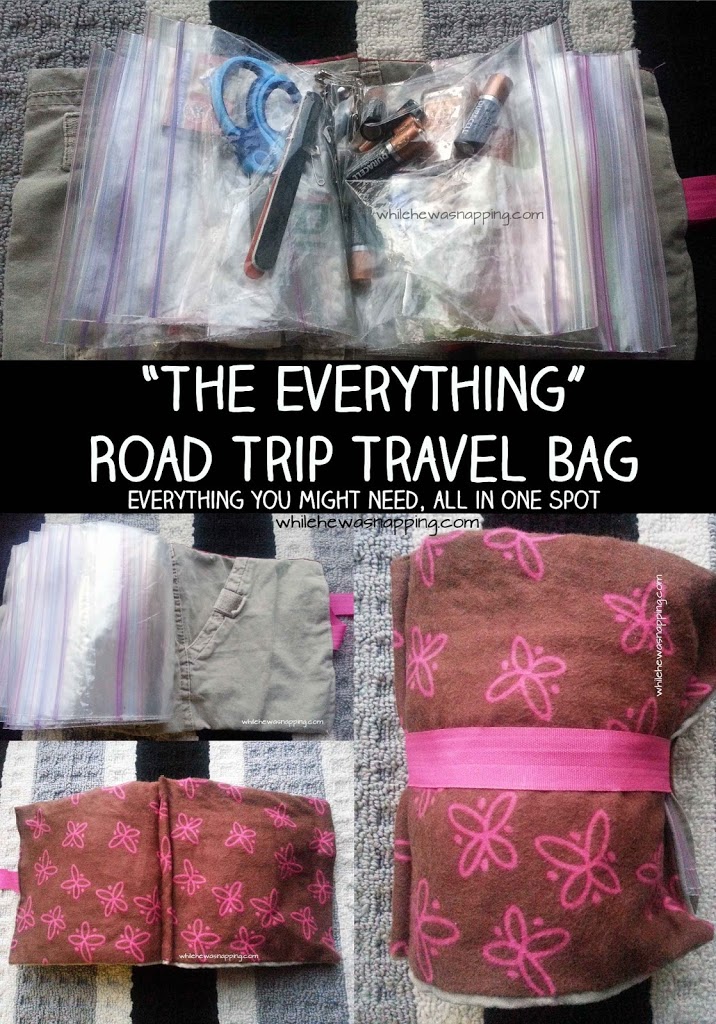
Today’s {Kids on the Road} is an easy little project.  That was a total lifesaver.  I found the idea on DIY Home Sweet Home (along with a ton of other great ideas, you should definitely check it out!).  Jamie called it the “essentials holder.”  I called it the “Everything Bag” or the “road trip bag”.  I took the idea and modified it a bit.  Some scrap fabric, a bit of ribbon, some zippy bags and about 30 mins was all it took.  You ready for this?!
THE EVERYTHING POUCH
ROAD TRIP BAG
The-Everything-Road-Trip-Travel-Bag-Pouch1

Materials:
– Old shorts/pants
– Scrap fabric ( approximately 6″ tall and 14″ wide.  Measure your zip bags to be sure they will fit.)
– Ribbon
– Zip top bags
– Thread and Sewing Machine
– Scissors/Rotary Cutter

Directions:
– Cut the scrap fabric to fit around your zip top bags (approximately 6″x14″).  Be sure to allow for seam allowance and approximately 3/4″ of an inch to sew the baggies in place.  Just a basic rectangle.

– Cut the shorts/pants to the same size as the scrap fabric.  You can use another piece of scrap fabric instead of the shorts, but I liked the idea of having the pockets on the inside.
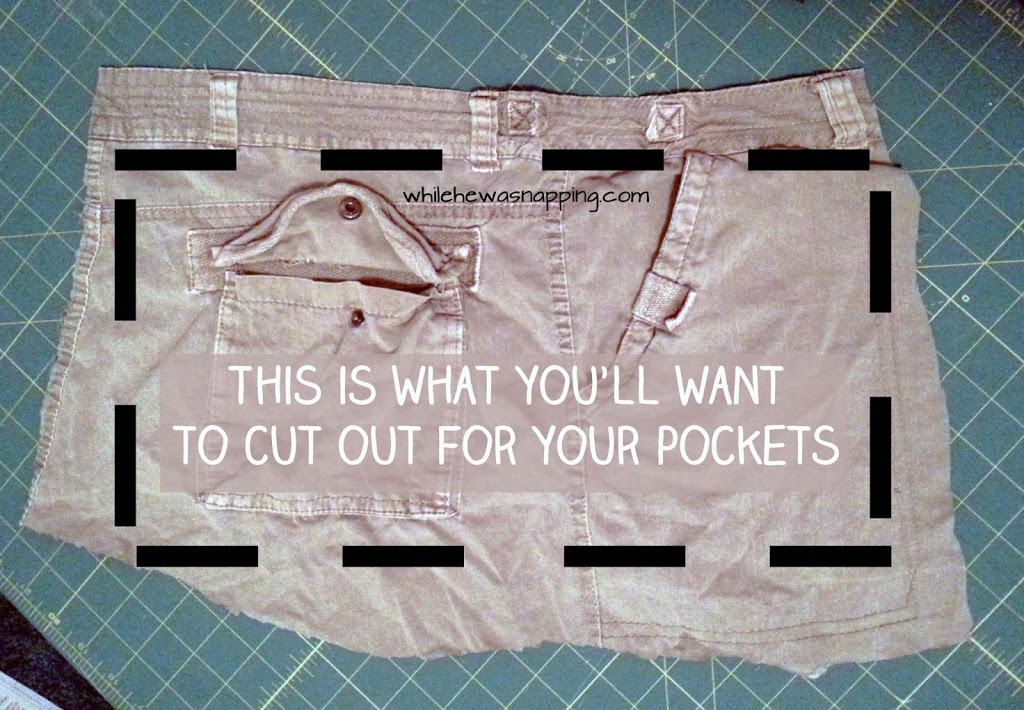
The Everything Bag

– Place the right sides of the fabrics together and straight-stitch three of the sides together.  Press the seams and flip the fabric right side out. (Sorry for the lack of photos… apparently I was in “project mode” and forgot to get pictures of this part).

– Cut a length of ribbon approximately 18-24″ and place it inside the open seam.  Fold the seam and straight stitch it shut, sealing the ribbon inside.  For a road trip bag that will stay together a little better, make two ties by cutting two lengths of ribbon and placing each approximately an inch and a half from the ends of the pouch.
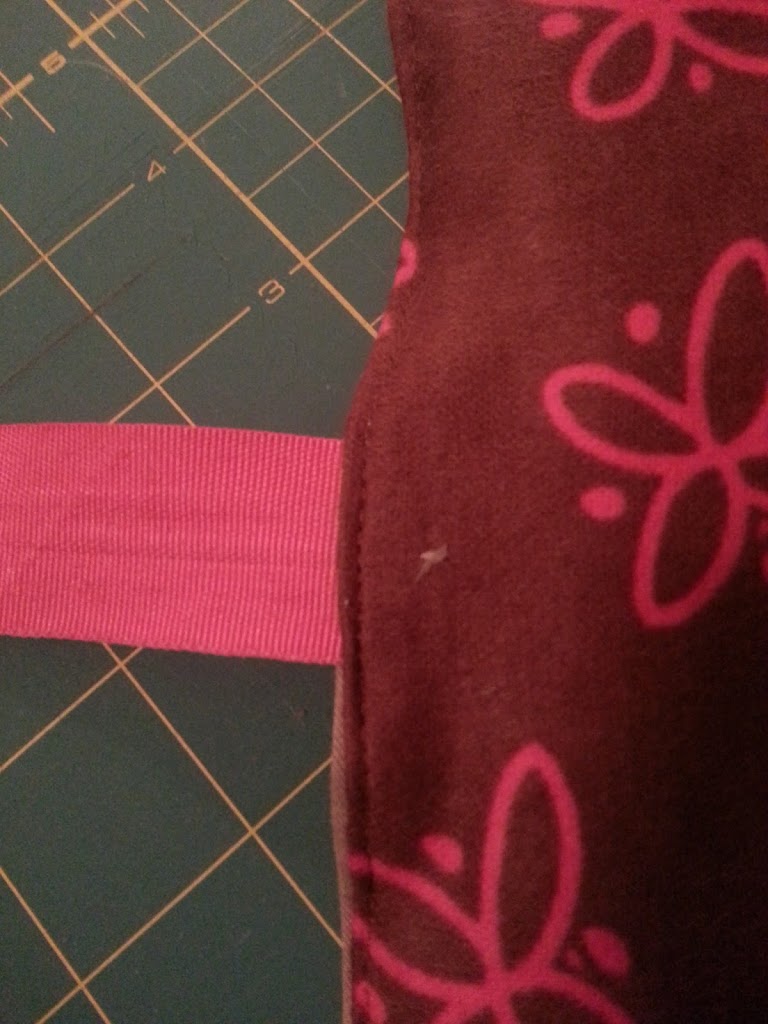
The Everything Bag


–  Decide how many baggies you want to include in your road trip bag and count them out.  Lay them out with all the zippy sides together.  I ended up having to pin the bags to the pouch to keep them from sliding so badly while I stitched them to the road trip bag.  I used sandwich -sized bags.
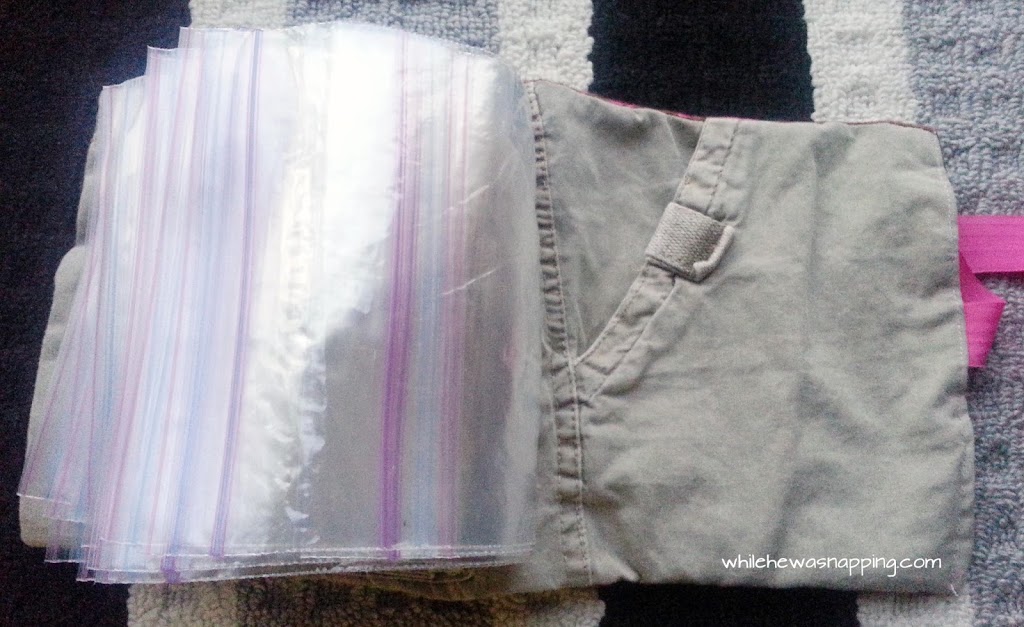
Ziploc-Bag-Holder

– Fold the pouch over on the bags, closing them inside and sew a straight seam up the outside of the pouch.  It will make a little tab on the outside of the bag.
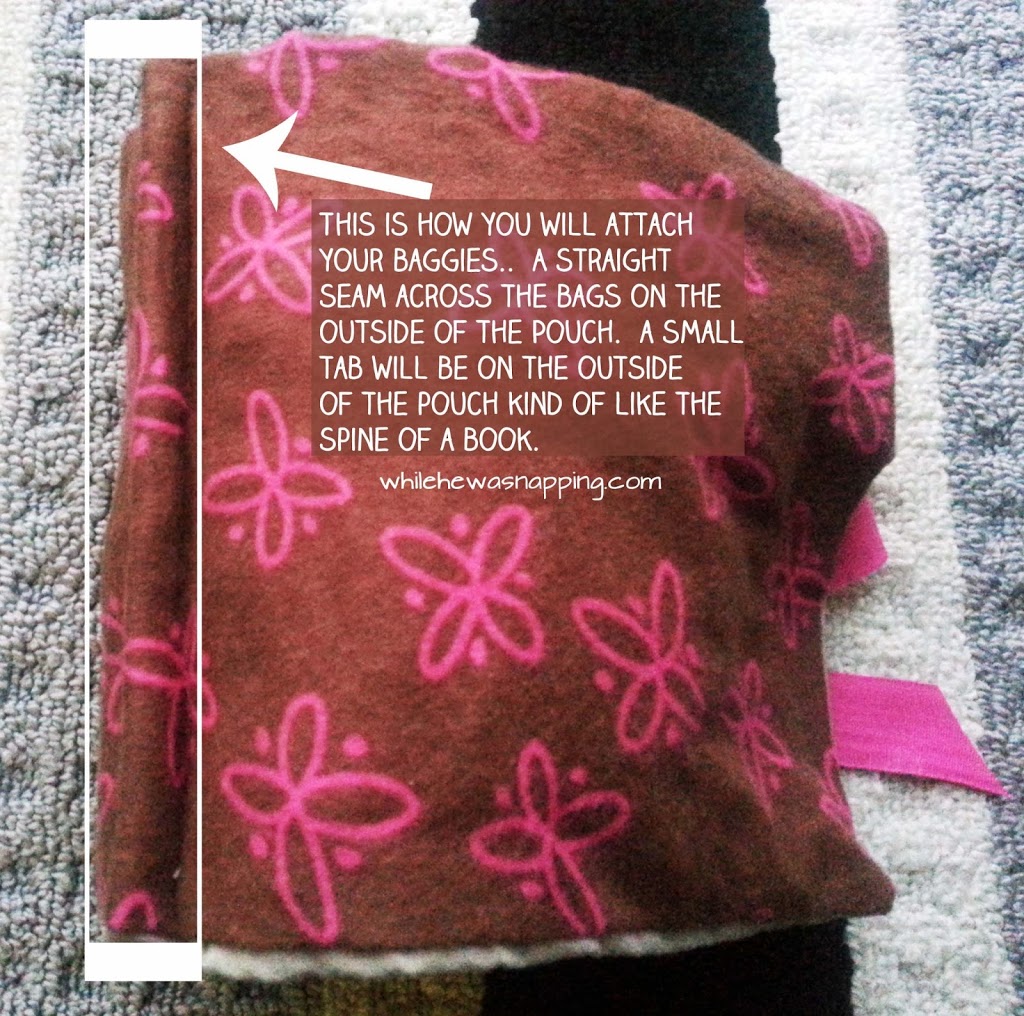
Road-Trip-Bag

– Sew a long (I did about 6″) strip of Velcro on one side of the ribbon.  My ribbon was long enough that it wrapped back on  itself, even when the road trip bag is full, so both of my Velcro pieces are on the ribbon.  I would suggest filling your bag before you attach your other piece of Velcro so you know just how much space inside the pouch you’ll need.  This placement will make it easier to replace the Velcro/ribbon if the time ever comes.  I’ll just have to un-stitch a small portion of the side seam, replace and stitch it back up – rather than worrying about any picking of my actual fabric.

I would also suggest putting the “hook” side facing toward the road trip bag (but actually located on the ribbon) and the “loop” side facing out from the road trip bag.  This way, you won’t get scratched by any exposed Velcro, because it will be the softer loop side and not the scratchy hook side.
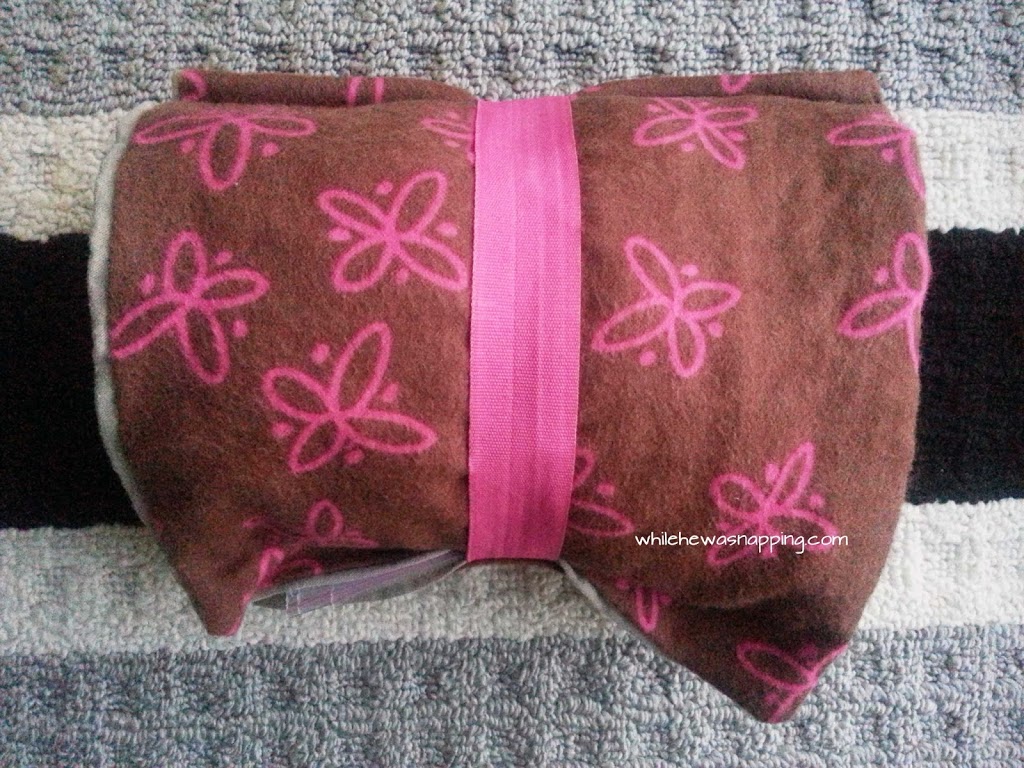
Everything Bag

That’s it.  You’re finished!  Now just fill up those baggies and stash the good stuff away for when you need it.  It is such a convenience to have all those little “needs” all in one place, easy to get to and even easier to find.  And pick up is a cinch.
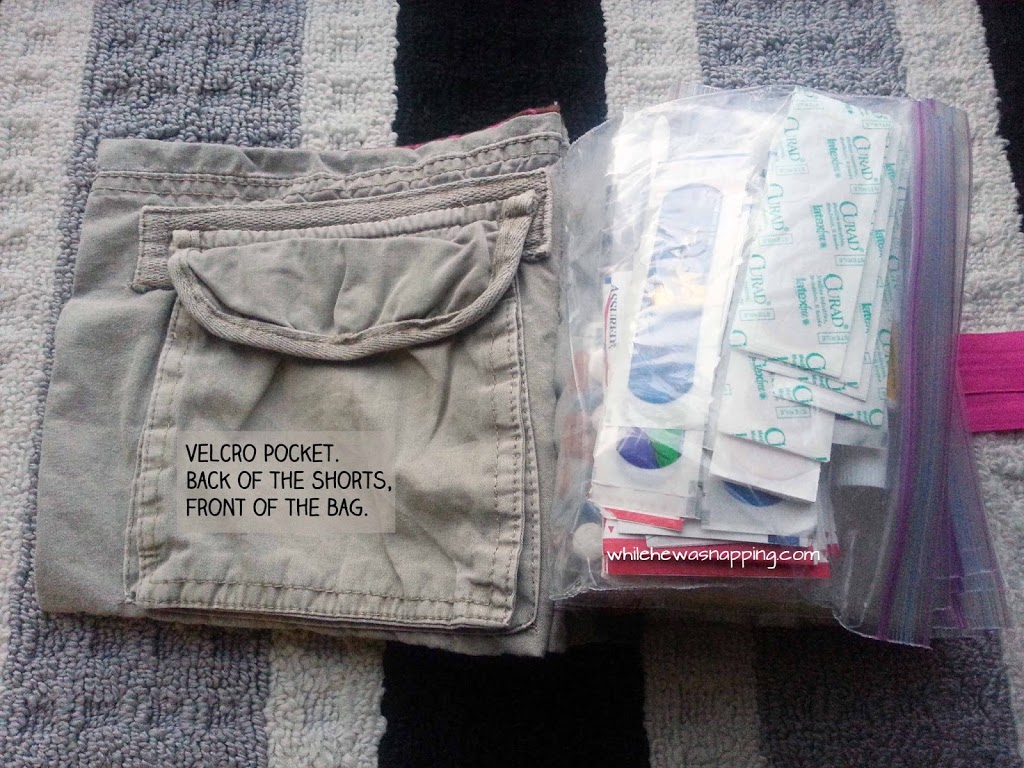
DIY-Road-Trip-Pouch

Need some ideas of what to fill those baggies with?  Here’s the goodies I stashed in mine:
– bandaids, first aid ointment and alcohol wipes
– toothpicks and flossers (stray popcorn kernels are one of my biggest pet peeves!)
– tylenol, ibuprofen, and excedrin – make sure you have dosing directions and amounts on all medications in case you need the information later.
– antacids
– chapstick, Tic Tacs, rubber band and a few bobby pins
– nail file, nail clippers, safety pins and safety scissors
– small box of matches and a butane lighter
– extra batteries for devices commonly used
– super glue
– small bottle of lotion, hand sanitizer, and anti-itch cream
– feminine hygiene needs
– Q-tips and a small pair of surgical scissors
– extra empty zip bags
– a cold compress and small fabric bandage (Ace bandage – I unrolled it and folded it so it would fit better)
– a small screwdriver and bit set
– an eyeglass repair kit
– pen, pencil and paper

Hopefully, you wouldn’t need to use all of these items on a single vacation, but it is extremely nice knowing: one, you have them if you need them.  Two, you know where they are.  Three, it’s compact enough to be packable, but not so small it gets lost.  If we got lost somewhere and needed to abandon our vehicle, this is one thing I would take with me and I wouldn’t even complain about having to carry it.


Thanks again, Jamie, for the inspiration!  Check out Jamie’s original project at DIY Home Sweet Home.

This post was written by Krista and originally appeared on While He Was Napping.

I'm Krista. Ringleader here on While He Was Napping, wife to my handsome Mr. Right & momma to my THREE energetic boys, Big J (9), Little J (6) & Little N (4). We FINALLY added a beautiful little girl to our family last December.

I’m knee-deep in Tonka trucks & Thomas trains. I survive our crazy days with Vanilla Coke, Sonic slushies, sweet snuggles and little giggles. When I tuck them in tight & kiss them good night, I get a little time to create & just be me.


It all happened
while (s)he was napping
Want More of My Story?

Privacy Policy

While He Was Napping respects your privacy and is committed to keeping any personal information collected on this website confidential. To find out what information we collect and how it is used or what options you have regarding your information, see our full privacy policy here. Creative Commons License The website found at whilehewasnapping.com and all subdomainsauthored and published by Krista is licensed under a Creative Commons Attribution-NonCommercial-NoDerivs 3.0 Unported License.

Pretty Chic Theme By: Pretty Darn Cute Design