First, I want to thank everyone who left their congratulations on our big news. We are definitely excited and I am counting the days until the temps drop below 90 degrees here! It’s killing me! My nesting instinct is in high gear already and My Mr. Right just rolls his eyes at each new projects I take on. Mostly because he knows I’ll run out of energy before I complete it and he will have to help me. But, he’s amazing and always steps up. I have some fun stuff along the baby theme coming up, so be on the look out for that. Now, let’s get down to business.
Being a busy momma, I have, on more than one occasion, run out the door with my purse flung over one shoulder, the diaper bag over the other and Little Monkey tucked under my arm while my other hand fumbles for the keys or the Sippy Little Monkey thought would be fun to throw or the toy slipping out of the diaper bag, all the while running down the stairs and up the hill to the parking lot.. After everything is in the car, the seat belts are buckled and our house is in the rearview mirror I realize, “Shoot, I never ________!” Insert a variety of activities in the blank. Finished my make-up, finished straightening my hair, put eyeliner on both eyes, found my matching sock (or knee high, if we’re on our way to church), painted the rest of my toes (which means some of them are painted… and some are not… new trend? I think not).
As I’ve mentioned before, My Mr. Right travels a lot with his job. So, errands are done with Little Monkey and, if you have any experience with two-year olds, you know that their patience for sitting in a cart at the store or the hot car seat in the car is always ten times shorter than your errand list. I try to run errands in the morning so that we are home in time for lunch and Little Monkey’s nap time. In the rush of getting up and getting breakfast and dressed and ready, I always seemed to get shorted on some part of my routine. Forget to brush my hair? Yep. Mascara on only one eye…? Yeah, uhm, that one was awkward since I realized before our first stop and had 6 stops to make. The looks I got were kind of finny though. It’s simple things, but things that make a difference. I got tired of being the harried, frazzled-looking mom while running errands. The pity looks got old. So… I came up with the emergency kit. However, this baby doesn’t have band-aids, antibiotic ointment or cold compresses, no sirree. Not that those things are bad. But, this is Momma’s Emergency Kit.
Here’s the How:
1) You will need:
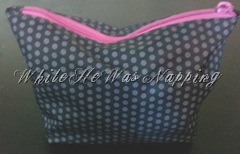
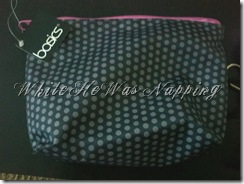
– A container of some sort. I found my bag at Target in the travel-size products section. It was a whopping $.99 and they had several designs to choose from. I, myself, am a little obsessed with polka dots. You could use a zippy bag or up-cycle an old sour cream container or whatever. You don’t have to buy anything.
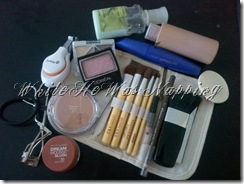
– Extras of your most trusted and favorite beauty supplies. Some ideas:
– foundation, or at least a cover-up stick or tinted moisturizer
– lipgloss or chapstick
– mascara
– eyelash curler
– eye liner
– liquid to powder blush or a color stick
– eye shadow
– brow pencil
– nail polish remover pads
– extra pair of hosiery (or socks, or mittens, a scarf, whatever it is that you ALWAYS forget)
– Q-Tips
– nail clippers and file
– tweezers
– lotion
– $20 cash (or however much you prefer)
– small package of wet wipes
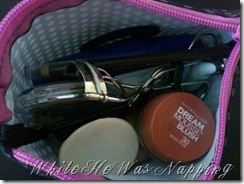
2) You can put whatever you need or want in your kit. Maybe you do want band-aids and antibiotic ointment in yours… This is totally personalized to your needs and hectic life. Just make sure that whatever you put in your kit can handle temperature changes. It would be really lame (and not very helpful) if you went to use your foundation and it was frozen or something. Depending on where you live, the temperature changes may be extreme. You can check the labels on cosmetics for best storage temps. Oh and if you’re up-cycling an old container, feel free to decorate your little heart out.
3) Take your “extras” and open any packages. Packaging takes up space and this kit is meant to be compact. Use a permanent marker and label them with the date you open(ed) them. You should replace items approximately every three to six months, depending on the specific item. Rotate your cosmetics if you realize something is coming up for replacement soon. You’ll minimize waste.
Most of my stuff I didn’t pay more than $2-3 for. The exceptions are the brushes and the mascara. (Little secret: check out the Dollar Store cosmetics aisle while you’re there. The Maybelline blush and the Lorel eye shadow are slightly mis-tinted, but they are what you pay $4 for at Target, even down to the labeled packaging. I can get over a little mis-tint for a 75% savings… Oh, and speaking of Target, they now carry the E.L.F. make-up line. Check it out for your extras. Most of their stuff is between $1-3 and I have been very satisfied with the quality.)
4) This may be the most important step. Ready? Take your kit to the car! Leave it there. Tuck it under the passenger seat, in the glove compartment, or in the console. You’ll want it somewhere out of the way, but still easily accessible. Now, the next time you think, “Ah, I forgot to _______!” you’ll be covered.
**Ok, please don’t apply make-up or remove toe nail polish or put on stockings or whatever while you are driving! Be safe. It won’t hurt you to take a couple minutes when you reach your destination to finish up whatever it is you need to do. If you wreck your car, you will most definitely be late… and this emergency kit is fantastic, but that’s one thing it can’t fix.**
Now, go put your kit together and be the hottest, most put-together (and possibly fashionably late) lady out there!
Krista
Do you have any other ideas for what to put in your “emergency kit”? Please share in the comments. I’d love to get more ideas.


