If you’ve ever been to a drive-in movie, you know how fun it can be. We love piling into the back of our van with all our favorite blankets and treats and enjoying a movie out in the summer air. But the drive in movies aren’t just fun in summer time, right?! You can skip the chilly night air and bring that fun right into your living room with a fun kid’s activity and art project: Making cardboard box cars! Then, let the kids sit in them while you watch a movie! Two fun family activities in one!
DIY CARDBOARD BOX CARS FOR AN AT HOME DRIVE-IN MOVIE NIGHT

DIY Cardboard Box Cars Materials:
– cardboard boxes your child can fit inside (1 for each car)
– box cutter
– spray paint
– packing tape
– construction paper
– hot glue gun and glue sticks
– scissors
– foam letter stickers
– chalk markers
– 3-inch circle punch
– aluminium foil
– black paper plates
– paper cup
– black wide (2 to 3 inches) grosgrain ribbon

DIY Cardboard Box Cars Directions:
PREPARE YOUR BOX
1. Start with some large, empty boxes. The boxes need to be big enough for your child to fit inside them semi-comfortably. Large diaper boxes are good.
2. Cut the flaps off the top of the box and a space wide enough to comfortably stand up through the bottom of the box.

3. Use the flaps and packing tape to create any extra shape to the car you want. I made a little dashboard in the green car and used small triangular pieces to help support the windshield in both cars.
4. Spray paint the boxes. My red box needed a primer, but the blue box did not. Both boxes got four coats of paint, plus the red box got a layer of primer. Let the paint dry thoroughly, preferably overnight. Mine actually dried for a couple of days, but 4-6 hours should be sufficient.

** If you want to construct cars as a group activity, whether for a movie night, a kids’ party or some other event, you will want to have the above completed prior to your event. You may want to do some of the following prior to the event as well, such as having things pre-cut.
CONSTRUCT YOUR CARS
5. Use paper plates and construction paper circles to create wheels for your car. Each wheel will need one plate and one circle. Use a glue stick to glue the construction paper circle to the center of the plate and use hot glue to secure the plate to the box. You will NOT want the plate to extend past the bottom of the box or it will get crushed when the box is placed on the floor.

6. Use a small piece of one of the cardboard flap, cut to a rectangle, to make a rear view mirror. Cover the rectangle with construction paper and use a small piece of aluminium foil to make the reflective ‘mirror’ part. Hot glue the mirror to the windshield inside the car. It won’t fall off, but it’s not super sturdy either. But, it’s hot glue, so no big deal.

7. Make a steering wheel with a black paper plate. You can decorate it or not. One of my boys chose to put a colored construction paper circle on his, the other decided not to.
In the green car, I secured the steering wheel to the dashboard I created with a small piece of cardboard taped onto the dashboard. I then hot glued the steering wheel plate to the small cardboard.
In the blue car, I used a paper cup covered in black construction paper to make a steering column. I then hot glued the steering wheel plate to the cup and the cup inside the box where the steering wheel is supposed to be (on the left, in our case).
GOTTA HAVE A SEAT BELT
8. Not only does a seat belt keep you safe, in this car, it holds it up! Create a seat belt with wide black grosgrain ribbon. I poked small holes in opposite corners of the box. If you’re standing at the back of the car, I put holes in the front right and the back left so it was like wearing a seat belt on the driver’s side of the car (in the US).
Put one end of the ribbon through one of the holes and tie a knot. Measure on the child how long the ribbon needs to be. Length will depend on the length of the child’s torso and where they want the car to sit while they are playing.
Have them stand in the car and pull the ribbon up over their shoulder and to the back of the car. Big J wanted his car to sit lower than Little J did, so the best way to figure this out is to actually measure it with the child in the car. Poke the other end through the hole at the back of the car and tie another knot. In the green car, we hid the front knot under the bumper.

9. If you want to create a bumper, use one of the flaps from the short side of the box and cut off a strip abour 3 inches wide. Wrap it in aluminium foil and use hot glue to secure it to the car.
DON’T FORGET THE HEADLIGHTS!
10. Create headlights with circles of yellow construction paper. Glue them on with a glue stick. Yellow plastic cups would also be cute and super easy for this. Create a windshield with a rectangle of light blue construction paper and glue it on. I had to use hot glue for the windshield. You could cut the windshield out, but I knew ours wouldn’t last that long if there were just small pieces of cardboard holding it all up, so I left it intact and used the construction paper instead. They have no problems seeing over it.

PERSONALIZE IT!
11. Create a license plate with construction paper. We used foam letter stickers and Big J and I used a chalk marker to write the large letters on the green car. Little J just did his own thing on this one. Make it a fun one!

READY, SET… DRIVE!
Now, your kiddos are ready for a great movie night! We have a large screen and projector that we like to set up for movie nights at our house. It was perfect for our at-home drive-in. And best of all, we didn’t have to wait for it to get dark, which means the kids were still in bed at a decent hour. Mom win! But what’s a movie night without some awesome movie night snacks?! Popcorn is the old standard and there are lots of ways to make just the way you like it. But, it’s definitely not the only go-to movie snack in our house.

MY TOP FOUR MOVIE SNACKS (besides popcorn)
SWEET AND SALTY COMBO
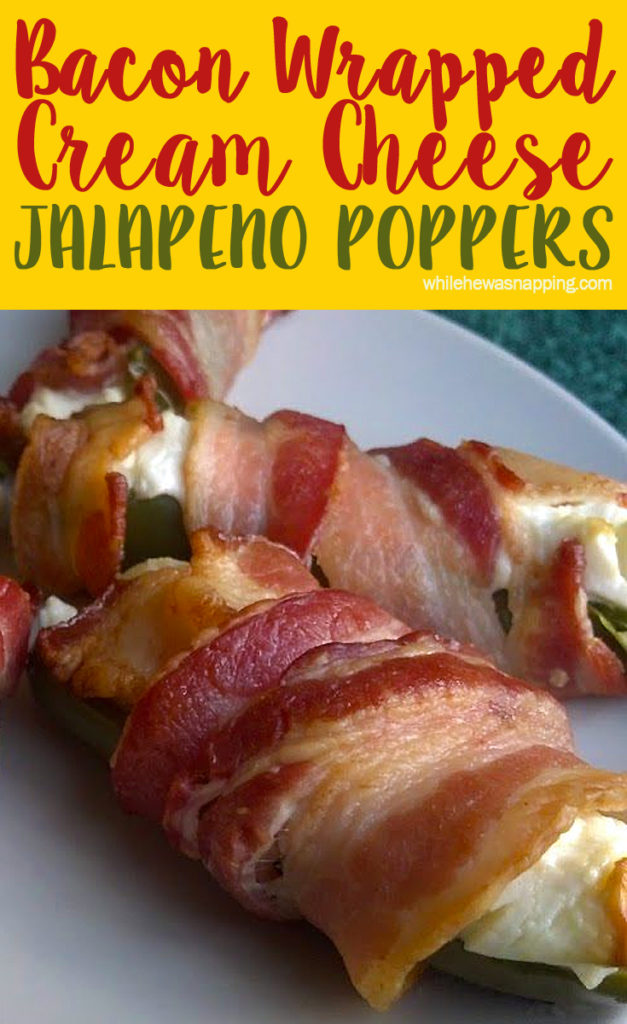
1. Bacon Jalapeno Poppers! These things are like crack. Seriously, I can promise you won’t be able to eat just one. Or two. Or even three. These jalapeno poppers are so delicious. It takes a little bit of time to cut them, pull out the seeds and then wrap each one – BUT, it is SO, SO, SO worth it! The sweet cream cheese, the salty bacon, the mild heat of the jalapeno. Yum. YUM.
HEARTY AND CHEESY
2. Pizza Pretzels. It’s a soft pretzel with pizza toppings: pepperoni, Italian herbs, Parmesan and Colby Jack cheese. It’s probably a ton of calories and your entire carbohydrate allowance for the day… but it’s totally worth the splurge!
FRESH AND SWEET SALSA
3. Mango Salsa and Tortilla Chips. This is the perfect way to get a little sweet and salty going on. It’s a fresh salsa made with delicious sweet mangoes, zippy onions, crunchy peppers and fresh cilantro. Pair with tortilla chips. Or eat it out of the bowl with a spoon. I won’t tell.
SATISFY THAT SWEET TOOTH
4. And, because I’m a chocoholic… Peanut Butter Cup Bars. It’s all the goodness of peanut butter cups in an easy to make cookie bar-style little treat. There’s just something about the peanut butter and chocolate combo that hits the spot for me.
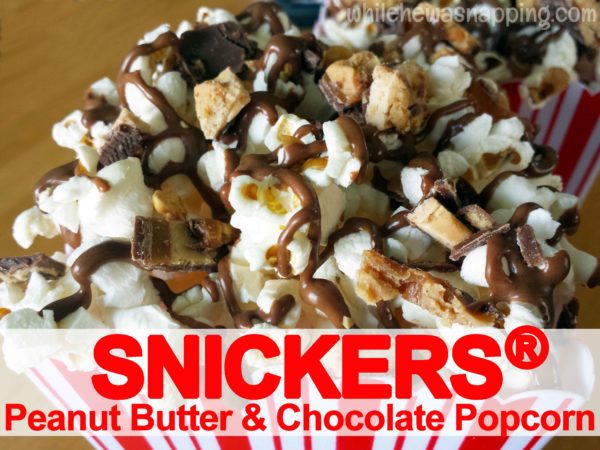
BONUS SNACK: If popcorn is just totally your jam… I got you. This Snickers Peanut Butter Chocolate Popcorn is AMAZING! Almost as addicting as those Jalapeno Poppers up there. But with chocolate. Try it. You’ll love it.
What are you waiting for?! Get your drive in movie on… at home!


