Today, we’ve got another contributor here to share some awesome ideas with you. Elisha from Pneumatic Addict Furniture will show you that power tools aren’t just for boys! She’s got a super cute project for you… take it away, Elisha!
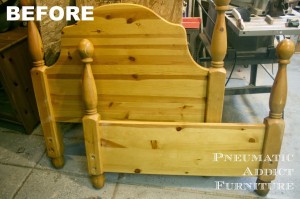
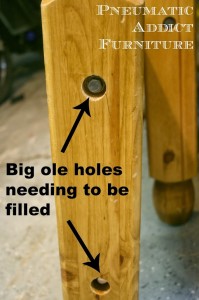
Depending on the bed you start with, you may or may not need to fill holes, remove hardware, etc. This bed was assembled with large lag bolts inside even larger holes. I could have left them alone, but that’s not how I do things.
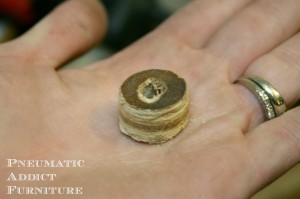
You can buy pre-made hole plugs, but it was 9 pm when I started this project. Plus, plugs this size are hard to find in the store. Its easy to DIY some yourself. I busted out my husband’s “hole hog” set and cut 16 plugs from a piece of scrap plywood.
Once they were glued in place, I filled any empty space with Bondo. After letting it dry over night, it was easy to sand the excess smooth. I knew I was planning on painting this bench, so the Bondo would be covered. Had I planned on staining it, I would have chosen stainable wood filler instead.
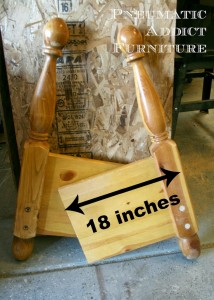
With the holes filled, it was time to butcher the footboard. This is one of those areas I haven’t heard talked about much in regards to building a bench. How wide should I cut each side? Had I simply cut this footboard in two, it would have been around 21 inches deep. Not terrible if you had pillows, but deeper than a typical chair. I decided a slightly shallower bench would look better and cut the footboard into 2, 18 inch wide pieces, using a circular saw.
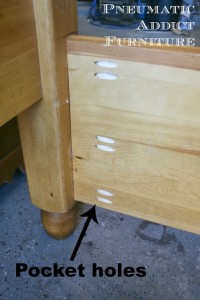
Then, using a pocket hole jig, I created 6 pocket holes on the inside of the cut edge. At this point, its nice to have a “helper” to hold the footboard in place. If not, try to prop it up with blocks, clamps, etc. I made sure the side was square with the back leg and joined the two with 3 inch wood screws and wood glue.
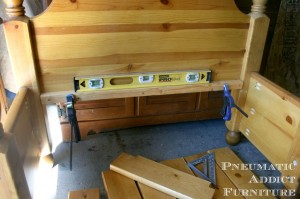
Next, I needed rails to attach my seat to. The plan was to use the original side rails to make the slats. Standard seat height is approximately 18 inches high. Knowing that the slats were 1 1/2 inches thick, I attached a scrap piece of 2 x 2 lumber at 16 1/2 inches from the ground, using more glue, 3 inch wood screws and making sure it was level
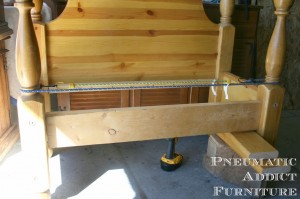
For the front rail, I found a scrap piece of 2 x 6 lumber and cut it the same length as the headboard’s width, minus the legs. You don’t have to use something so beefy, but I wanted to match the thickness of the the original wood. I drilled 4 pocket holes on each end of the rail. Making sure to flip the pocket holes to the inside where they won’t be seen, I joined the rail with the two front legs, using glue and 3 inch wood screws.
What’s up with the bungee cords? Well, this too would be a nice time to have a helper, pulling the front legs close together while you attach the rail. If no such helper exists, just use a strong bungee or tie down to bring them in.
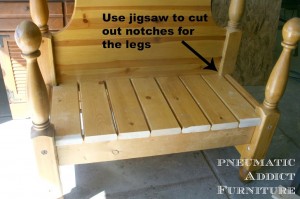
Time to add the slats. I used the original side rails that came with the bed for donor wood, but you could buy new wood. Measure how many you will need to fill up the width and cut them to length. Measuring from the headboard, my slats were 17 inches long. In order to run them the full width of the bench, I had to notch the corners of the outside slats. That involved using my arch nemesis, the jigsaw.
*Keep in mind, if you plan on using this bench outside, you will need to leave spaces between the slats for drainage.
At this point, I could have called the bench done. I’ve seen benches like this, but I thought it was missing something to truly make it a bench and not just a Frankenstein bed…. Armrests!
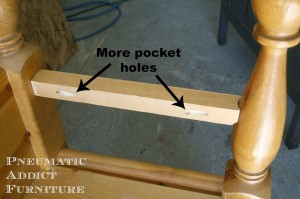
I sat on the bench, bent my arm, and marked the height on the back post. Then, I dug up some leftover pieces of 2 x 2 lumber, and cut them to fit between the posts. The front was a bit more challenging because it was curved at that point. I think that’s why so many ladies chose not to add armrests. They are scared of the curved posts. To account for the curve, you can do what I did and shape a groove using an electric sander. It wasn’t too difficult, at it doesn’t have to be perfect. As long as you have the general shape, Bondo or wood filler will make up the difference.
I attached them using, once again, pocket holes, glue and screws.
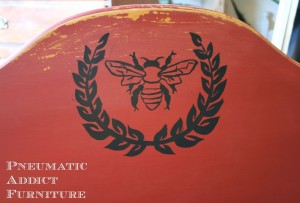
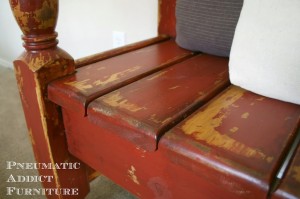
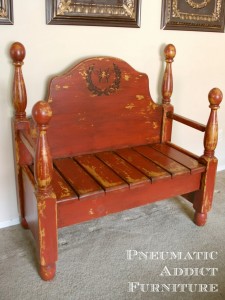
The milk paint chipped all by itself (just like I wanted), but the bee design took a scraper and some sand paper to distress. I then glazed the entire thing with a custom mixed, dark brown glaze and to finish it off, I sealed it with 3 coats of spar urethane in satin.
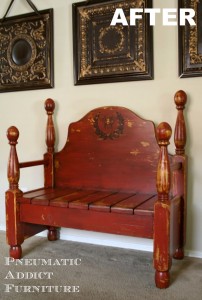
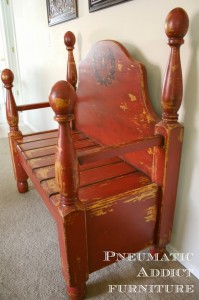
Here’s the final product!
Gotta love milk paint and its chippyness!
