We have some friends that have a little boy two months older than our Little Monkey. Back when the boys were just little (like in infant carriers kind of little), they were given a BundleMe Car Seat Cover. I liked it A LOT! It was warm, attached to the seat (who doesn’t love picking wet, dirty blankets up off the ground?), and you can still put the seat belt straps up against the child like they are supposed to be fastened.
And then I started doing some looking for them. I about died when I saw they were around $50! For the light, cheap versions. The heavier version I wanted was closer to $90! Uhm, JJ Cole, I’m not made of money! So, I set out to make my own. Wal-Mart was having their polar fleece on sale and so I decided to use that for our knock-off. I spent less than $10 on my knock off and bought other stuff {you know, like diapers and wipes} with the $80 I saved on the JJ Cole version.
Here’s the How:
(Because this project was pre-blog, I don’t have process pictures. It’s fairly self-explanatory though. If you have questions, please email me or leave a comment {and make sure your email address is enabled so I can answer you back!}. I will get back to you as soon as I can.)
Supplies:
– 4 yards of polar fleece. I did two yards of brown and a yard and two yards of green to match our car seat. If you want a lighter, single-layer cover, you’ll only need two yards.
– Velcro. I prefer the non-sticky back for sewing.
– Scissors
– Coordinating thread.
– Zipper. You’ll need either two shorter ones or one great big long one. I couldn’t find one long enough to go all the way around the bottom of the cover, so I ended up with two shorter ones, one on each side of the cover.
Instructions:
1. Lay your fleece out in the car seat so you’ll kind of have an idea of how it will fit. The top of the fleece will sit at the top of the car seat. It should lay flat in the car seat and then fold up over the bottom to make a blanket.
2. Lay your fleece out, right sides together. Pin and sew the fleece together. Leave a hole that you can turn the fabric through. I left one whole side open to flip my cover through. You could leave a smaller opening if you want a little more finished look to your cover. If you opt for a lighter, single layer version, skip this step.
3. Turn the fabric so your seams are on the inside. Lay the cover out in the car seat again and mark the locations of the buckles. Make sure you get all the holes for the shoulder straps and the strap that goes between the legs.
4. Cut a small slit just wide enough to get the bottom buckle (the one that goes through your little one’s legs) through the fabric. Stitch a small rectangle around the slit to help hold the fabric in place. Because fleece doesn’t fray, you don’t have to hem it.
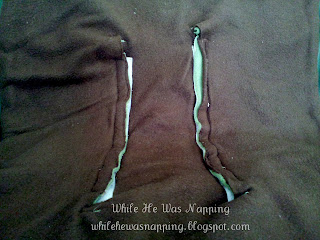
5. For the shoulder straps, I cut a vertical split that runs from the top slit to the bottom slit. Sew a length of velcro along the slit. Your shoulder straps will slip through the velcro and you won’t have to sew individual slits for each position.
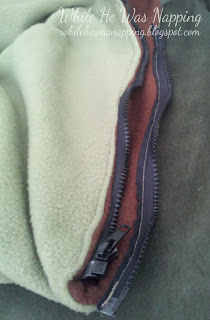
6. Figure out where your cover will fold back up and cover your little one’s legs/torso. Ours is actually long enough to hang on the canopy of the car seat, which we did with Little Monkey. (With this new kidlet, it will be more like a blanket and we’ll use the car seat cover as the over-the-top cover.) Pin your zippers in place and sew them down. I didn’t tuck them in between the seams. (If you want to do that, you’ll need to place and sew your zippers in before you sew the two pieces together.)
You’ll end up with this:
7. Insert into car seat. Compare the $90 JJ Cole version to your $10 version and admit it may not be as pretty, but you have an extra $80 in your wallet…


